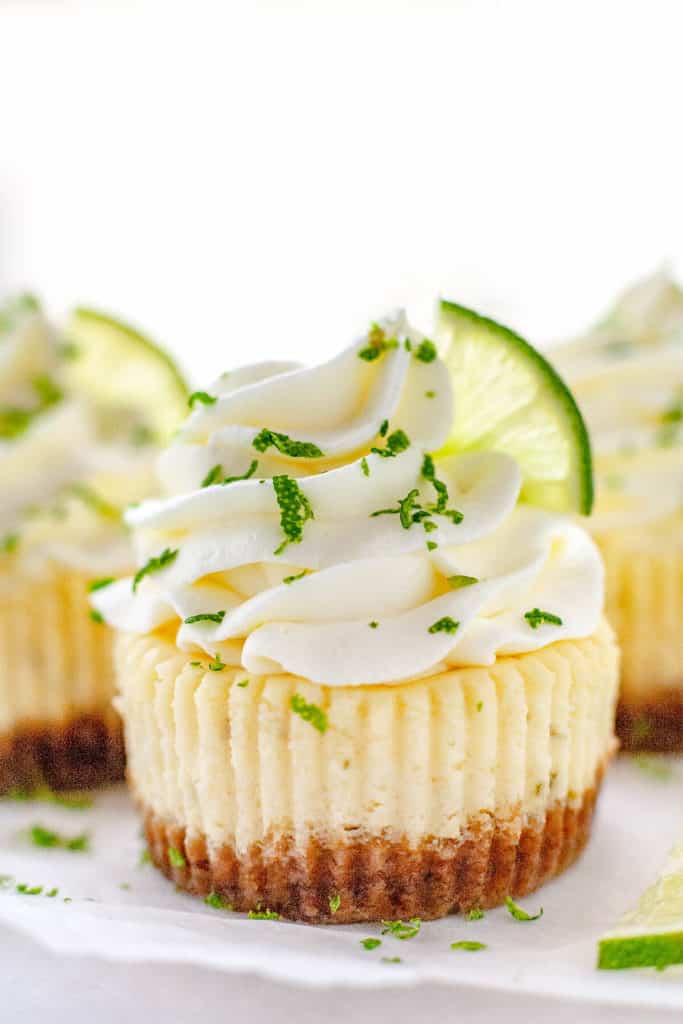
These Mini Key Lime Cheesecakes are the perfect combination of creamy, tart, and sweet in the cutest little cakes. Quick and easy to make using a muffin pan and paper liners.

Get your Key Lime Pie and your cheesecake fix in these sweet little Mini Key Lime Cheesecakes. Creamy Key Lime cheesecake on a graham cracker crust topped with swirls of whipped cream. So irresistible!
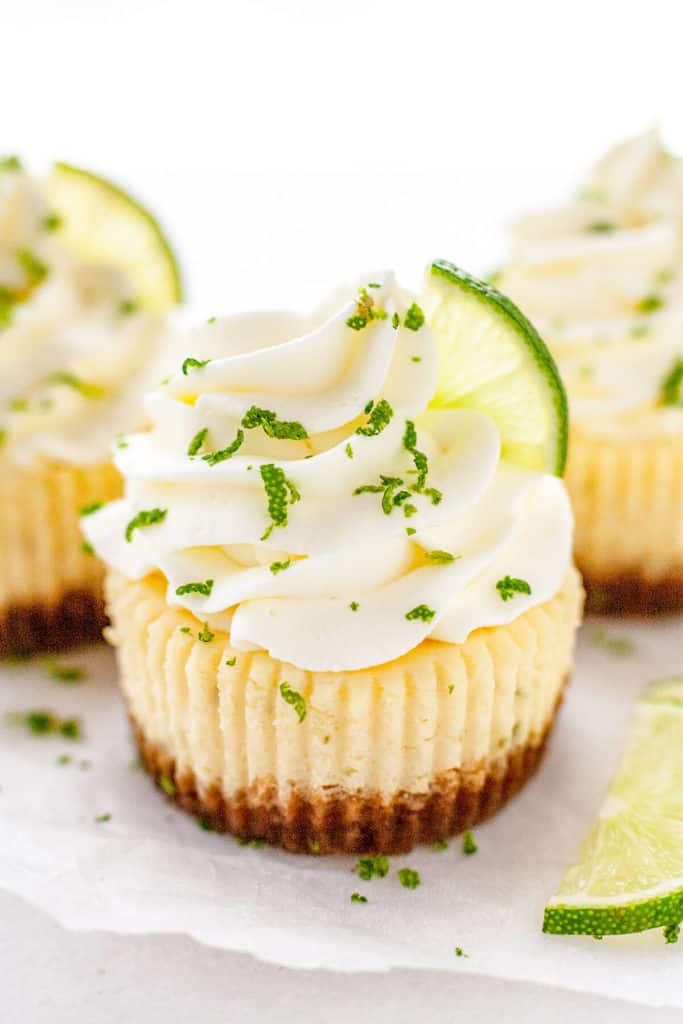
I love Key Lime Pie, but some of my kids find it a little intense. Enter these Mini Key Lime Cheesecakes. All the wonderful flavor of Key Lime Pie in a creamy smooth cheesecake.
These Mini Key Lime Cheesecakes are quick and easy to make. No fussing around with a water bath or long baking times. Baked in a muffin pan lined with cupcake liners, they bake up in about 20 minutes and cool much faster than a big cheesecake. They’re pretty much fool-proof!
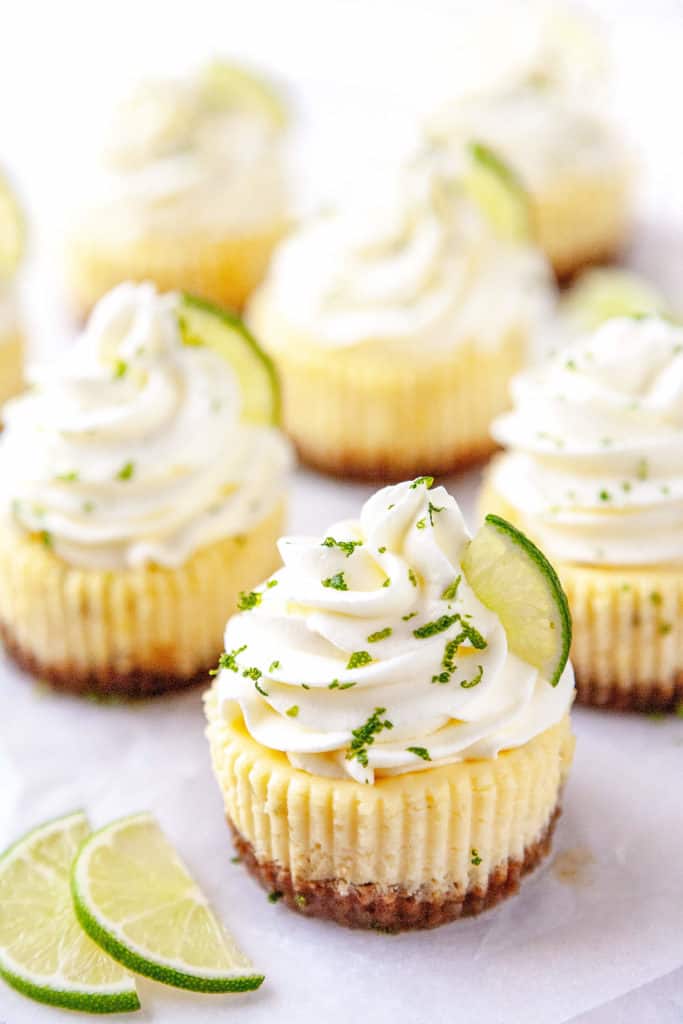
I love miniature desserts. They’re so impressive to serve to guests. Only you will know how easy they were to make. Plus, you can have a satisfying dessert in a few bites without committing to a whole slice of cheesecake.
Jump to Section
Do I have to use Key Lime juice
The limes we see most often in the grocery store are known as Tahiti or Persian limes. They’re bigger and darker green than Key Limes.
Key limes have their own unique flavor. They’re more aromatic, and their juice is generally thought to be tarter and more floral. Whenever I find them fresh, I grab a couple of bags and go crazy making Key Lime desserts.
To be honest, I make these Key Lime Cheesecakes with regular limes when I don’t find the Key Lime variety.
In an article I read at Fine Cooking, the author and her husband, a horticulture professor who specializes in tropical fruit, found the acid and sugar components to be quite similar in both Key and Tahiti limes. They encountered so many skeptics who claimed they’d be able to tell the difference in a pie, that they devised a dinner-party test where they served pies with both Key limes and Tahiti limes. In the more than twenty times that they asked the guests to taste both pies and guess which one was made with Key Limes, the votes were always tied.
Key Limes were grown commercially in the Florida Keys until a hurricane in the late 1920s pretty much wiped the crop out. Following that, production largely switched over to the more efficient and disease-resistant Persian variety. While many residents in the Key region still grow the eponymous trees on their property, most of the Key limes you find in stores here are sourced from Mexico.
After reading Stella Parks’ article on Key Limes over at Serious Eats, Key Limes? More Like Key LIES, I’m starting to rethink the whole Key Lime vs. Tahitian lime debate. Stella points out that while this particular species of lime, Citrus aurantiifolia, was grown in California, Texas, and mainland Florida, groves in the Keys came to dominate the market in the early 20th century because they produced a superior citrus.
Growing conditions matter as much as genus or species, which is why tea drinkers, coffee lovers, wine enthusiasts, and chocoholics care to learn about origins and estates. The region's uniquely alkaline soil mellowed the limes' astringency, and abundant coastal rains fueled their growth to larger, lemon-like proportions, with an average length of two inches. That means the original Key limes were fat and juicy, with well-rounded acidity and a rather yellow rind.
And as Stella put it, “Sure, these limes are Citrus aurantiifolia regardless of where they're grown, but if that's all it takes to nail authenticity, I'm going to start farming Hawaiian pineapples in my backyard.”
What kind of crumbs to use in the crust
A graham cracker crust is the traditional crust to use with Key Lime Pie and often with cheesecake and is what I have given the recipe for.
I also love to use shortbread or plain vanilla or butter cookie crumbs. Since shortbread cookies are sweeter than graham crackers and have different amounts of fat in them, you may need to use less butter and less sugar if you substitute shortbread cookie crumbs for graham cracker crumbs.
Depending on the brand of shortbread, I just add the melted butter a tablespoon at a time until the mixture looks like wet sand.
How to make Mini Key Lime Cheesecakes
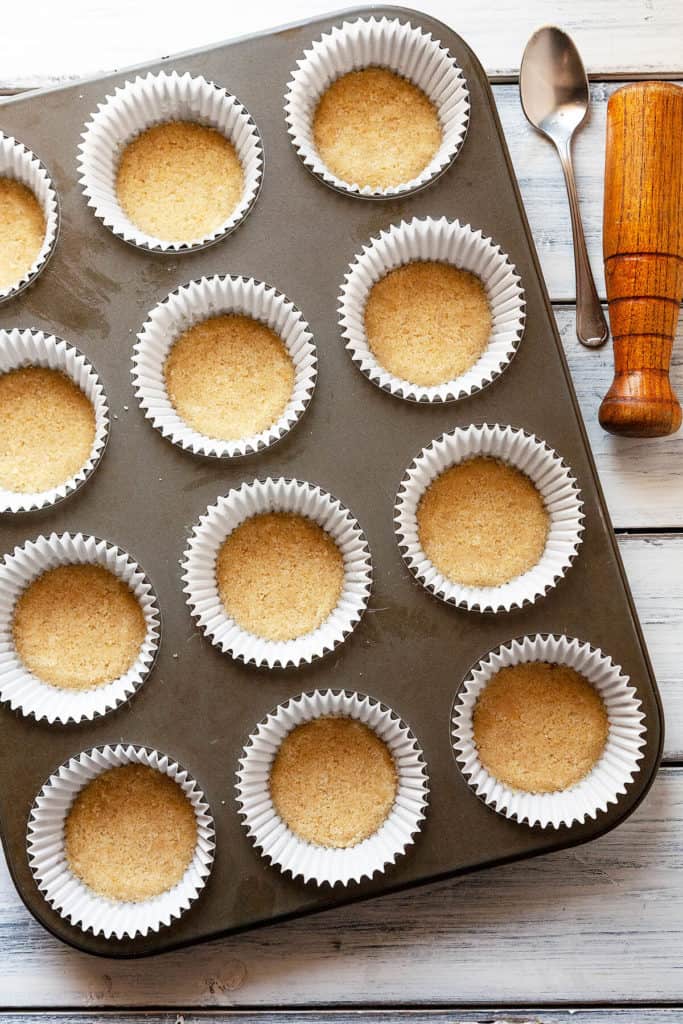
Graham cracker or cookie crumbs are mixed with melted butter and sugar, then pressed into a paper lined muffin pan. It’s baked for a few minutes until it is set and golden.
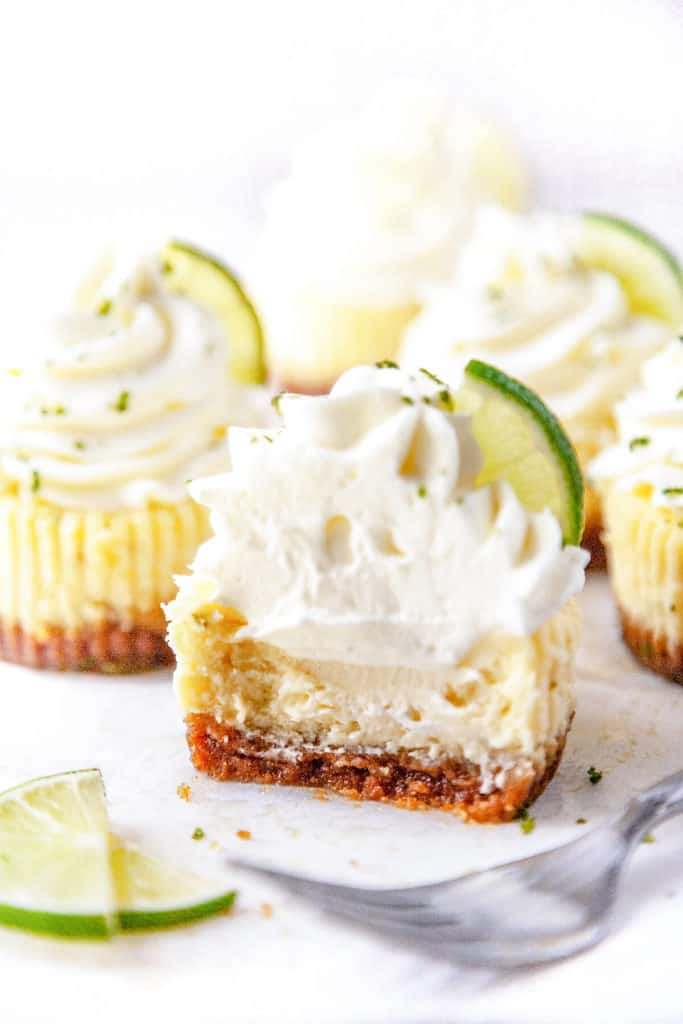
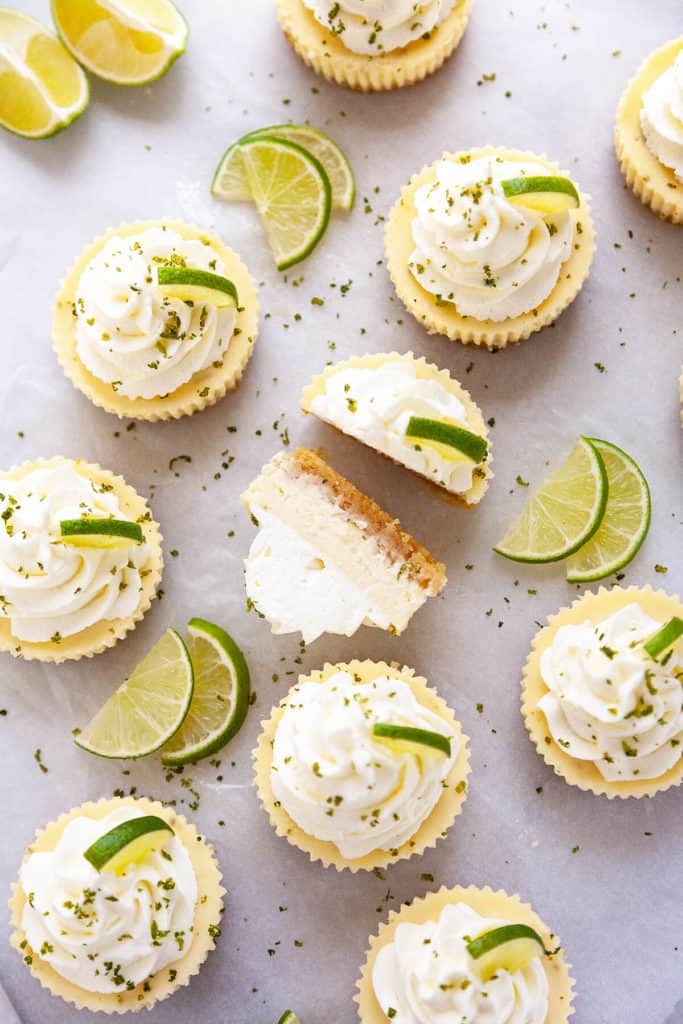
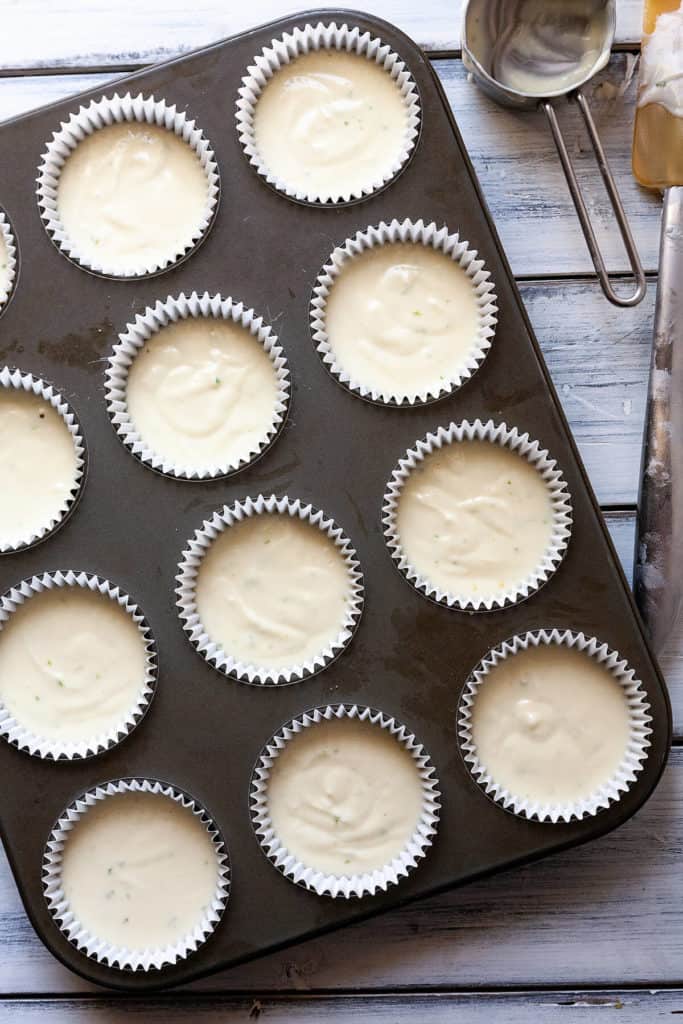
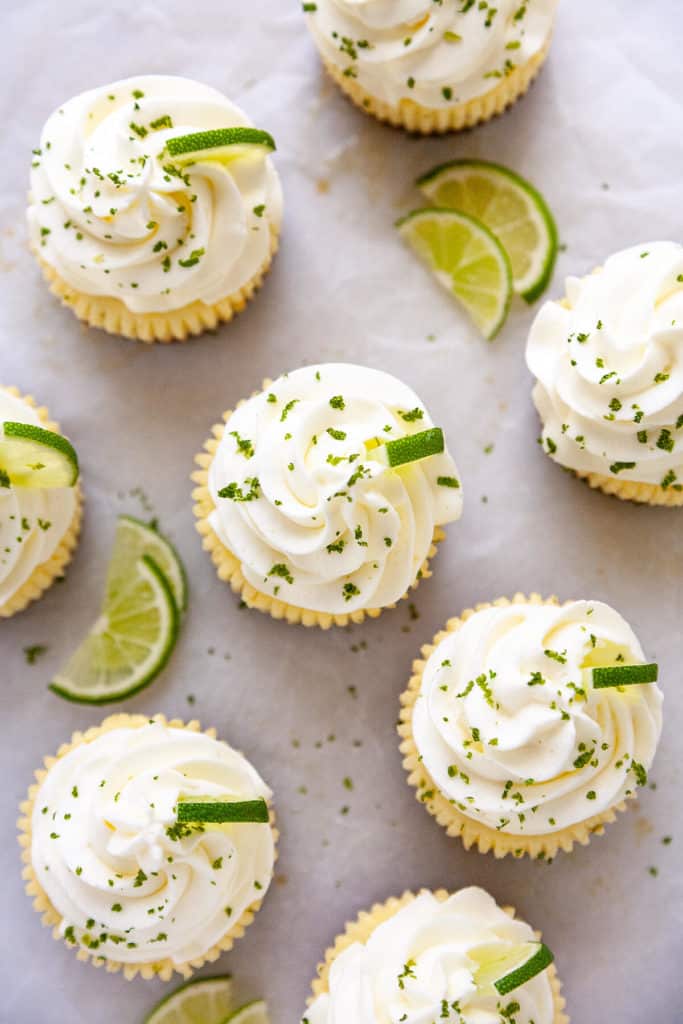
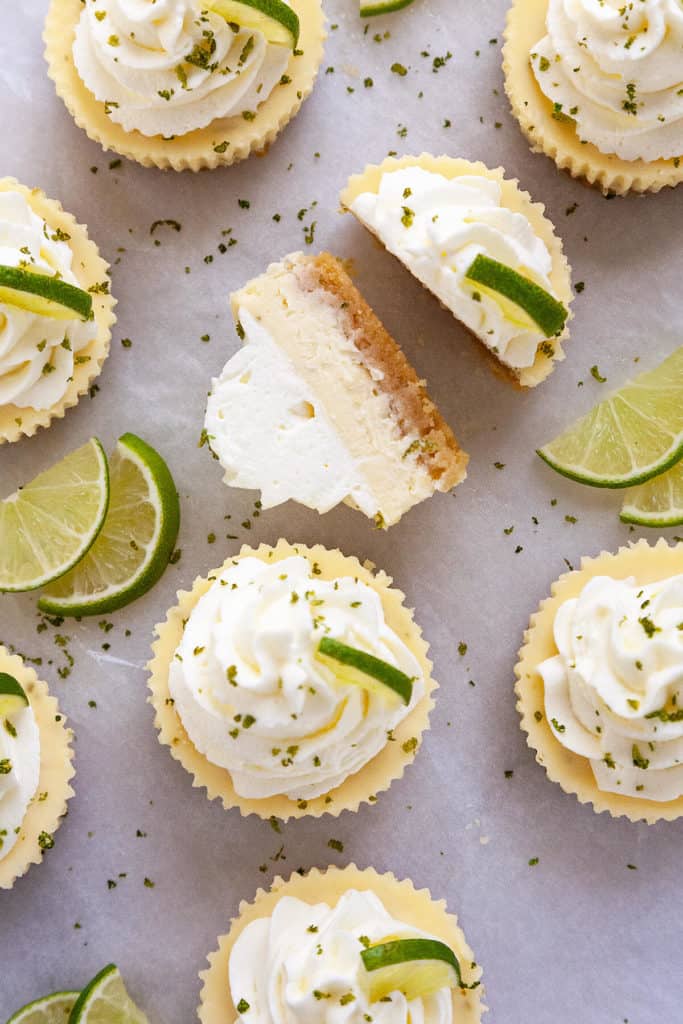
While the crusts are baking, the filling ingredients are mixed together. After the crusts have cooled slightly, the filling is spooned on top, then baked for about 20 minutes, until they tops are set and they are slightly jiggly in the centers. After cooling to room temperature, they are refrigerated for 2-3 hours until chilled and set. They’re topped with whipped cream before serving.
How to make stabilized whipped cream
Stabilizing the whipped cream topping is optional, but it’s so easy that I find it’s worth it if I want the whipped cream to stay fresh for some time.
Normal whipped cream begins to deflate and leak water after a few hours and doesn’t hold up well when not refrigerated. As extra insurance that the whipped cream will stay perfect until the cakes are eaten, I like to stabilize the whipped cream with a little gelatin.
It’s very easy and there is no noticeable difference in the texture and taste. It’s very natural tasting and feeling, not like that funky whipped cream topping you find on desserts in the supermarket.
Simply stir 1 teaspoon of powdered, plain gelatin into 1 tablespoon of water. Let it rest for 5 minutes so the water is fully absorbed. Heat the gelatin mixture in the microwave for 5-7 seconds so that it melts and smooths. Let it cool slightly, and stir in 1 teaspoon of whipping cream so there are no streaks of gelatin in the whipped cream.
With a cold bowl and cold beaters, whip the cream and sugar until it thickens and forms soft peaks (when you lift the beaters out of the bowl the whipped cream folds over). With the mixer on low, you’ll slowly pour the cooled gelatin mixture in as your mixing the whipped cream. Continue mixing the whipped cream on medium high until you have stiff peaks (when you lift the beaters out of the bowl the whipped cream stands straight up and doesn’t fold over) but don’t let it get crumbly.
Tips for Stabilized Whipped Cream
Chill your bowl and beaters before getting started. This will help your whipped cream thicken up quicker and increase the volume.
After dissolving the gelatin in the microwave, stir in a teaspoon of cream to help it incorporate more thoroughly into the whipped cream.
Let your gelatin cool slightly before mixing it in so that it’s not too hot when you add it to the whipped cream.
You can spoon or pipe the stabilized whipped cream on your dessert, then refrigerate the dessert until you’re ready to serve it. The stabilized whipped cream will hold up at room temperature for a couple of hours, but it’s best to keep your dessert refrigerated. Avoid leaving it anywhere too warm for too long.
Baking tips for Mini Key Lime Cheesecakes
Make sure your dairy products are at room temperature before mixing the cheesecake filling. This will ensure a much smoother and creamier cheesecake.
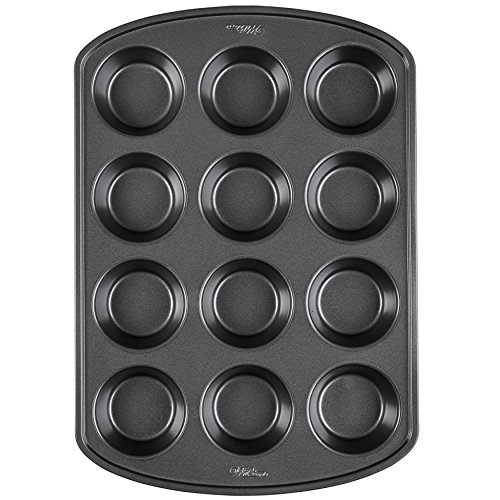
Line the muffin tin with paper cupcake liners to ensure easy removal from the pan.
Don’t over bake the cheesecakes. Bake until just set and the center jiggles slightly. If your cheesecake cracks on the top, you’ve over baked it a bit.
You can serve these mini cheesecakes in the liners. If you prefer to remove the liners before serving, place the cheesecakes in the freezer for 30 minutes or so to make it easier to remove them.

Mini Key Lime Cheesecakes
- Total Time: 4 hours 35 minutes
- Yield: 12 1x
Description
These Mini Key Lime Cheesecakes are the perfect combination of creamy, tart, and sweet in the cutest little cakes. Quick and easy to make using a muffin pan and paper liners.
Ingredients
For the graham cracker crust:
- 1 ¼ cups (150g) graham cracker crumbs (about 10 full-sheets)
- 3 tablespoons (37g) granulated sugar
- 4 and ½ tablespoons (64g) butter (melted)
For the cheesecake filling:
- 16 ounces cream cheese ((454g), softened to room temperature)
- ⅔ cup (132g) granulated sugar
- ¼ cup (57g) sour cream or Greek yogurt
- 4 ½ tablespoons (64g) fresh lime juice
- 1 tablespoon lime zest (finely grated)
- 1 teaspoon vanilla
- 2 large eggs (room temperature)
For the Whipping Cream:
- 1 cup heavy whipping cream
- 3 tablespoons confectioner's sugar
For the optional Stabilized Whipped Cream:
- 1 teaspoon plain (unflavored gelatin)
- 1 tablespoon water
- 1 teaspoon whipping cream
To garnish:
- Freshly grated lime zest
Instructions
To make the graham cracker crust:
- Preheat oven to 350°F. Line a standard 12-count muffin pan with 12 cupcake liners and set aside.
- Combine the graham cracker crumbs, sugar, and melted butter in a mixing bowl and stir until well combined. Evenly distribute the mixture between all 12 cavities of the muffin pans, making sure to press each one down firmly into an even layer. Bake at 350°F for 5 minutes, remove from the oven and set aside to cool. Keep oven temperature at 350°F.
To make the cheesecake filling:
- In the bowl of a stand mixer fitted with the paddle attachment, or in a large mixing bowl using an electric mixer, beat the cream cheese and sugar until smooth. Add the lime juice, lime zest, sour cream, and vanilla. Mix until fully combined, scraping down the sides of the bowl as needed. Then, add in the eggs one at a time and mix on low speed until just combined.
- Evenly distribute the cheesecake filling between all 12 cavities of the muffin pans. Bake at 350°F for about 20 minutes or until the tops of the cheesecakes are set. The center should be slightly jiggly. Don't over-bake. If you notice them starting to crack in the oven, they are over-baking.
- Remove from the oven and allow to cool at room temperature for at least 1 hour. Wrap with plastic wrap and transfer to the refrigerator to chill for at least 3 hours or overnight.
- You can serve these mini cheesecakes in the liners. If you prefer to remove the liners before serving, place the cheesecakes in the freezer for 30 minutes or so to make it easier to remove them.
- Pipe the freshly whipped cream on to the top of each mini cheesecake.
- Sprinkle with freshly grated lime zest if desired.
For Whipped Cream or optional Stabilized Whipped Cream:
- If making optional Stabilized whipped cream, stir 1 teaspoon of powdered, plain gelatin into 1 tablespoon of water. Let it rest for 5 minutes so the water is fully absorbed. Heat the gelatin mixture in the microwave for 5-7 seconds so that it melts and smooths. Let it cool slightly and stir in 1 teaspoon of whipping cream.
- With a cold bowl and cold beaters, whip the cream and sugar until it thickens and forms soft peaks (when you lift the beaters out of the bowl the whipped cream folds over).
- If making the optional Stabilized Whipped Cream, with the mixer on low, slowly pour the cooled gelatin mixture in as your mixing the whipped cream.
- Continue mixing the whipped cream on medium high until you have stiff peaks (when you lift the beaters out of the bowl, the whipped cream stands straight up and doesn’t fold over), but don’t let it get crumbly.
- Transfer whipped cream to a pastry bag fitted with a large star tip, and pipe on cheesecakes.
- Garnish with freshly grated lime zest.
Equipment
 Buy Now →
 Notes
Store mini cheesecakes in an airtight container in the refrigerator for 3-4 days.
Freezing instructions: Mini cheesecakes will freeze well for up to 3 months. Store in a freezer bag or container, thaw overnight in the refrigerator. Add the whipped cream once the cheesecakes have thawed.
- Prep Time: 10 minutes
- Cook Time: 25 minutes
- Category: Dessert
- Method: baking
- Cuisine: American
Nutrition
- Serving Size: 1 cheesecake
- Calories: 341
- Sugar: 20.9 g
- Sodium: 217.3 mg
- Fat: 23.2 g
- Carbohydrates: 29.3 g
- Protein: 5.2 g
- Cholesterol: 93.8 mg
Enjoy, friends!
Follow me on INSTAGRAM and PINTEREST for all the latest content and recipes!
Subscribe to FOODTASIA’S NEWSLETTER to receive fresh recipes straight to your inbox.

Chelsea
These were SO GOOD!! They weren't particularly difficult to make, either. Although I do hate zesting citrus I loved them so much, I made them again for Easter brunch!
Kelly
So happy you like them, Chelsea! Thanks so much!
Jody
These are delicious. I’m going to make them again. I’d like to know if I can bake these in the paper liners that are more like a plain cup style liner without a pan. Do you think they will stick? And, would cooking time/temp change?
Kelly
Hi Jody, I haven't tried baking these in those kind of liners, so I'm not sure about them sticking. If you try it, spraying the insides with nonstick baking spray may help. The cooking time may change somewhat because of the size difference, if any, and because it is not touching a metal pan. Just keep an eye on them while baking and judge the doneness based on how they look. Bake until the tops of the cheesecakes are set, and the centers are slightly jiggly.
Shama
This recipe is amazing!!! I've made it a couple times now for parties and have been asked to make more in the future. Thank you so much for sharing 🙂
Kelly
Thanks so much, Shama! So happy you liked it!
Shama
Incredible recipe! This has been a big hit at multiple parties now. Thank you for sharing this!
Kelly
So happy you like it Shama! Thanks so much!
Martha
They were fairly easy to make, and they tastes so good! I will be making them again soon.
Kelly
So happy you liked them, Martha! Thanks so much!
Diana Boontriga Evans
SO good! I keto-fied this recipe and actually made it crustless as well, and it was amazing.
Kelly
Great idea, Diana! Thanks so much!