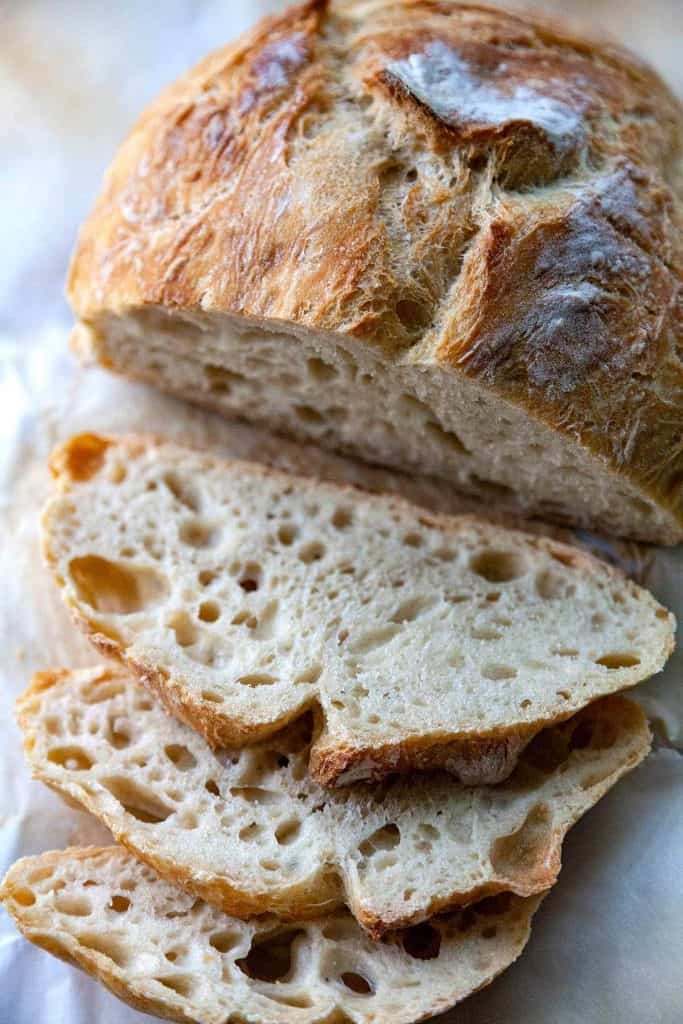
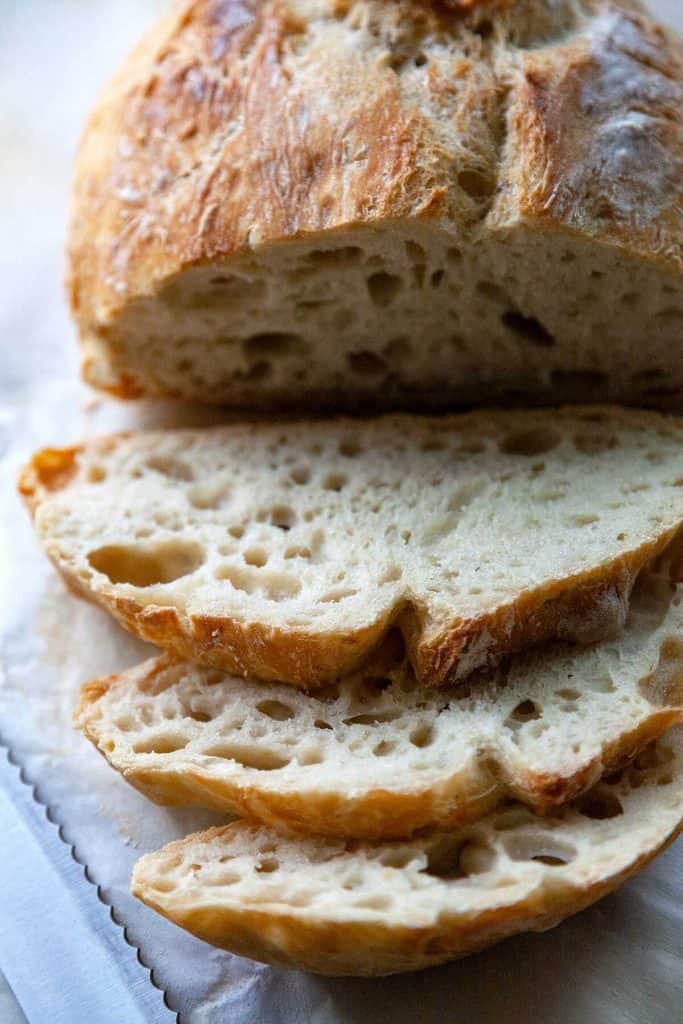
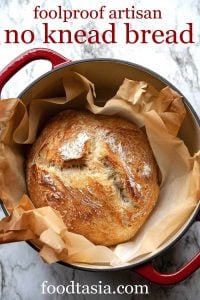
The WORLD’S EASIEST Crusty Artisan No Knead Bread with a crispy, rustic crust and a soft chewy interior filled with irresistible air pockets. The perfect, foolproof recipe perfect for beginners and experienced bakers alike. There’s nothing like the smell of freshly baked bread coming from your kitchen.

Jump to Section
The MOST INCREDIBLE No Knead Bread Recipe
I am blown away by the quality of this artisan no knead loaf. I’m leery of many no knead bread recipes, but this one is a keeper.
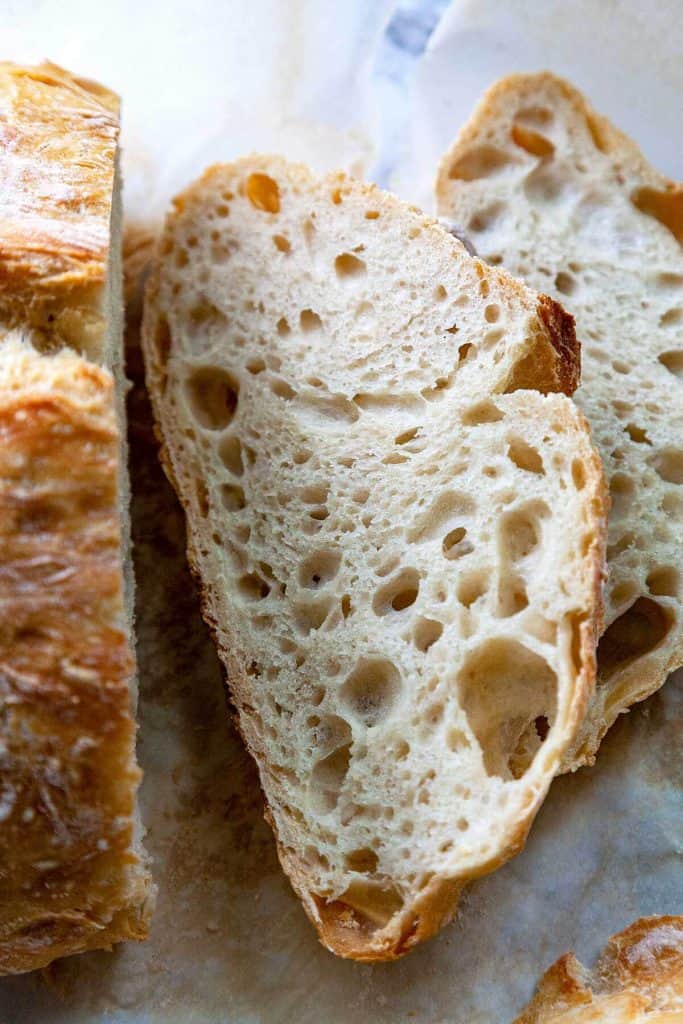
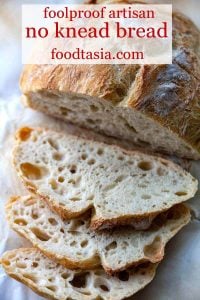
With its irresistibly crusty exterior and its soft, chewy interior so light and full of air pockets – this is truly everything I ever dreamed of in a loaf.
Perfect for beginners or more experienced bread bakers. I’ve baked my own bread for years, and I still keep coming back to this loaf over and over again. It’s practically foolproof. Even a beginner will have success with this loaf.
The EASIEST 5 Minute No Knead Bread recipe EVER
This No Knead Bread Recipe is ridiculously easy to make.
- Just 5 minutes of hands on time
- No knead, no mixer – just give it a couple of stirs with a spoon
- No shaping it into a loaf – just pour it out and give it a tuck and a push here and there. It will look messy at this point, but this is what will give it that gorgeous, cracked, rugged crust.
- Flexible rising times - from as quick as 2 hours, to 12-18 hours on the counter, to up to 5 days in the fridge
Why this recipe works
- Slow rise – the slow rise of this dough allows you to use less yeast while the complex flavors of the dough develop.
- Wet dough – a wet dough allows the gluten to develop without kneading and creates bigger air pockets in the loaf.
- Baking technique – baking the bread in a dutch oven gives a crisp, crackly crust found in artisan loaves. The dutch oven creates a steamy environment which gives a boost to the rise of the bread.
While it gives the best results, a dutch oven is not needed to make this No Knead Bread! I've given some alternatives down below.
How do you make homemade No Knead Bread?
No Knead bread is simple to make in these easy steps:
- Stir the ingredients together in a large mixing bowl
- Cover the bowl with plastic and let rest 12-18 hours
- Pour the dough onto floured parchment paper and roughly shape into a ball
- Preheat the oven and dutch oven to 450° F for 30 minutes
- Put the parchment and dough ball into the pan, cover, and bake for about 45 minutes.
Then pat yourself on the back for making the easiest, most incredible loaf of no knead bread EVER!
Ingredients
Flour – bread flour or all-purpose flour. Bread flour is the best for homemade breads, but all-purpose can also be used if that’s what you have on hand.
Bread flour has more protein than all-purpose flour which creates higher amounts of gluten. Because of the higher protein level, bread flour is able to absorb more liquid, allowing it to hold its shape and rise upward instead of outward.
The high amount of gluten in bread flour also creates a more elastic dough, which produces a lighter and chewier loaf, as opposed to a bread that is more dense and crumbly. It also creates bigger air pockets.
Yeast – Instant yeast can be mixed right in with the flour as shown here.
If you are using active dry yeast, dissolve the yeast in water first according to the package directions. When it gets bubbly and foamy, mix with the rest of the ingredients.
Make sure your active dry yeast is fresh. If using active dry yeast, be sure to proof it in water or according to the directions on the package before mixing it with the rest of the ingredients. Active dry yeast is unstable and can be dead, even before the expiry date. It also has a larger grain size and needs direct contact with water to dissolve.
How to make Step by Step
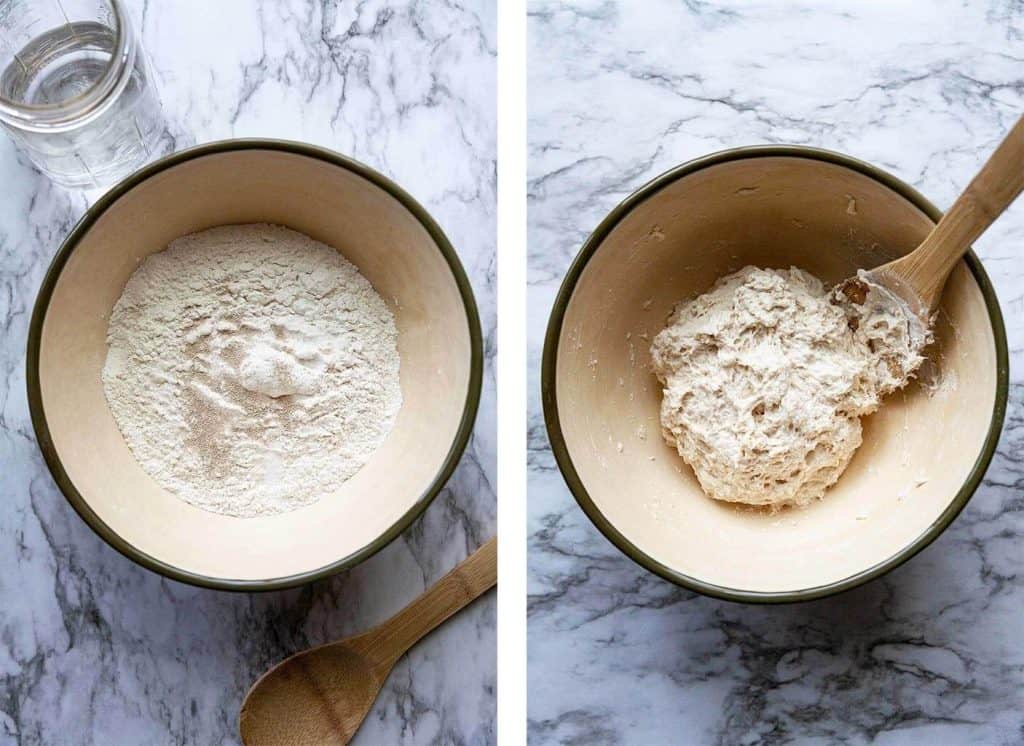
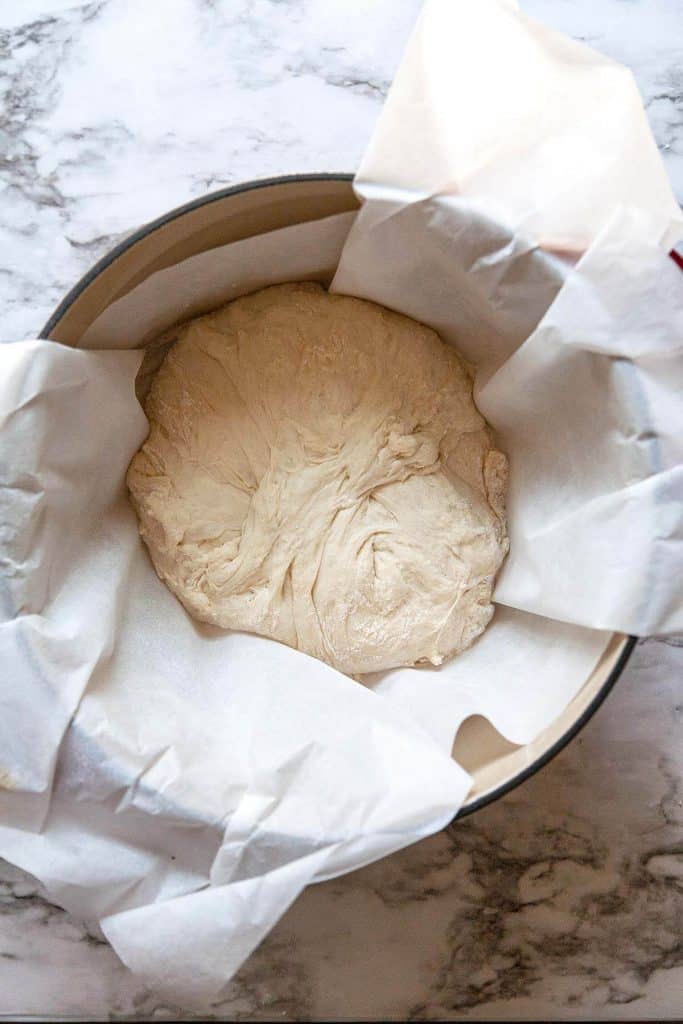
In a large mixing bowl, mix together the flour, yeast, salt, and water until a shaggy, rather wet, dough ball forms. (If you're using active dry yeast, dissolve it in the water first. When it becomes foamy, mix with the rest of the ingredients.)
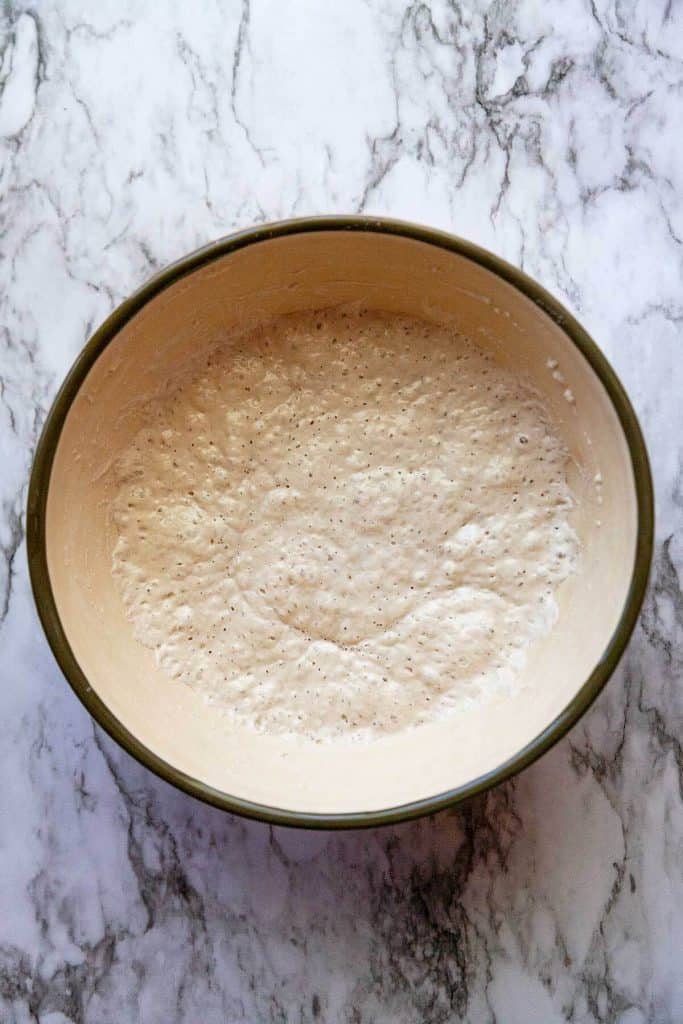
Cover with plastic and let sit on the counter at room temperature for 12-18 hours. When it’s done, the dough will be a little loose and the surface should be covered with tiny bubbles.
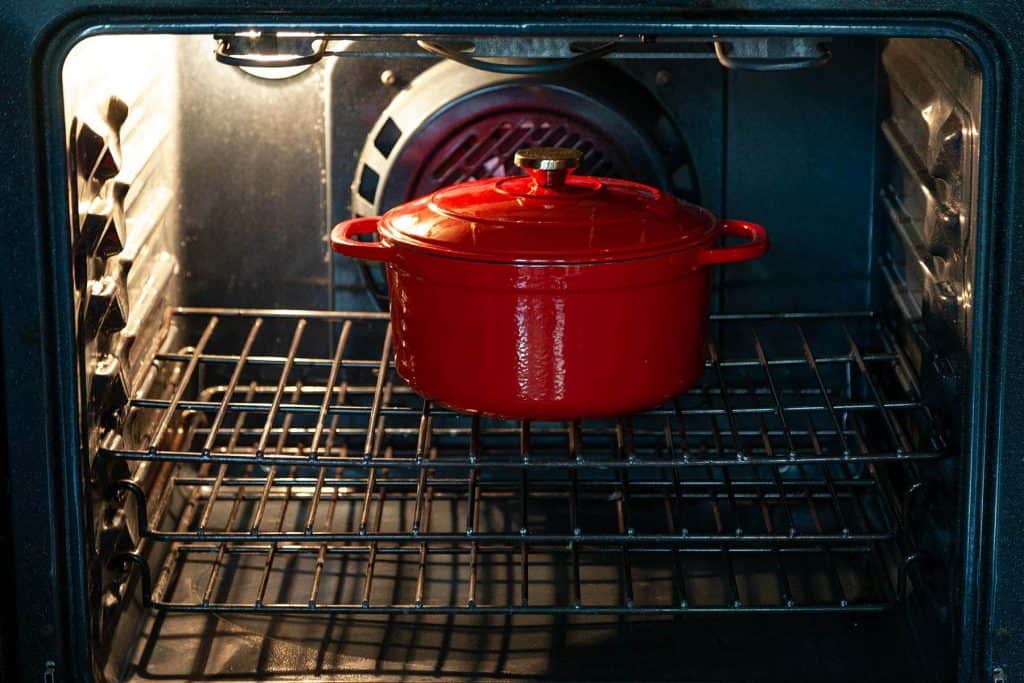
When you’re ready to bake, preheat the oven to 450° F. Put a large, 5.5 - 6 quart Dutch oven with a lid into the oven to preheat for 30 minutes.
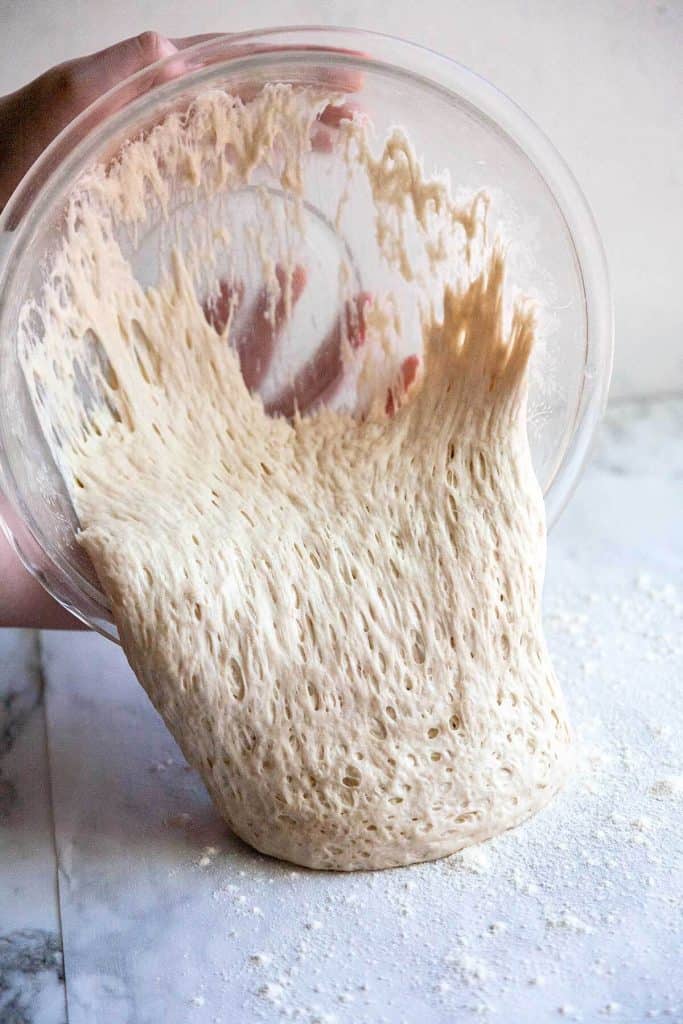
Sprinkle flour on a piece of parchment paper and pour/scrape the dough out onto the paper. The dough should be somewhat stringy (from the gluten) and full of air bubbles.
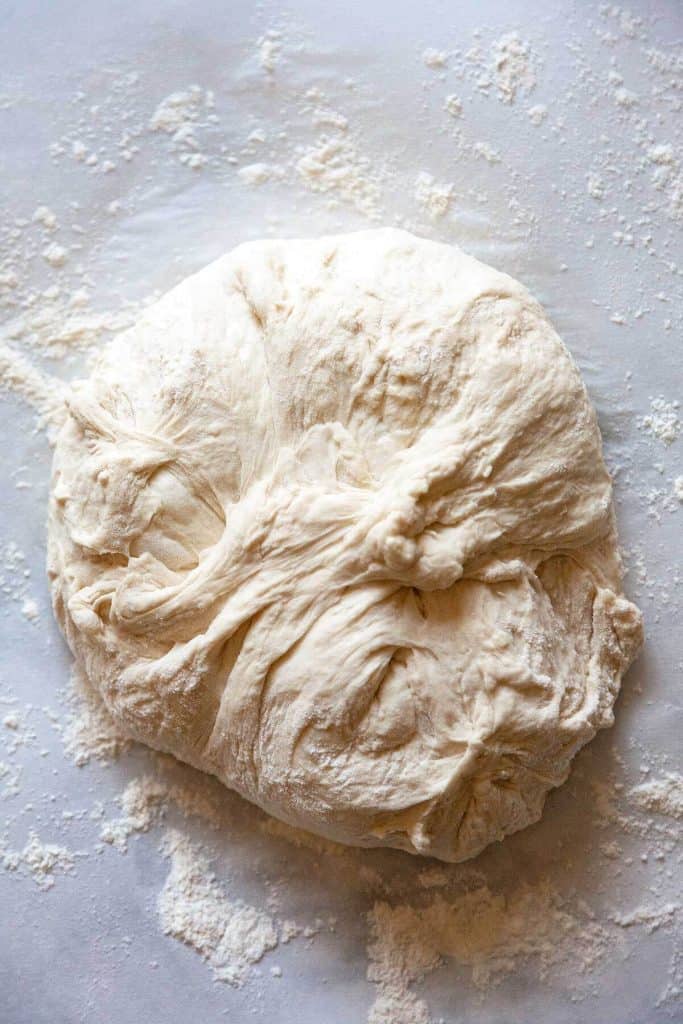
Sprinkle a little flour on top of the dough - just enough so that the dough doesn’t stick to your fingers. Gently form the dough into a ball shape by lifting up the edges onto the top of the ball and pushing on the sides with cupped hands.
The shape will be a little messy – this is what gives the final loaf it beautiful, rustic appearance. The openings on top is where the cracks will form.
Cover the dough with plastic or a kitchen towel until pan has heated.
Remove the pan from the oven and take off the lid. Lift the dough and parchment paper together and lower them into the pan. Be very careful – the pan is super hot.
I use a wooden spoon to press the parchment paper towards the sides of the pan if I see it pushing into the dough and giving it a funny shape.
Put the lid on the pan and put it in the middle of the preheated oven. Bake for 30 minutes.
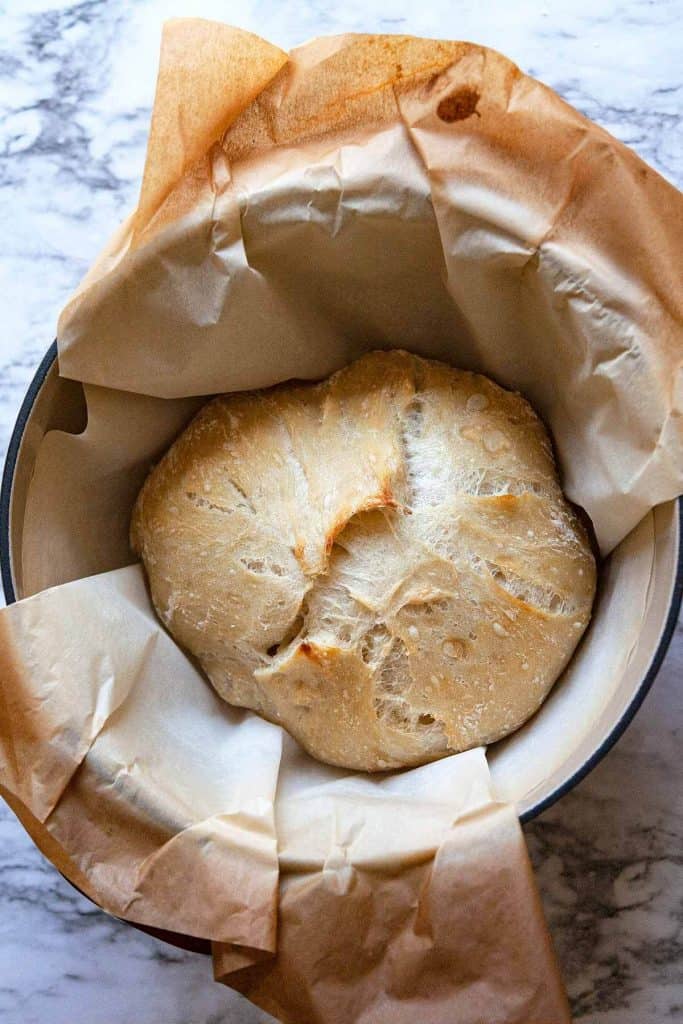
Remove the pan from the oven, remove the lid, and put the pan back into the oven to bake for about 10-15 minutes, until the crust is a beautiful golden brown.
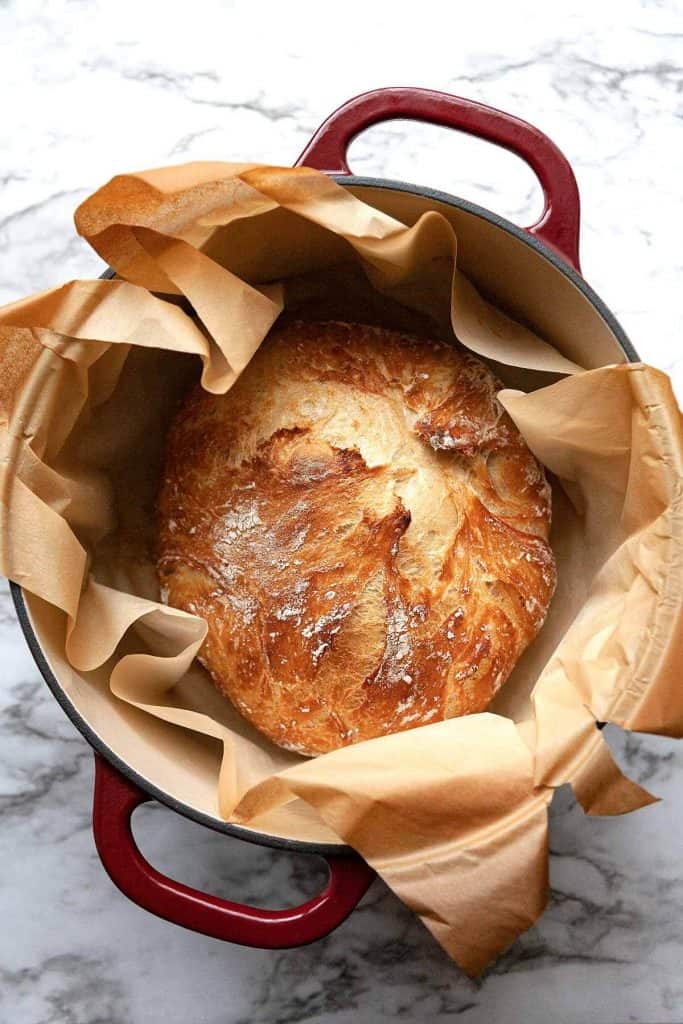
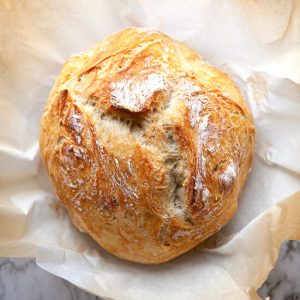
Remove the pan from the oven and lift the loaf out of the pan holding the four corners of the parchment.
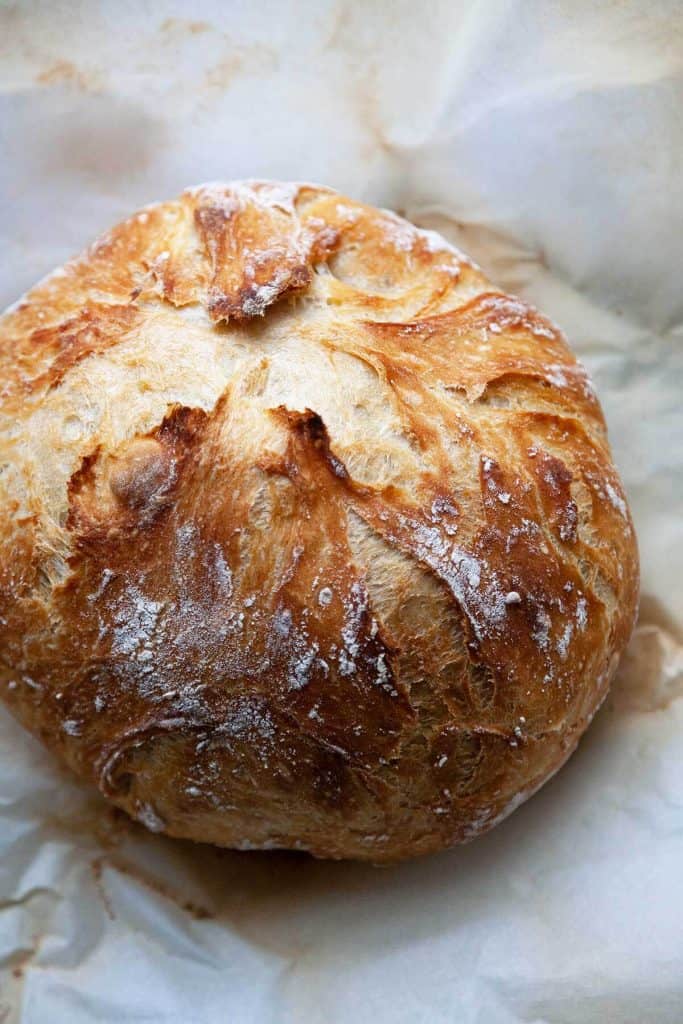
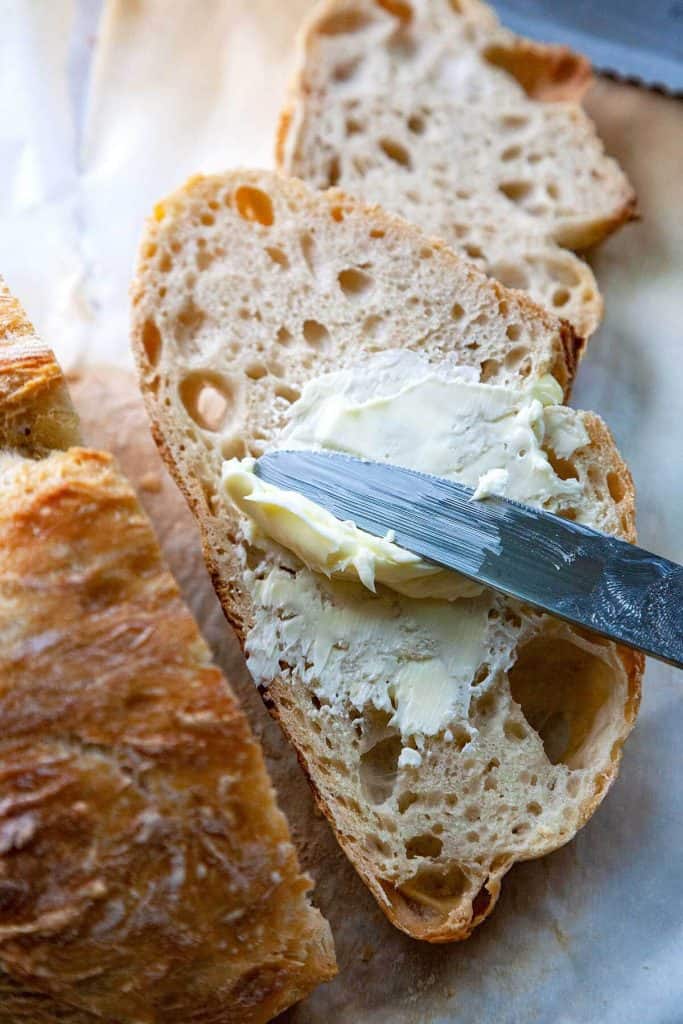
Let the loaf rest for at least 10 minutes before cutting (or tearing) into it.
For a quicker no knead loaf and flexible rising times
- If you’re really in a hurry you can make a quicker no knead loaf by increasing the amount of yeast and using warmer water (about 110° F. Water above 130°F will kill the yeast). Use 2 teaspoons of yeast and let rise for 2 hours before proceeding with the recipe. This will sacrifice some flavor that comes from the long, slow rising.
- The recipe as written allows a 12-18 hour slow rise at room temperature.
- For even more flavor development, refrigerate the risen dough for up to 5 days. Allow to sit at room temperature for an hour or so before proceeding with the recipe.

Substitutions for a dutch oven
A dutch oven is a worthwhile investment for the easy and quality loaves that you will want to bake again and again. I use a 5.5 quart Lodge dutch oven that I picked up at Walmart for about $40. You can also find the 6 quart Lodge here and a less expensive one here.
No dutch oven? While using a dutch oven is ideal and gives the best results, here are some ways you can bake this no knead bread without a dutch oven:
- Any oven safe pot or pan with a tight fitting lid that can be heated up to 450° F.
- A covered metal pot
- If your lid has a plastic handle, cover the top with aluminum foil.
- An oven safe covered casserole dish
- In a baking pan with a pan of water on the bottom rack to create steam.
Recipe
Fullproof Artisan No Knead Bread
Equipment
Ingredients
- 3 cups flour, bread or all-purpose 425g
- ½ teaspoon instant or active dry yeast*
- 2 teaspoons salt
- 1 ½ cups room temperature water 340g
Instructions
- In a large mixing bowl, mix together the flour, yeast, salt, and water until a shaggy, rather wet dough ball forms.
- Cover with plastic and let sit on the counter at room temperature for 12-18 hours. When it’s done, the dough will be a little loose and the surface should be covered with tiny bubbles.
- When you’re ready to bake, preheat the oven to 450° F. Put a large, 5.5 - 6 quart Dutch oven with a lid into the oven to preheat for 30 minutes.
- Sprinkle flour on a piece of parchment paper and pour/scrape the dough out onto the paper. The dough should be somewhat stringy (from the gluten) and full of air bubbles.
- Sprinkle a little flour on top of the dough - just enough so that the dough doesn’t stick to your fingers. Gently form the dough into a ball shape by lifting up the edges onto the top of the ball and pushing on the sides with cupped hands.
- The shape will be a little messy – this is what gives the final loaf it beautiful, rustic appearance. The openings on top is where the cracks will form.
- Cover the dough with plastic or a kitchen towel until pan has heated.
- Remove the pan from the oven and take off the lid. Lift the dough and parchment paper together and lower them into the pan. Be very careful – the pan is super hot.
- I use a wooden spoon to press the parchment paper towards the sides of the pan if I see it pushing into the dough and giving it a funny shape.
- Put the lid on the pan and put it in the middle of the preheated oven. Bake for 30 minutes.
- Remove the pan from the oven, remove the lid, and put the pan back into the oven to bake for about 10-15 minutes, until the crust is a beautiful golden brown.
- Remove the pan from the oven and lift the loaf out of the pan holding the four corners of the parchment.
- Let the loaf rest for at least 10 minutes before cutting (or tearing) into it.
Notes
- Bread flour creates a chewier loaf with larger air pockets that rise upwards instead of outwards.
- Instant yeast can be mixed right in with the flour as shown here.
- If you are using active dry yeast, dissolve the yeast in water first according to the package directions. When it gets bubbly and foamy, mix with the rest of the ingredients.
- Dough can be refrigerated after rising for up to 5 days to develop more flavor. Let sit at room temperature for an hour before proceeding with recipe.
- Bread stays fresh for about 2 days. After that, I slice it and keep it in a ziplock bag in the freezer for up to 3 months.
Nutrition
Enjoy, friends!
Follow me on INSTAGRAM and PINTEREST for all the latest content and recipes!
Subscribe to FOODTASIA’S NEWSLETTER to receive fresh recipes straight to your inbox.
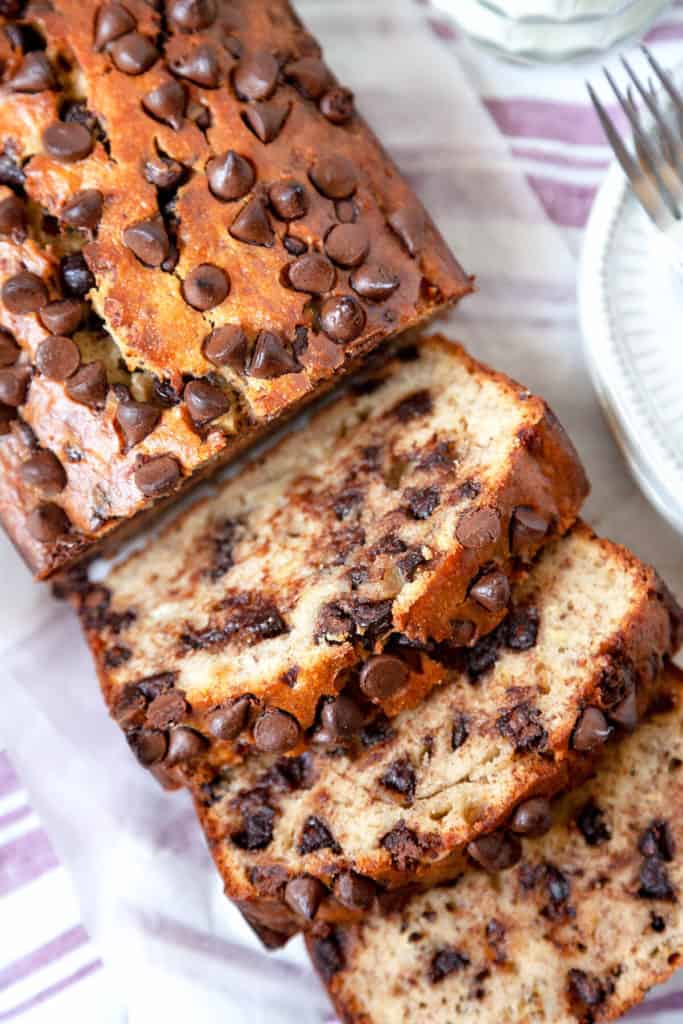
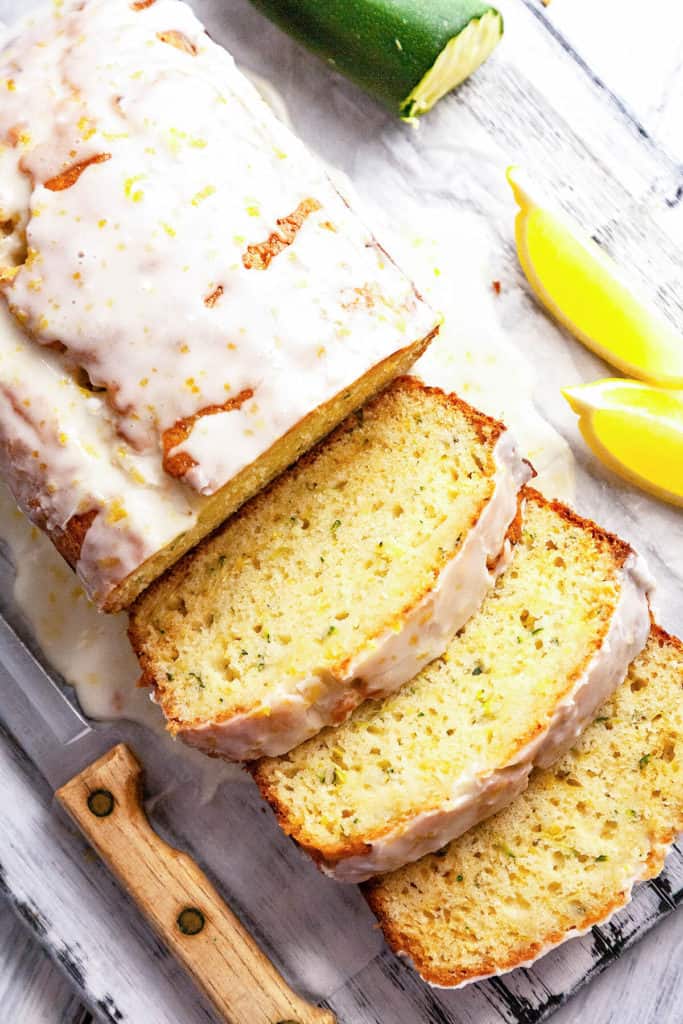
You might also like:


Brenda says
Love how this bread come out. Wondering if I could add seasoning to the mix to make like Italian seasoning to make homemade garlic bread. Trying my second loaf with a mix of all purpose and bread flour.
Kelly says
So happy you liked it, Brenda! Adding a seasoning should work just fine. That's a great idea!
Stew says
Better than expected a new fav
Kelly says
So happy you liked it, Stew!
Brenda says
Could you double this recipe and would the baking time be the same?
Kelly says
Hi Brenda, I'm not sure what effect doubling the recipe would have, especially as far as fitting into the pan. It would need more baking time.
katrina Woerner says
Can you add other ingredients to the bread...like nuts or dried fruit? Or maybe cheese or jalapenos?
Kelly says
Hi Katrina, it should work ok.
Ken stewart says
Can you use milk instead of water for bread?
Kelly says
Hi Ken, sorry, I haven't tried it with milk.
Joy says
Tried this 2 days ago and absolutely love this recipe!!! The bread is delicious
Kelly says
Thank you, Joy! So happy you liked it!
jeff bravo says
Big fan of this recipe. Made it twice for Christmas, then a set of rolls the other day. Made Christmas really easy - didn't have to do anything to the dough in the morning.
Just for my own curiosity this time, I added a teaspoon of honey to see if it would affect the rise and the air bubbles (giving yeast more to munch on). The rolls I did on a hot cookie sheet (wrmed up the same as with Dutch oven and a brownie tray half filled with water.
Kelly says
Hi Jeff, How did the honey affect the rise and how did they turn out as rolls?
Melissa says
Looking forward to making my first dutch oven loaf. But I do have a question. The parchment paper I have says its suitable for temps up to 420 degrees. The recipe calls for a temp of 450 degrees. Is this safe?
Kelly says
Hi Melissa, I really don't know if it would be safe for not.
Brenda says
I use parchment paper.
Linda says
Hi, this will be my first time making. I just bought a cast iron Dutch oven, that's a first, too. It was so simple to put together the ingredients. I used fast acting instant yeast. It's on my counter doing it's thing. My question is you said after mixing the ingredients that it would be a wet dough, I didn't find that to be. It was hard to mix in the flour it was so dry, that I had to a couple teaspoons more water. I had the cup and a half to start with. I don't feel I did anything wrong with so few ingredients, but could I have? But, anyway its resting and I'll bake in the morning. Can't wait to try. Nice warm, fresh baked bread for Christmas morning. Thank you for this recipe!
Linda
Kelly says
Hi Linda! When you first mix it, it won't be as loose, but it will loosen up as it rests. Check the photos above for the texture at each stage.
Joesy Fuda says
looks fantastic but 1 cup of flour into grams is 120 so 3 cups should be 360. How did you get 3 cups flour, bread or all-purpose 425g? that's a lot of difference?
Kelly says
Hi Joesy, that’s a great point.
This recipe was developed using the scoop and level method at 5oz or 142g per cup of flour, the way I was taught baking and used in sources like Cooks Illustrated and Julia Child.
The spoon and level method weighs in at 120g per cup, the method used by King Arthur Baking.
As there are different ways of measuring a cup of flour, it’s best to go by weight and to use recipes that have tested and written the recipe by the weight they have used.
Happy baking!
Brenda says
It’s Brenda again! I’ve made this bread three times and given them to family. They absolutely loved the bread but asked if it was sour dough. I leave it sit on the counter 18 hours before proceeding with the baking. Does it kind of turn into a sour dough?
Kelly says
Hello again, Brenda! I'm so happy to hear that they liked it! Technically it's not a sourdough bread because it uses a commercial yeast to rise, whereas a sourdough is naturally leavened with wild yeast and good bacteria. But yes, you are developing flavor and doing a little fermenting in that time on the counter.
Brenda says
Easy and tasted fantastic! Will definitely be making again!
Kelly says
So happy you liked it, Brenda!
Johnny Fuentes says
Thank you for your generosity sharing this recipe.
Kelly says
Hope you liked it, Johnny!
Betsy says
Do you start with 3 cups of flour, 360 grams, and is the rest of the flour for shaping and dusting?
Kelly says
Hi Betsy, this recipe was developed using 5oz (141.7g) per cup of flour so I add the whole 425g to the dough.
Jennifer says
Only use 1 tsp salt otherwise it’s way, way too salty. The bread comes out really good…I do a light knead and a quick slice on top of the dough to get a nicer looking loaf. In between uses, I store the bread in a gallon zip bag.
Marilyn says
Help Please! Made this twice and the first time it was delicious but not enough air pockets. I did the same thing on the second batch but used a new Fleishmans yeast. It was so wet after fifteen hours, i couldn't get it to hold a shape and it ended up ripping the parchment paper and streaming down the worktop like the blob. I cooked it anyway out of curiosity and it turned out a sold weapon of mass destruction! What went wrong?
Kelly says
Hi Marilyn, A slow, cool rise time gives larger and more air pockets. Not sure what happened on the second try. Were the measurements correct and did you use instant yeast or proof active dry yeast?
Marilyn G Roosevelt says
Hi Kelly -
Apologies for taking so long to respond to your kind response! I've been poorly over the summer, but back to baking - hopefully!
I used Active Yeast Fleischmans Brand the second time. The first time, I used some type of granuel that I had decanted but not sure what it is.
Which is better? Active or Instant? I only have active.
Thank you SO much for your response.
Kelly says
Hi Marilyn! Sorry to hear you haven't been well. I hope you're feeling better! Either type of yeast can be used. The active one just has to be proofed in warm water before mixing with the other ingredients. Good to hear from you and take care!