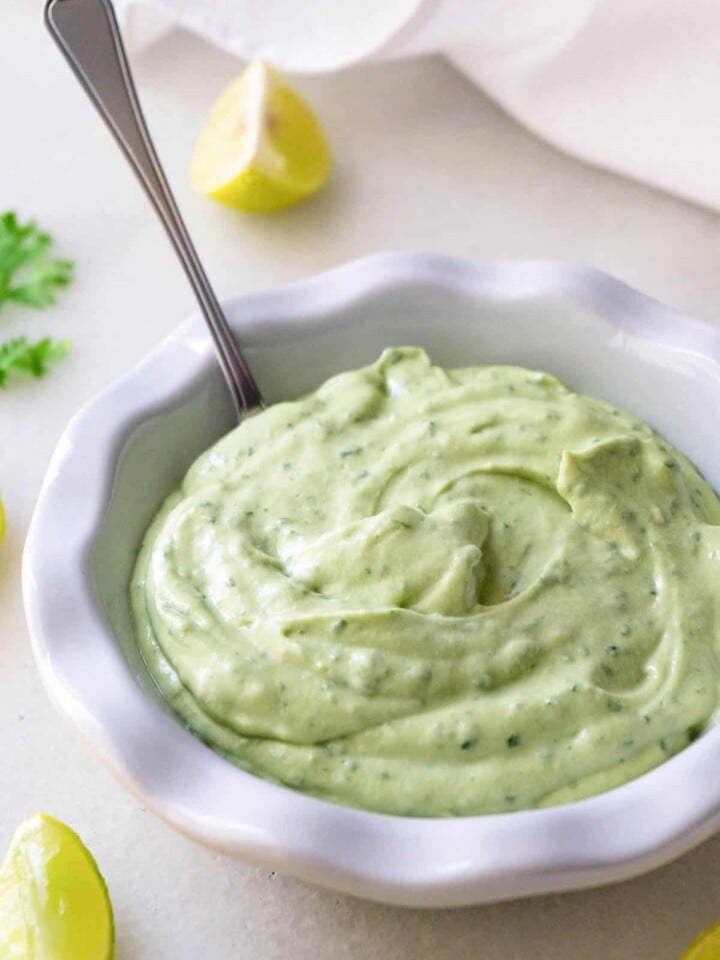
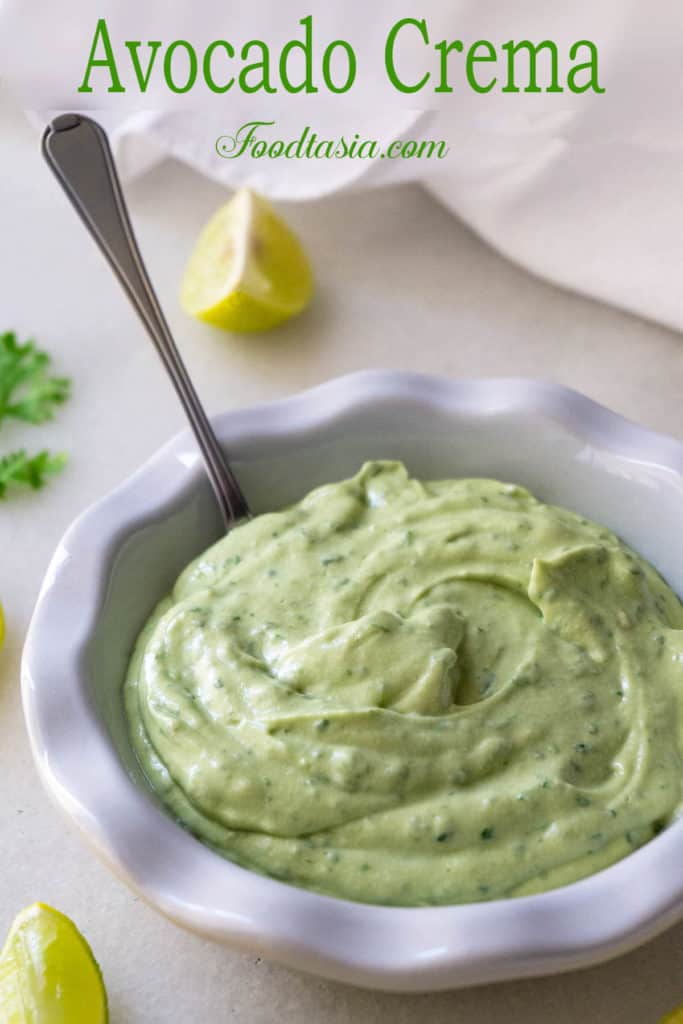
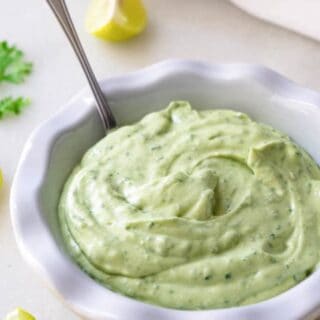
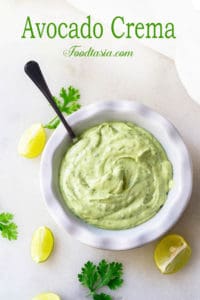
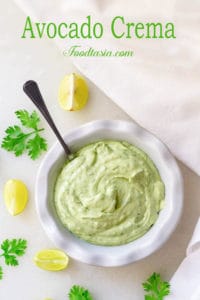
Silky smooth and luxuriously creamy, Avocado Crema provides a rich and cooling contrast to spicy dishes. It’s a perfect complement to Mexican and Tex-Mex dishes such as quesadillas, tacos, nachos, and burrito bowls. It can also be used on salads and as a dipping sauce.
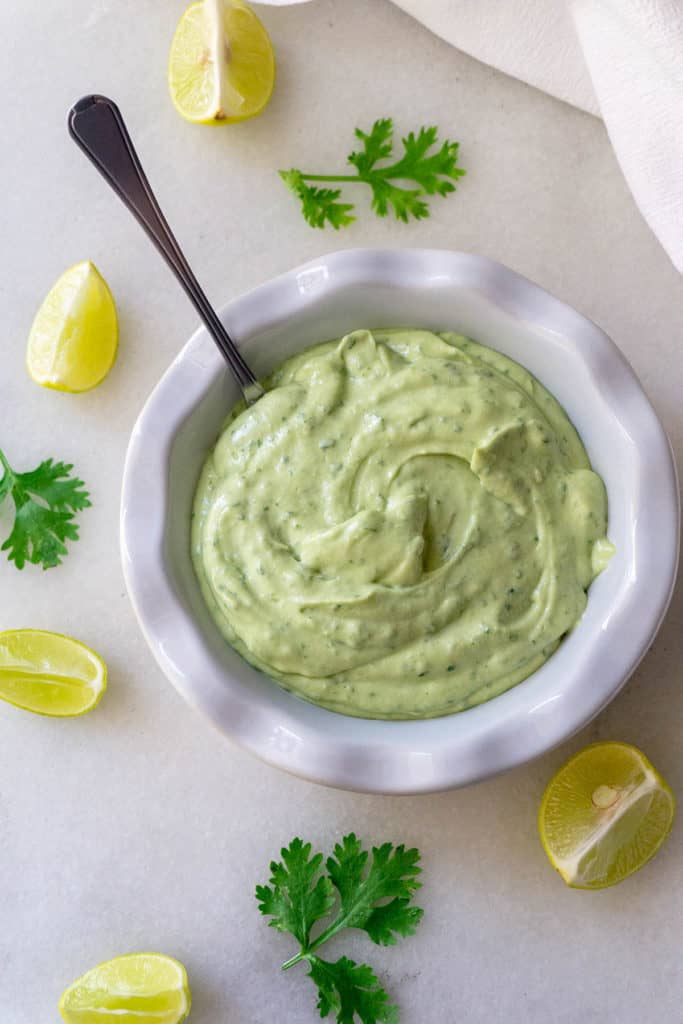
 Avocado Crema is closely related to guacamole, however it is creamier, fresher, and silky smooth. I love the cooling, creamy contrast it provides to all my favorite crunchy, spicy Mexican foods. It's all about the balance of flavors and textures - and Avocado Crema is indispensable when it comes to spicy dishes. You'll love it on my Beefy Bean and Cheese Quesadillas!
Avocado Crema is made by blending avocado and sour cream. Cilantro and lime juice keeps it fresh and flavorful. Avocado Crema can also be made with Greek yogurt or Mexican Crema. Crema is the Mexican version of crème fraiche, a soured and thickened cream that is milder than American sour cream. It's super easy to make in just one step. Check out my recipe for How to Make Crème Fraiche. If you have regular yogurt on hand, check out my recipe on How to Make Greek Yogurt.
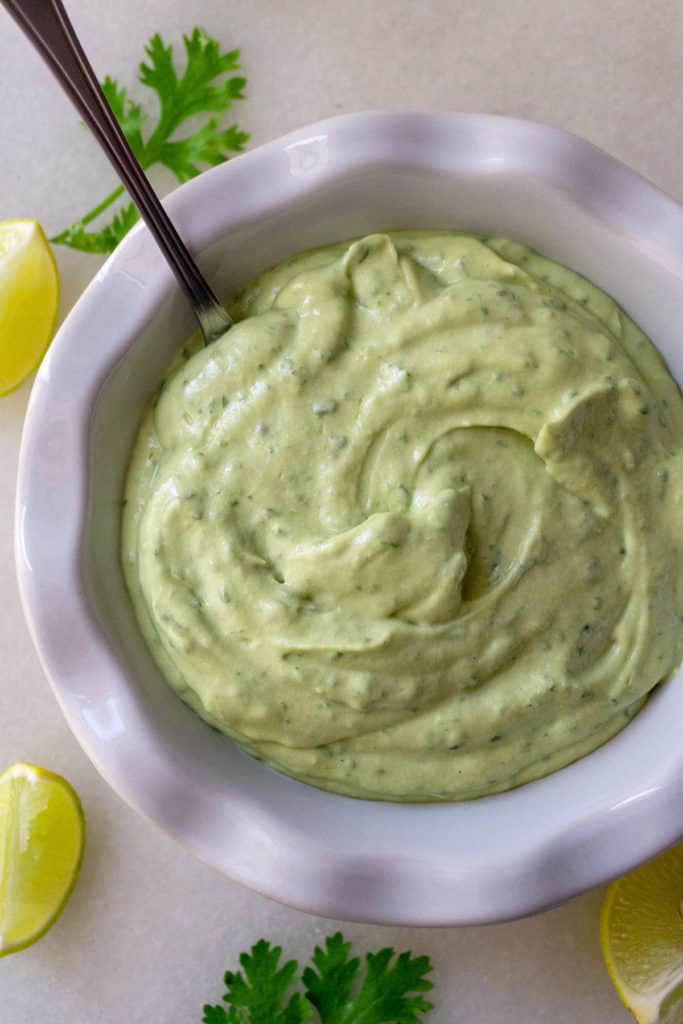 My secret to making Avocado Crema luxuriously smooth and silky? Two tablespoons of mayonnaise. Be sure to use the best quality mayo and one that is not strong in flavor. As always, homemade is the best. Check out my recipe for Foolproof Homemade Mayonnaise.
 Enjoy! Don't forget to pin for later!
Jump to Section
Recipe
Silky Smooth Avocado Crema
Ingredients
- 1 medium avocado
- ¼ cup chopped cilantro
- ½ cup sour cream
- 2 tablespoons mayonnaise
- 1 tablespoon lime juice
- ½ teaspoon salt
Instructions
- Combine all of the ingredients in a food processor and process until smooth.
- Keep chilled
Notes
- You can use Greek yogurt or Mexican Crema (the Mexican version of Crème Fraiche) in place of the sour cream. Click the links for recipes to make your own.
- For a 5-minute Greek yogurt, spoon regular yogurt onto a clean dishtowel that is folded in half. Cover with another dish towel that is folded in half. Let rest for 5 minutes while the excess liquid is absorbed into the towel. Lift off the top towel and scrape up the thickened yogurt.
Nutrition
You might also like:
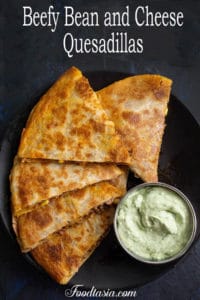
Beefy Bean and Cheese Quesadillas:

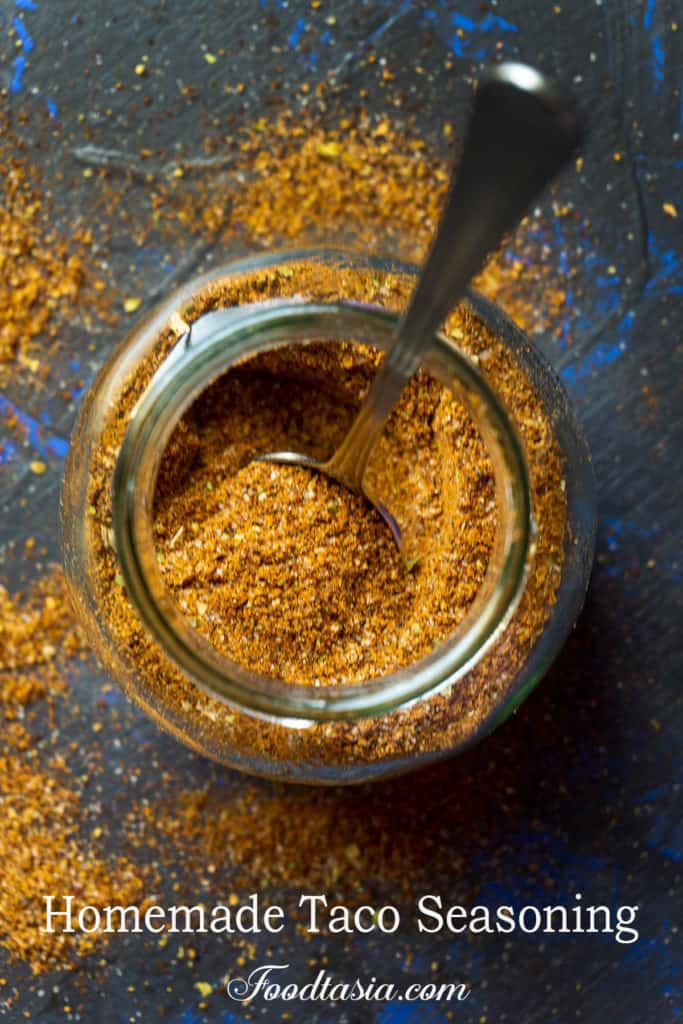
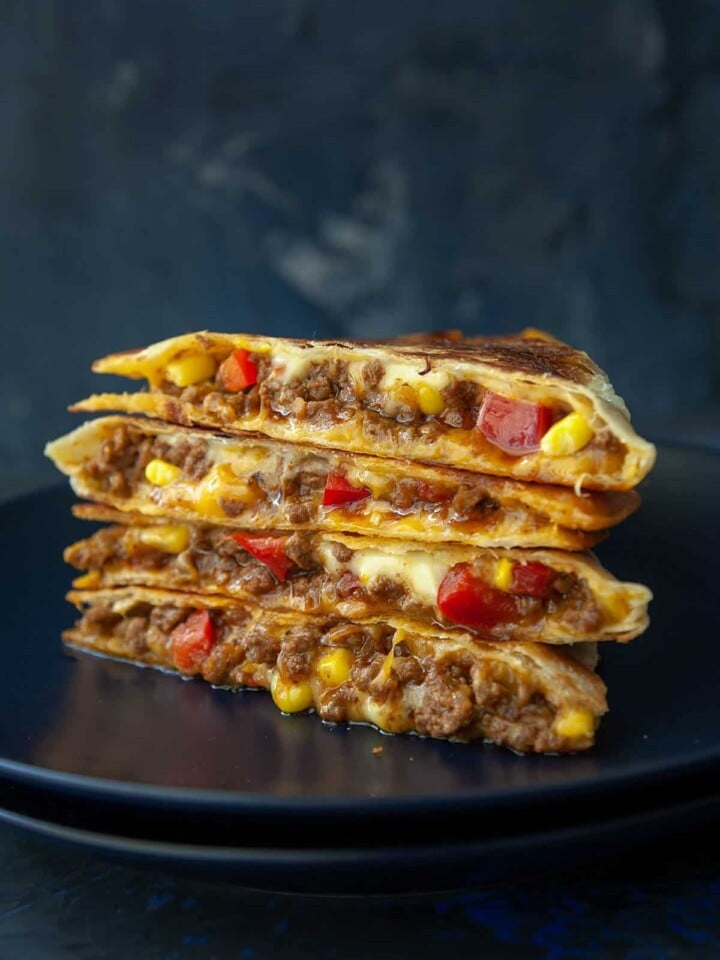
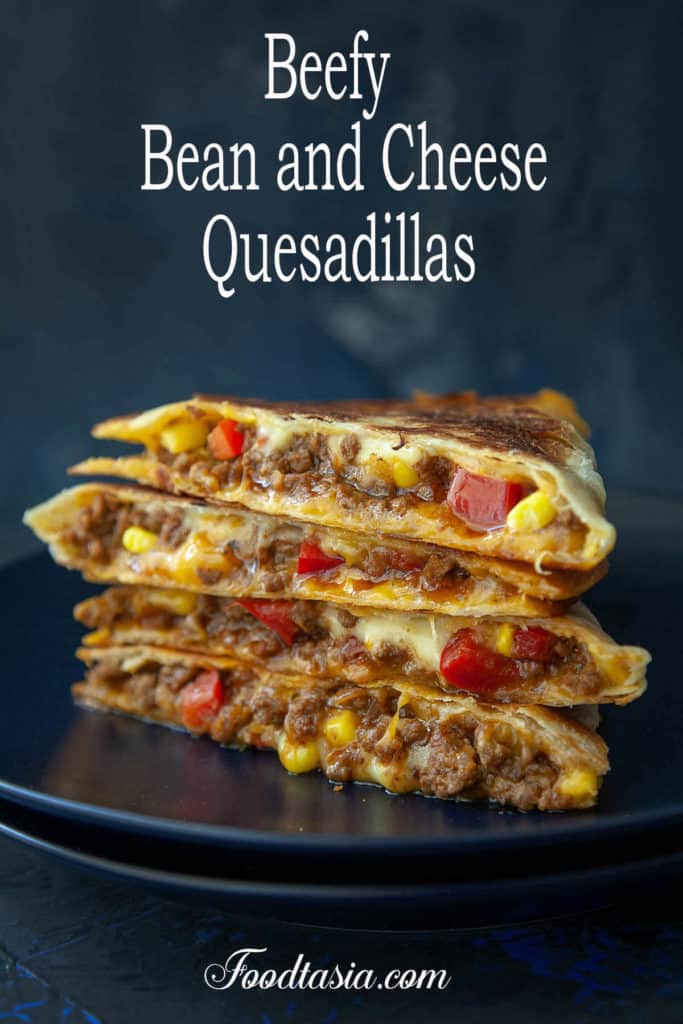
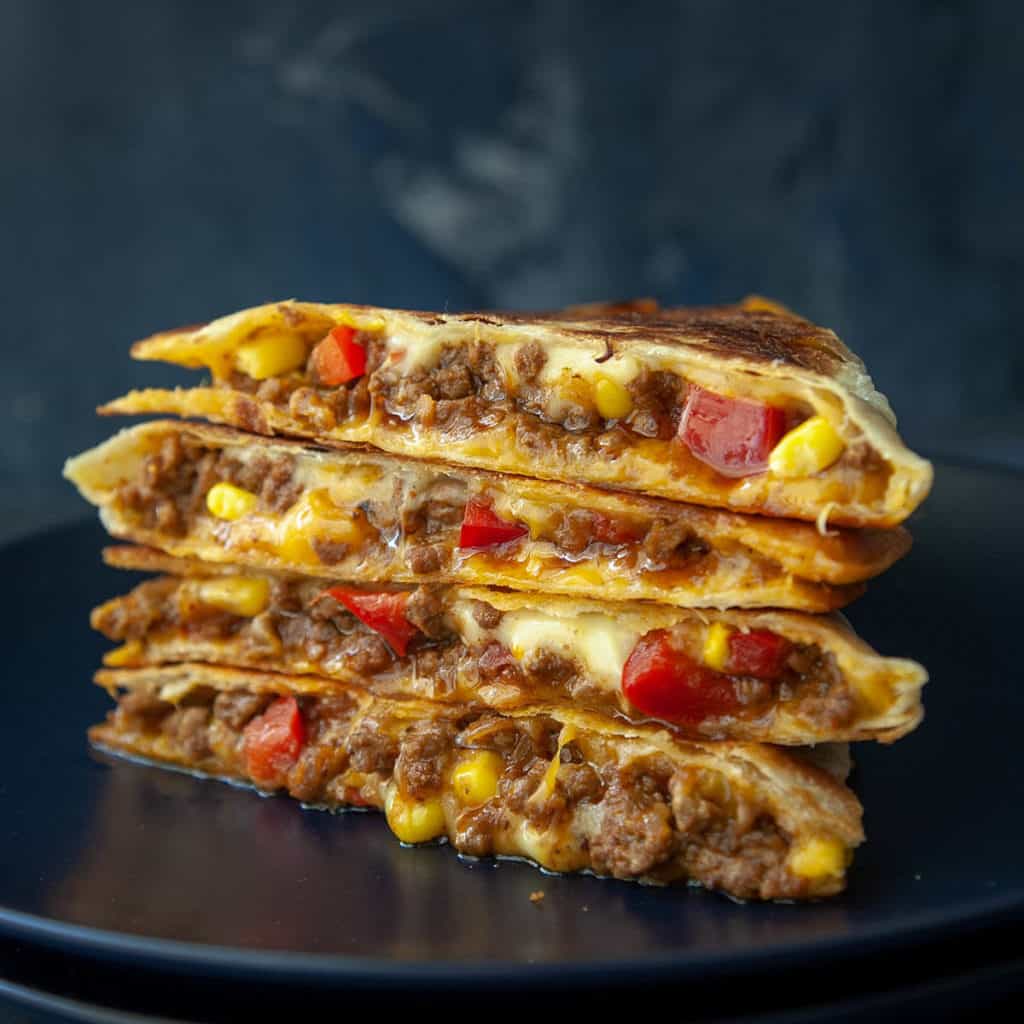 We don't even bother ordering quesadillas in restaurants anymore because these Beefy Bean and Cheese Quesadillas are so amazing. They have the perfect balance of flavors and textures. The tortilla is light and crispy. And then there's the gooey melted cheese. Cheddar and pepper jack make a great combination, and using more than one cheese gives a more complex flavor. Sweet corn and red bell pepper add more flavor and texture to the mix as well as beautiful color. The Mexican spiced ground beef filling really takes these Beefy Bean and Cheese Quesadillas to a whole new level.
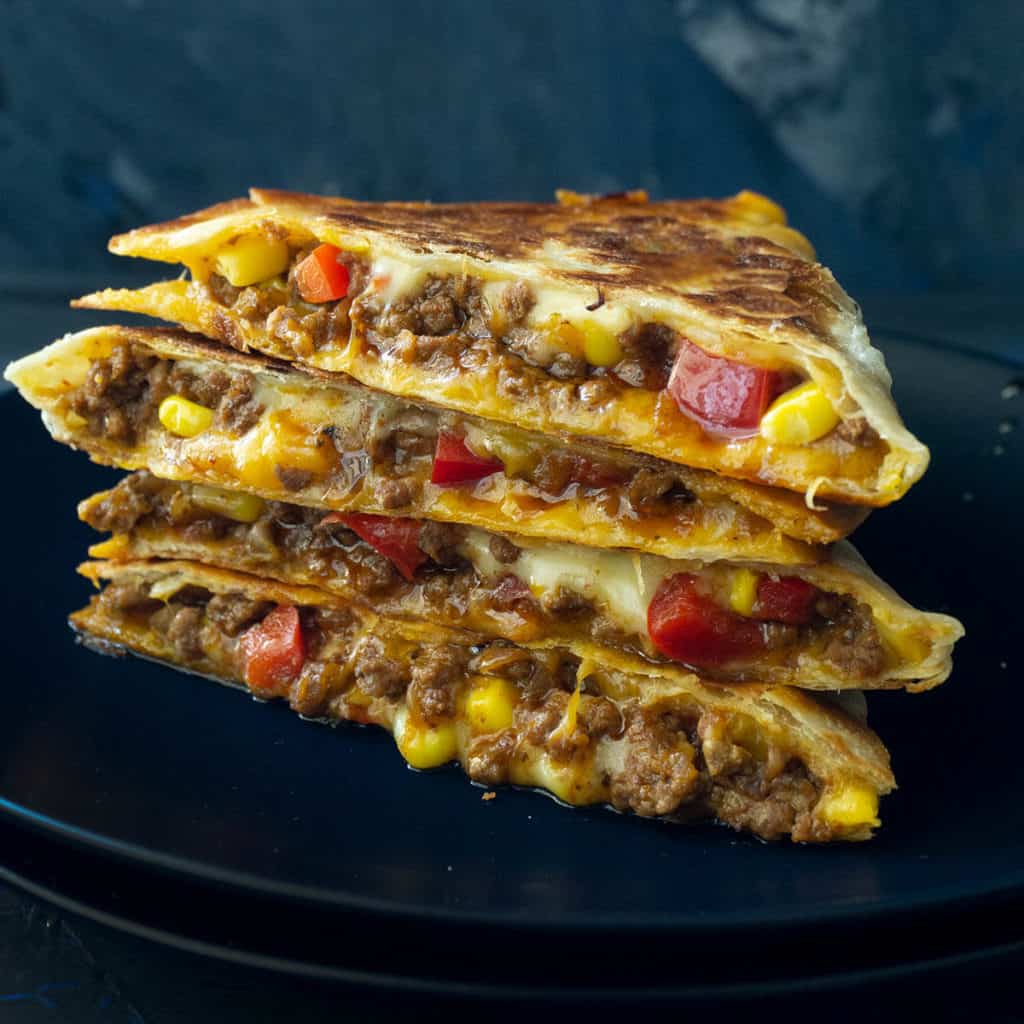 If you're short on time, you could just use a packet of taco seasoning and ground beef - I have done that many a times, and it still tastes great. Every busy cook needs a shortcut. But if you want really amazing - like the best quesadillas you have ever eaten - take the easy extra steps of sautéing some onion, red bell pepper, and garlic before adding the ground beef and using homemade taco seasoning. It makes all the difference. Try my
 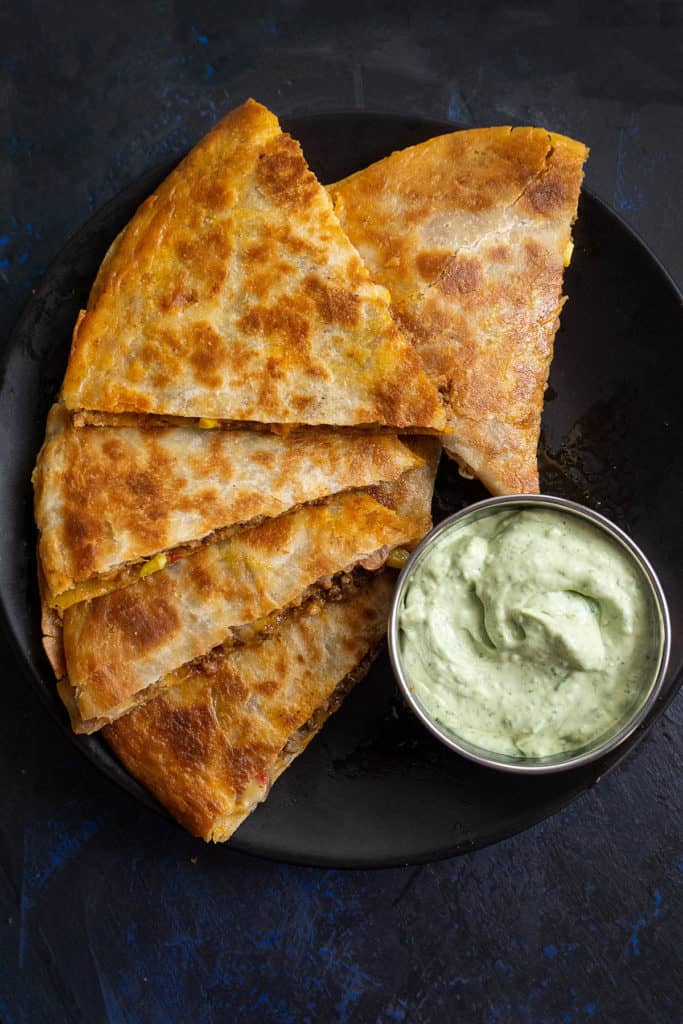 You can use canned refried beans to make these Beefy Bean and Cheese Quesadillas, or you can make your own from dried beans. As usual, homemade is the best and has a superior flavor. But, sometimes we need shortcuts. I usually have some homemade refried beans in the fridge for a quick lunch or late night snack. Check out my
 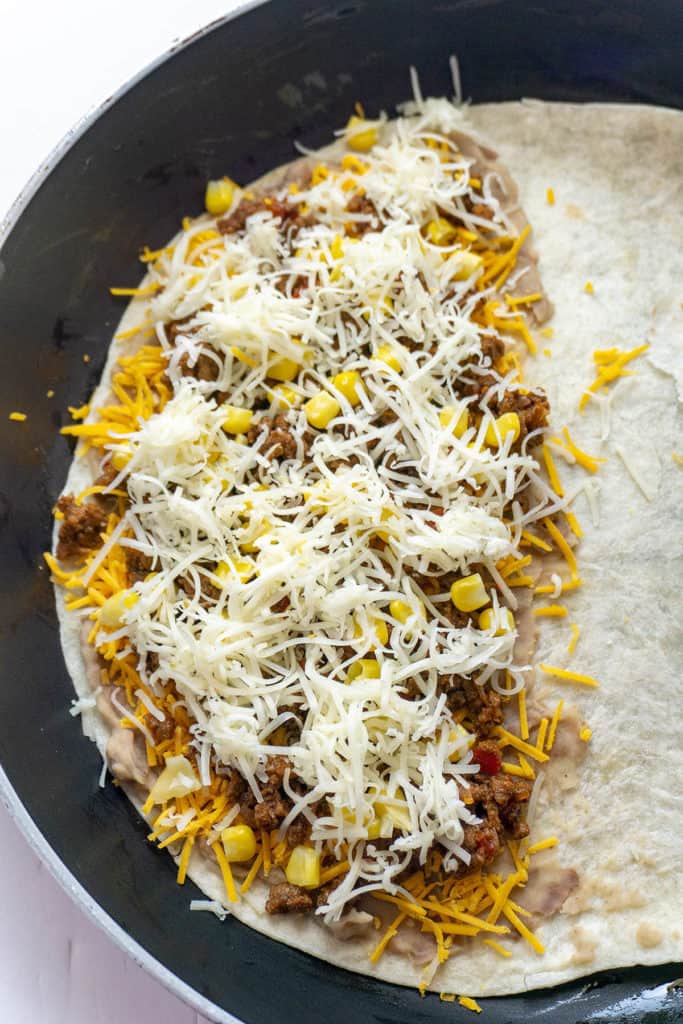 To make the Beefy Bean and Cheese Quesadillas, layer the refried beans, the cheddar cheese, the beef filling, the corn, and then the pepper jack cheese on one half of a large flour tortilla. Fold the other half of the tortilla on top of the filling and shallow fry in a large skillet until both sides are golden brown. Cut the tortilla into wedges and serve.
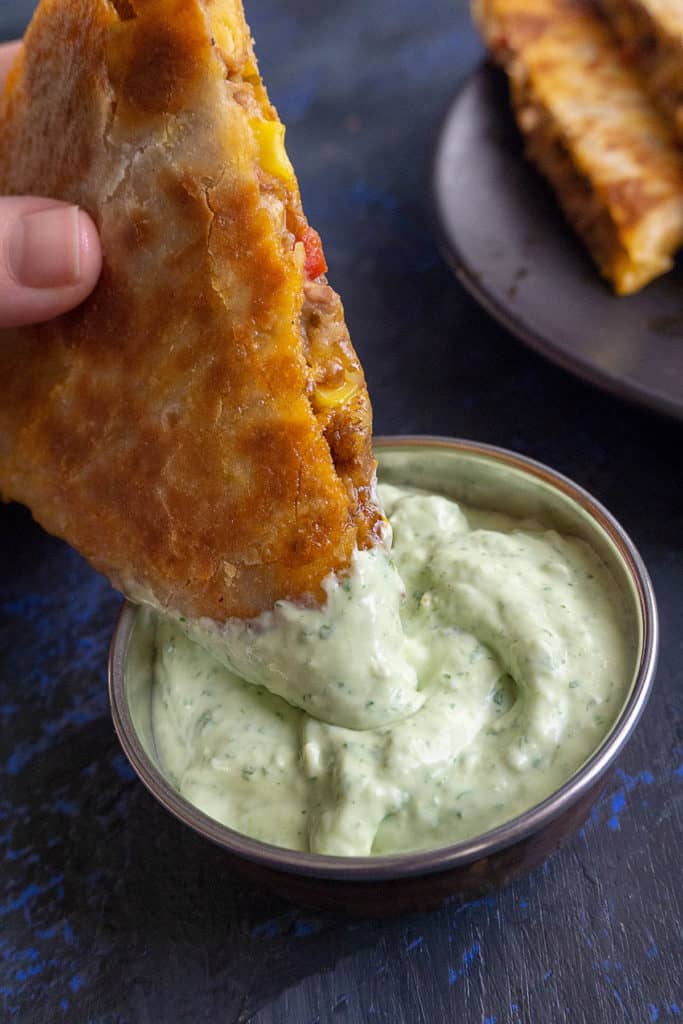 Serve the Beefy Bean and Cheese Quesadillas with

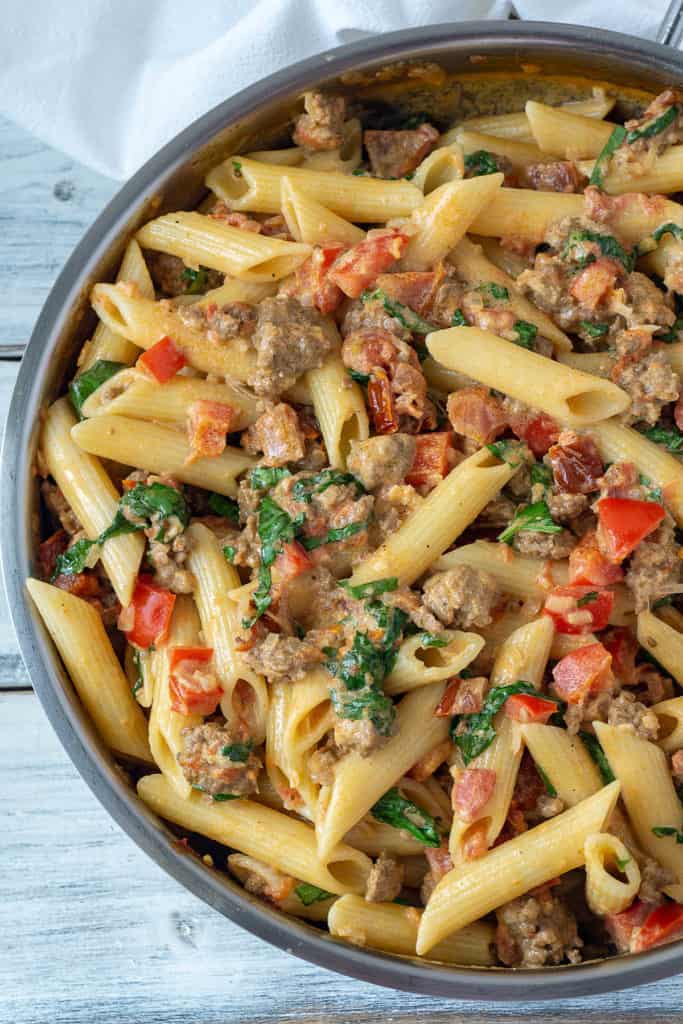
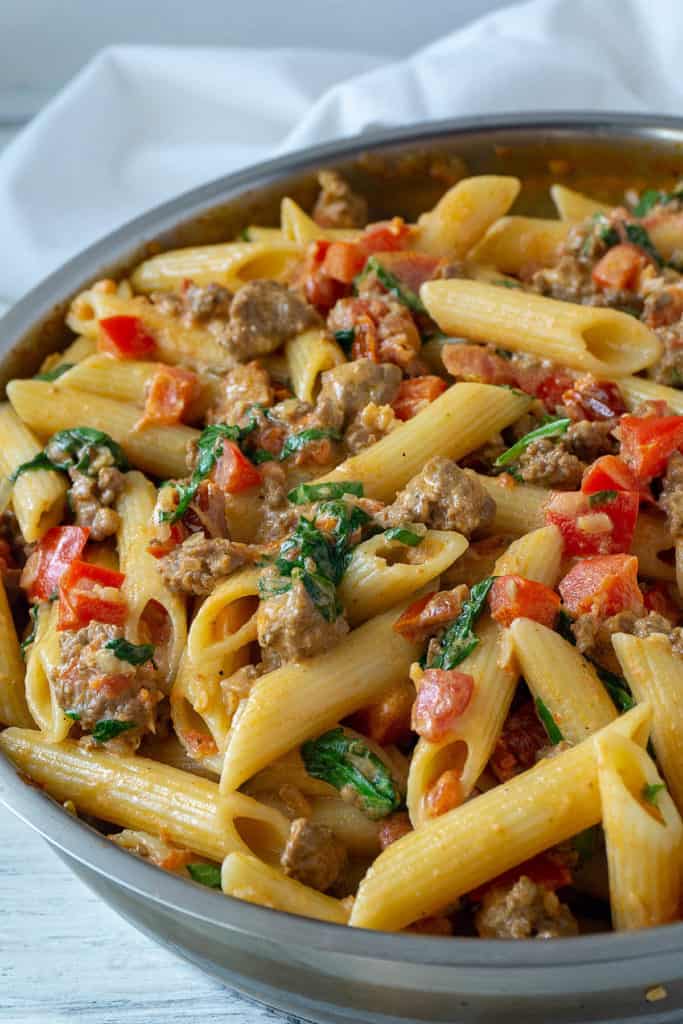
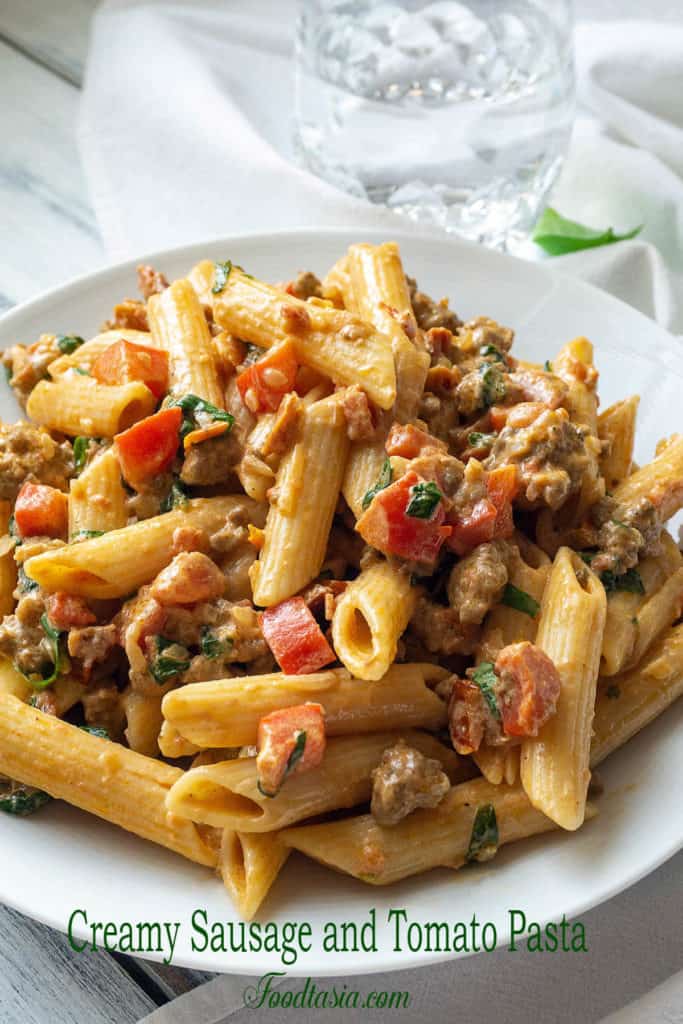
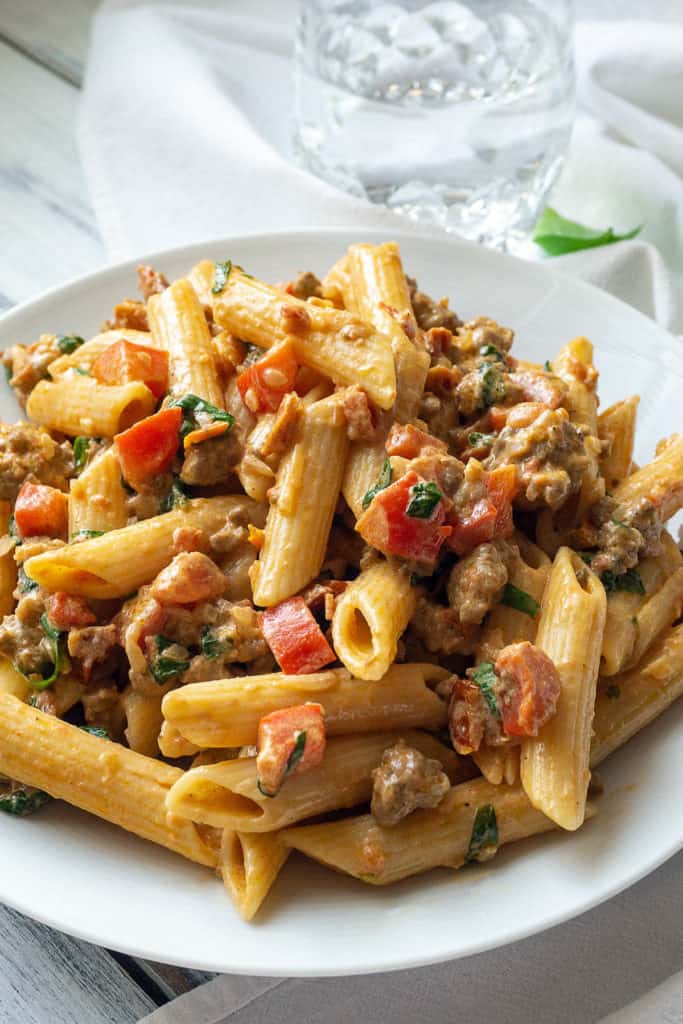 I love it when I can make a delicious dinner that everybody loves, that fills the kitchen with wonderful smells, and even has a little leftover that reheats beautifully for a midnight snack or tomorrow's lunch - all in the time that it takes to boil pasta. This Creamy Italian Sausage and Tomato Pasta is exactly that. 30 minute meals for the win!
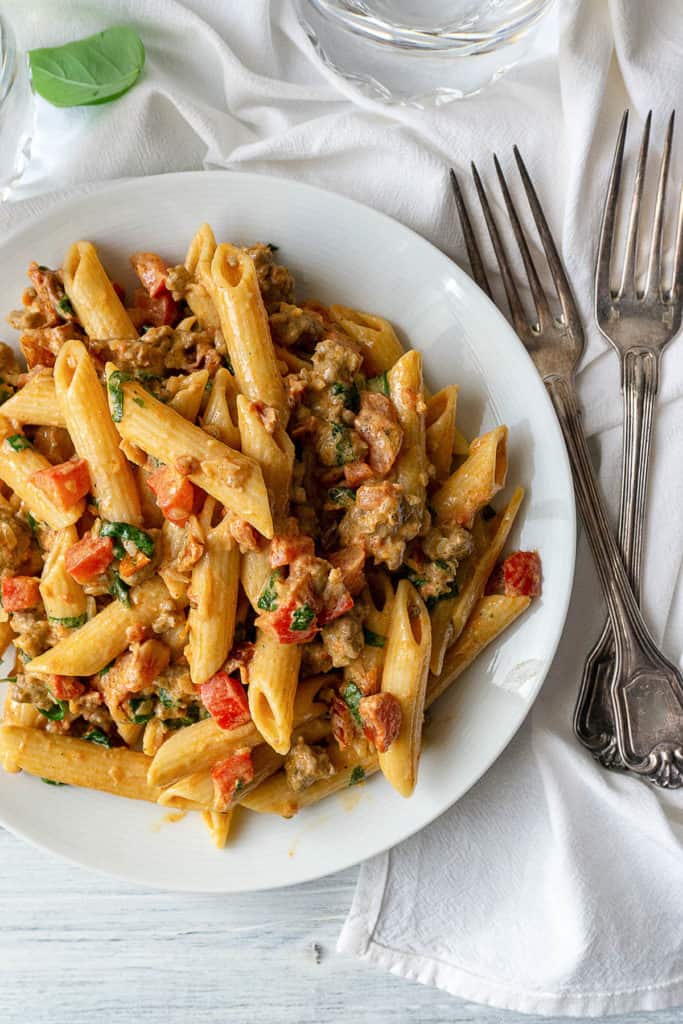 There are so many flavors going on in this Creamy Italian Sausage and Tomato Pasta, the kids won't even notice that you've slipped in some super healthy vegetables - spinach, red bell peppers, two kinds of tomatoes. That's a win-win!
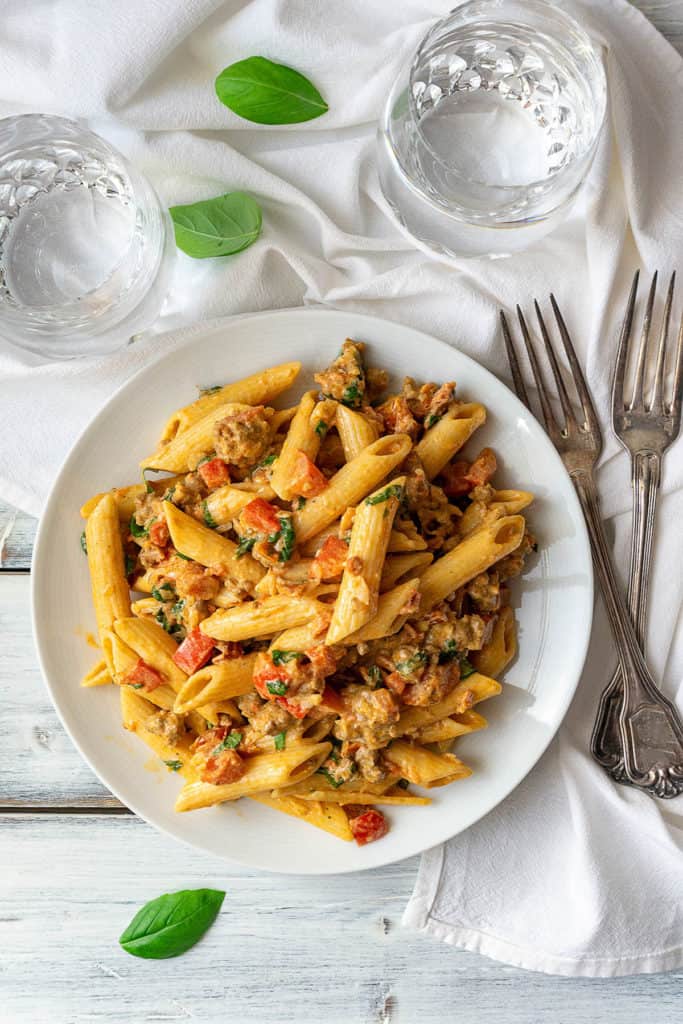 Creamy Italian Sausage and Tomato Pasta is so quick and easy to make. Simply boil some pasta while you make the sauce. Sauté some onion and red bell pepper in a little olive oil for a minute or two. Add the sausage and cook until its brown and cooked through.
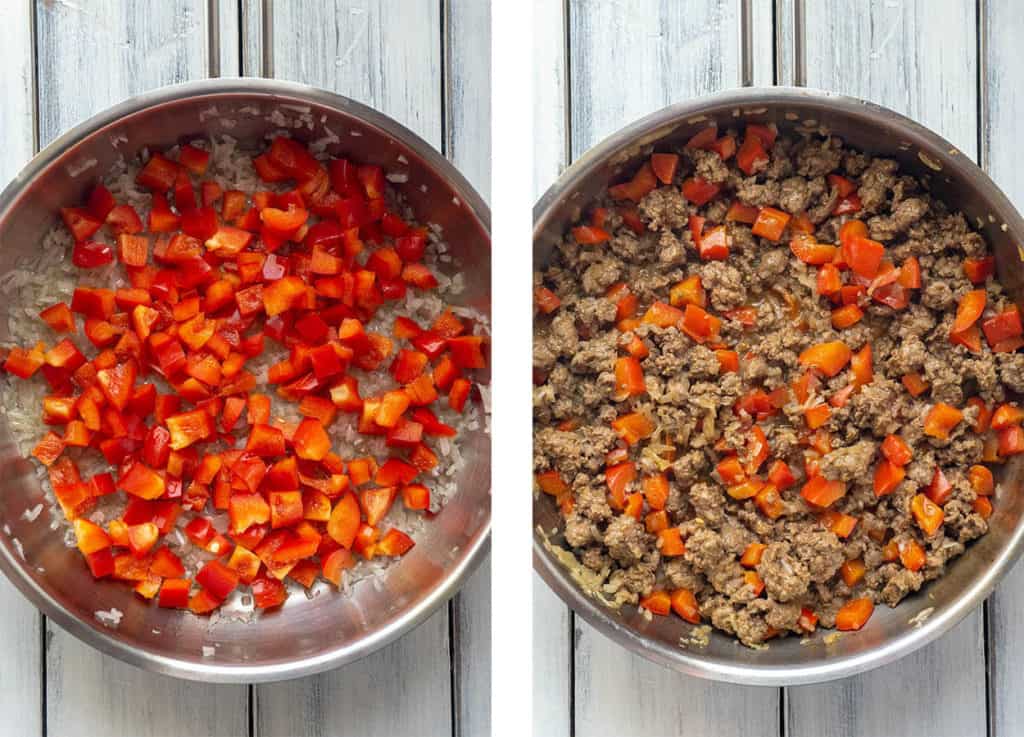

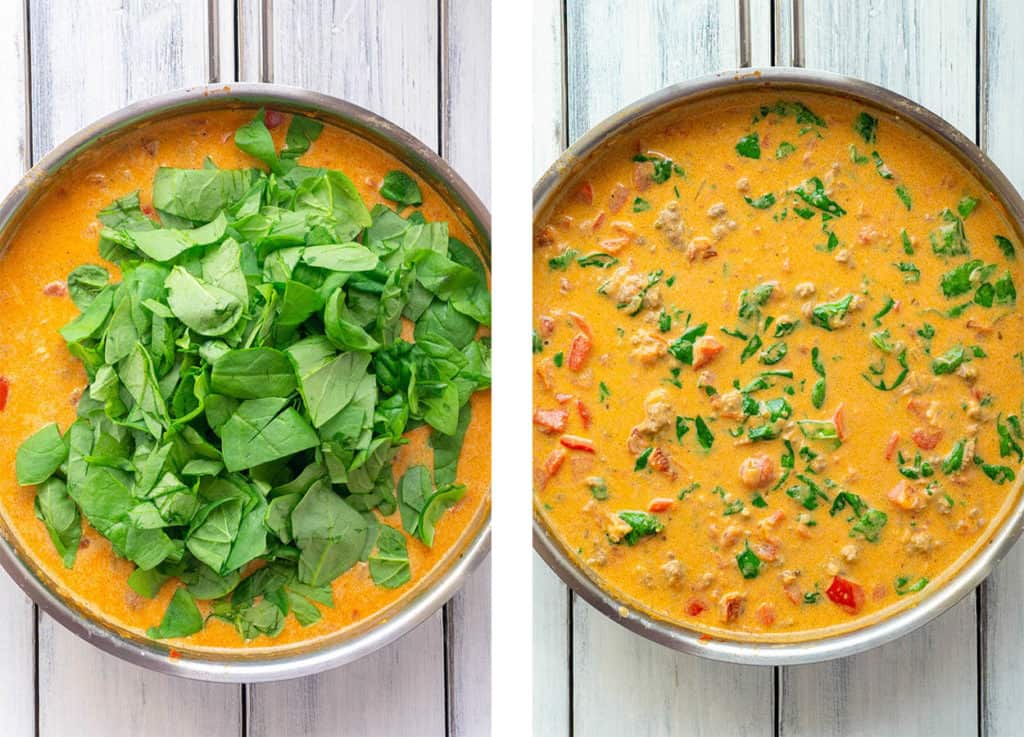 All that's left is to sprinkle with some basil and toss it with the pasta. I like to toss the pasta with a spoon of butter first, but that's just personal preference. Also, if you want to make it ahead of time, keep the sauce and the pasta separate. The buttered pasta will stay hot a few hours if you wrap the pan in a blanket. The sauce can just be gently reheated before tossing with the pasta.
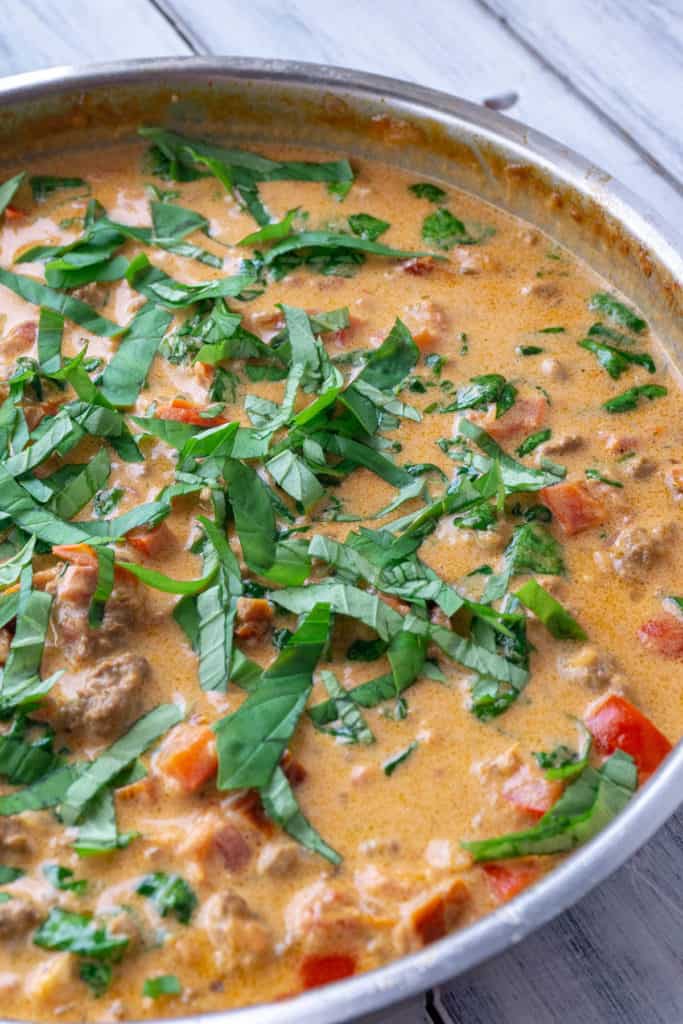
 Busy families, I've got you covered! Enjoy!
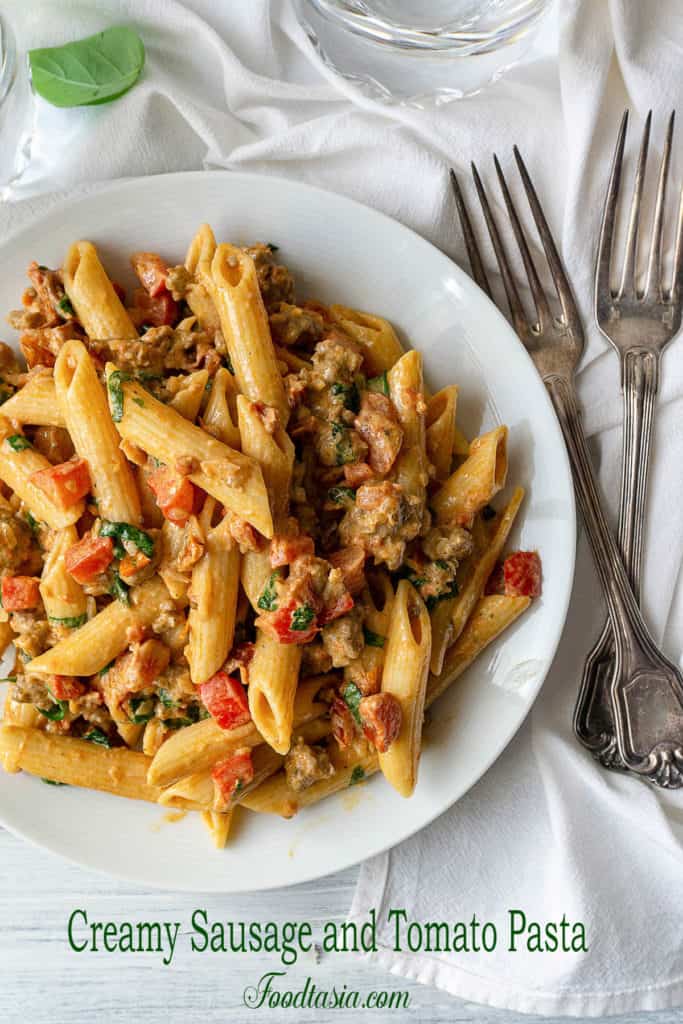

 Don't forget to pin for later!
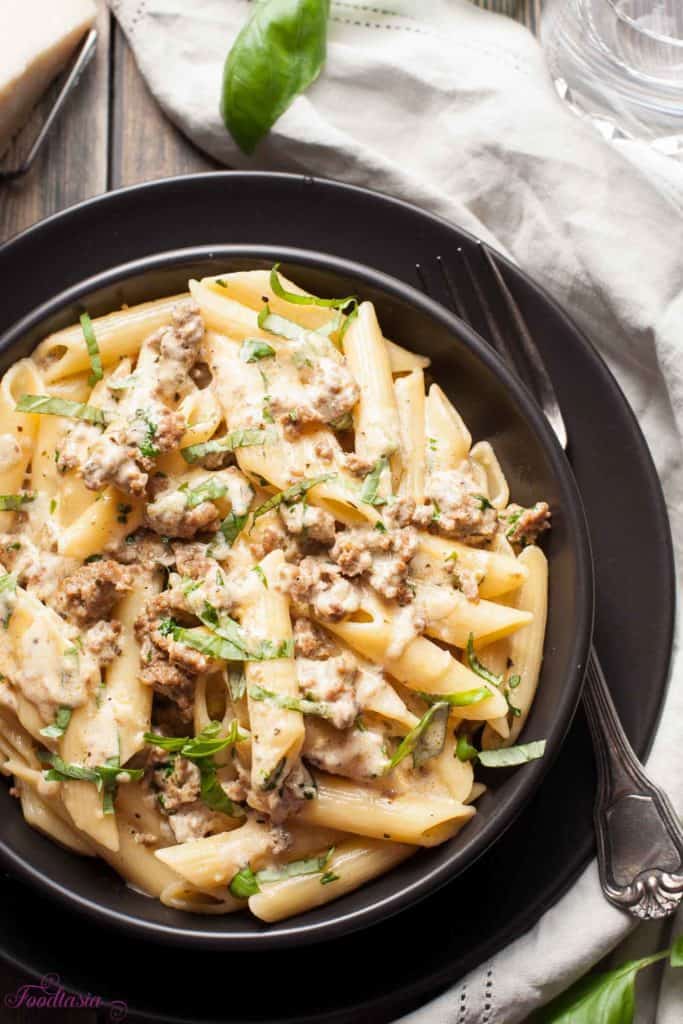
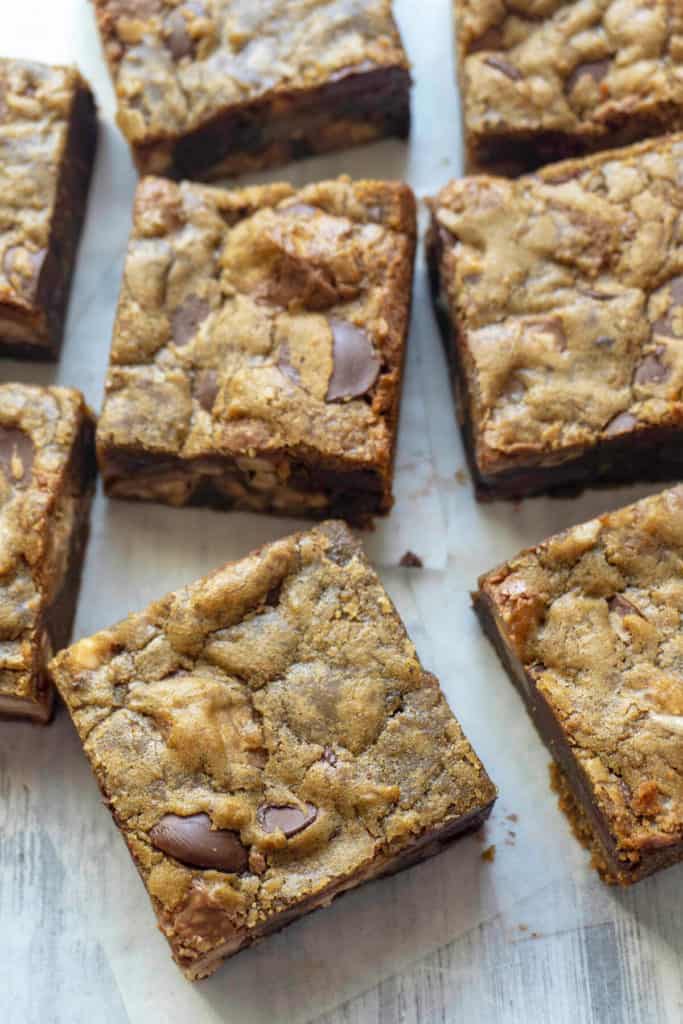 Overstuffing them into a blondie is my favorite way to eat candy bars. The blondie is rich and dense and gooey, the perfect base to hold in all the candy chunks. Semi-sweet or bittersweet chocolate chips balance the sweetness of the caramel, nougat, and milk chocolate of the Snickers bars. Kind of. This bar is very sweet and very delicious!
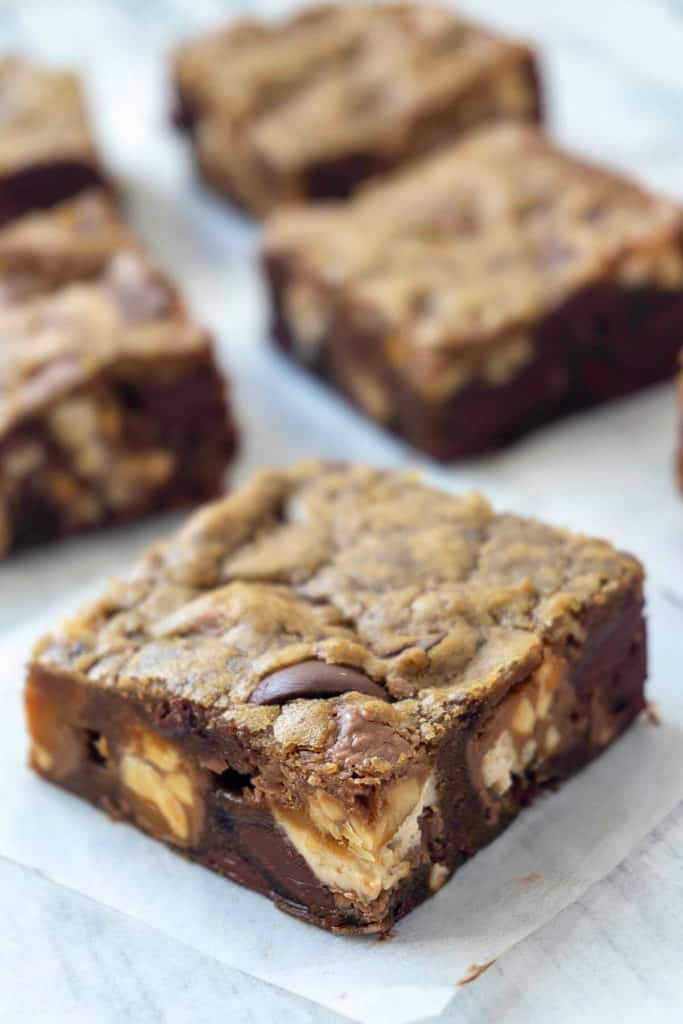 These Snickers Blondie Bars are a cinch to make. Whip them up in one bowl - no mixer needed. Melted butter makes them chewy and easy to mix.
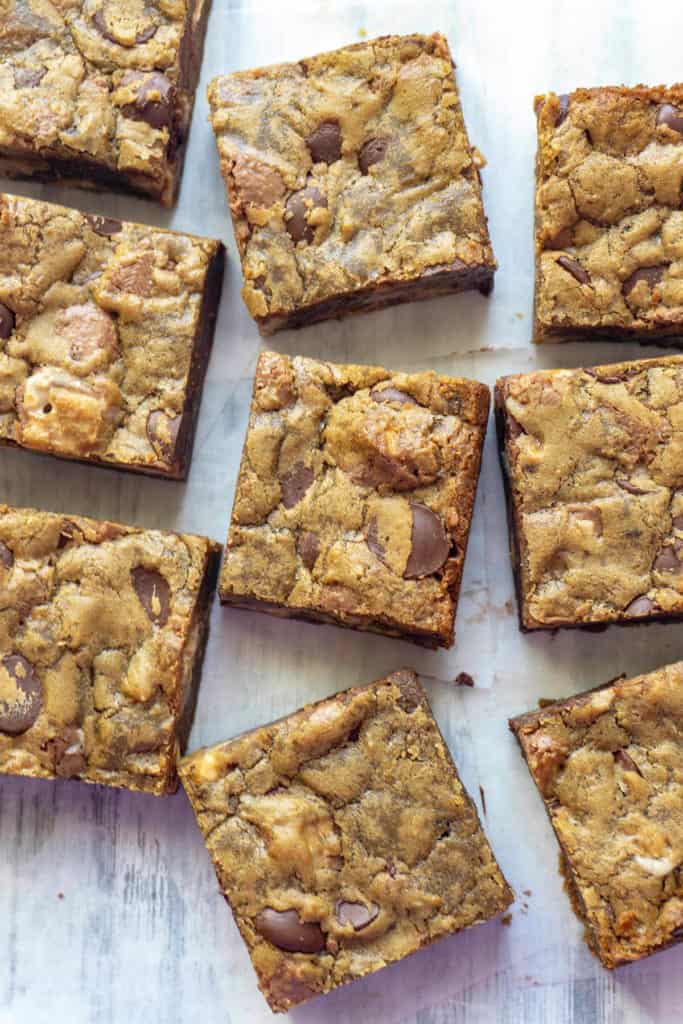 Simply whisk cooled melted butter and brown sugar together in a mixing bowl. Whisk it good here - you want the butter to all be absorbed into the sugar, not separated. You also want your butter to be cooled so when you whisk in the egg, it doesn't cook. I melt the butter about three-fourths of the way in the microwave then let the residual heat melt the rest of the butter. This saves on cooling time. Stir in the vanilla and dry ingredients thoroughly, then add the chunks of Snickers bars and chocolate chips.
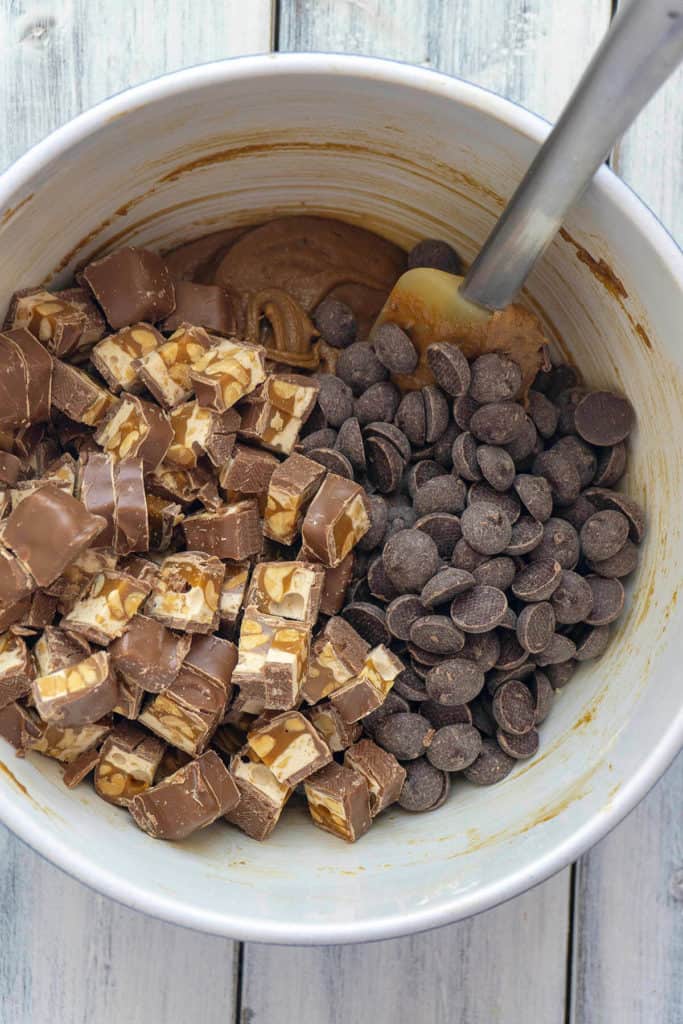 I use an 8-inch square pan with a removable bottom. This makes it really easy to lift the blondies out of the pan. If you don't have a pan with a removable bottom, line your pan with a sheet of aluminum foil or baking parchment leaving an overhand on both sides so you can lift the blondies out.
 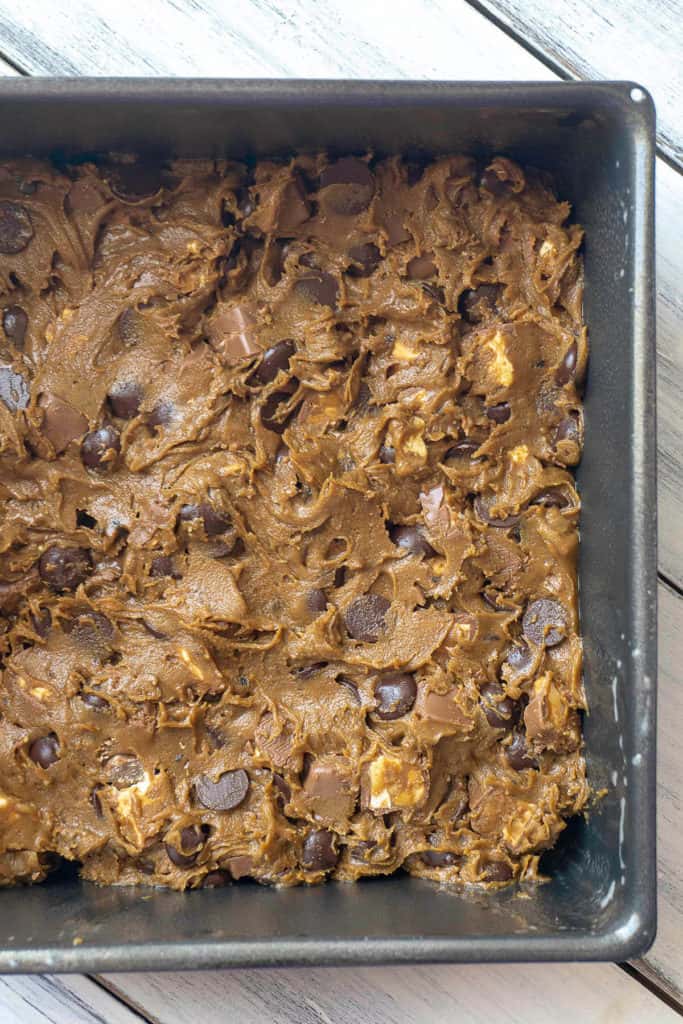 For a really moist and dense blondie, bake until the top is set and the sides are beginning to turn golden brown. They will be soft when you take them out, so let them cool before cutting. My favorite way to eat these Snickers Blondie Bars is cold, straight out of the refrigerator. They're dense and gooey and fudgy.
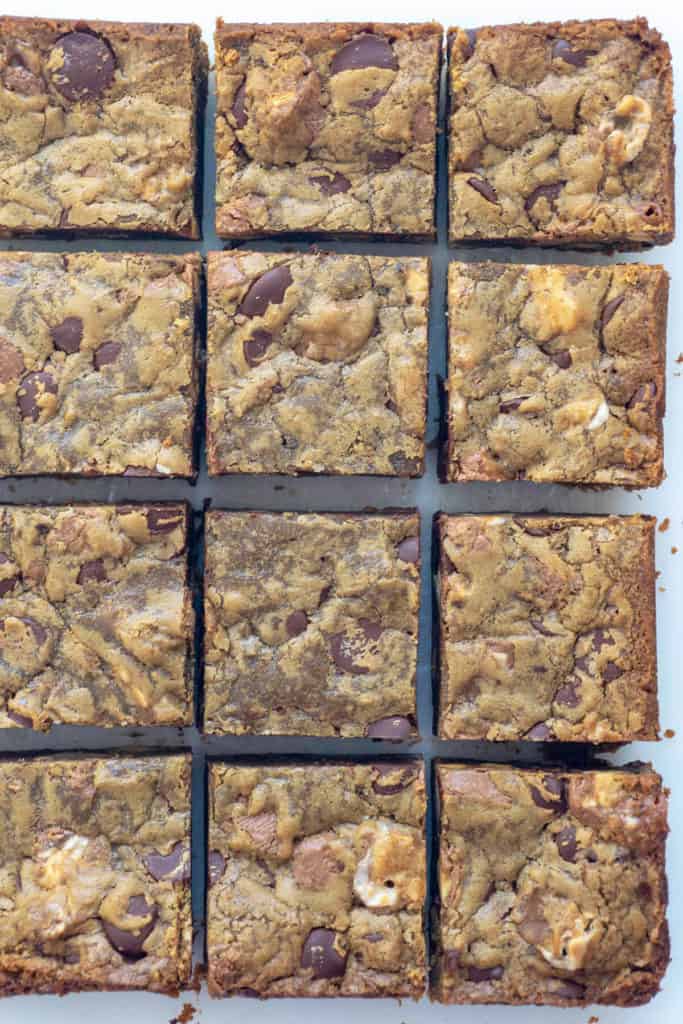 You can use light or dark brown sugar in these blondies. I usually use light brown sugar, but I've baked these with dark brown sugar. You can see how dark and rich the bar becomes. The dark brown sugar adds more of a caramel-y flavor, and I think a slight bitterness to counter all the sweet going on in these bars. Either sugar would be good in these bars.
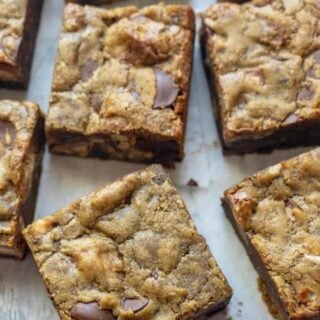
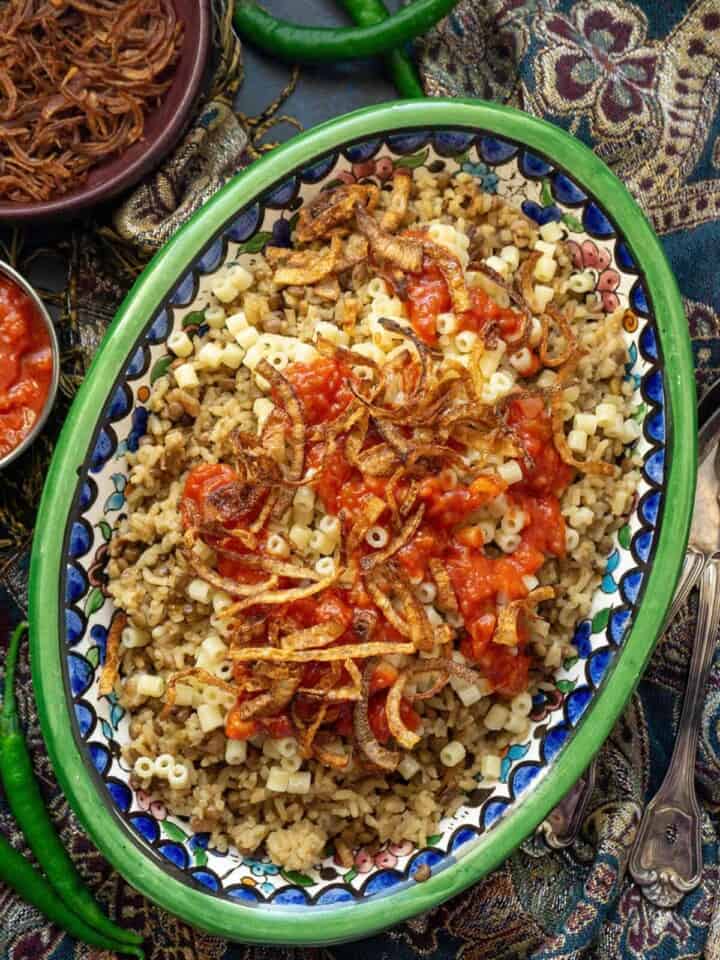
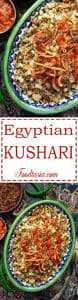
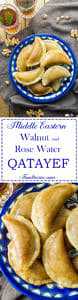
 Kushari (also spelled Kushary, Koshari, Koshary) is a popular street food in Egypt sold by vendors from their carts on street corners. I fell in love with Kushari - the national food of Egypt - on my first visit to Egypt. Each Kushari street cart is a theater of sight and sound. The Kushari street cart is lined with big metal containers filled with each of the ingredients. The Kushari man scoops each ingredient in turn onto a metal plate, clanging his metal spoon on the plate after each ingredient, making the well known sounds of the Kushari symphony in the five seconds it takes for him to skillfully assemble each dish.
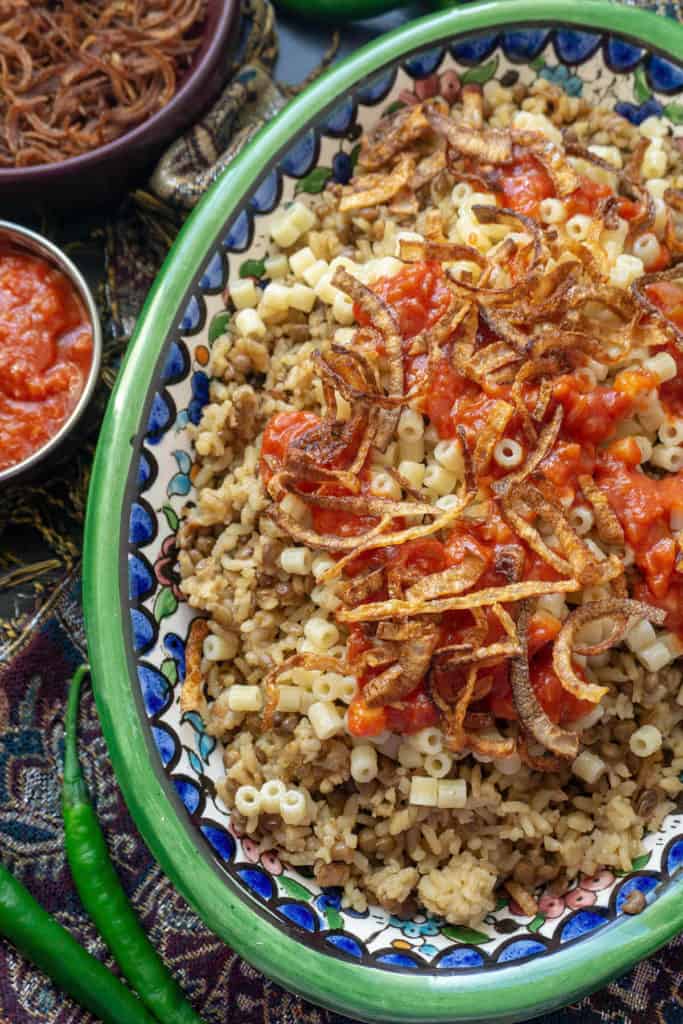 Eaten for breakfast, lunch, or dinner in Egypt, Kushari is an inexpensive working class staple. It is a wonder that such humble ingredients can come together to make such a delicious, addictive dish. Even in Dubai, there are restaurants that specialize in and sell only Kushari.
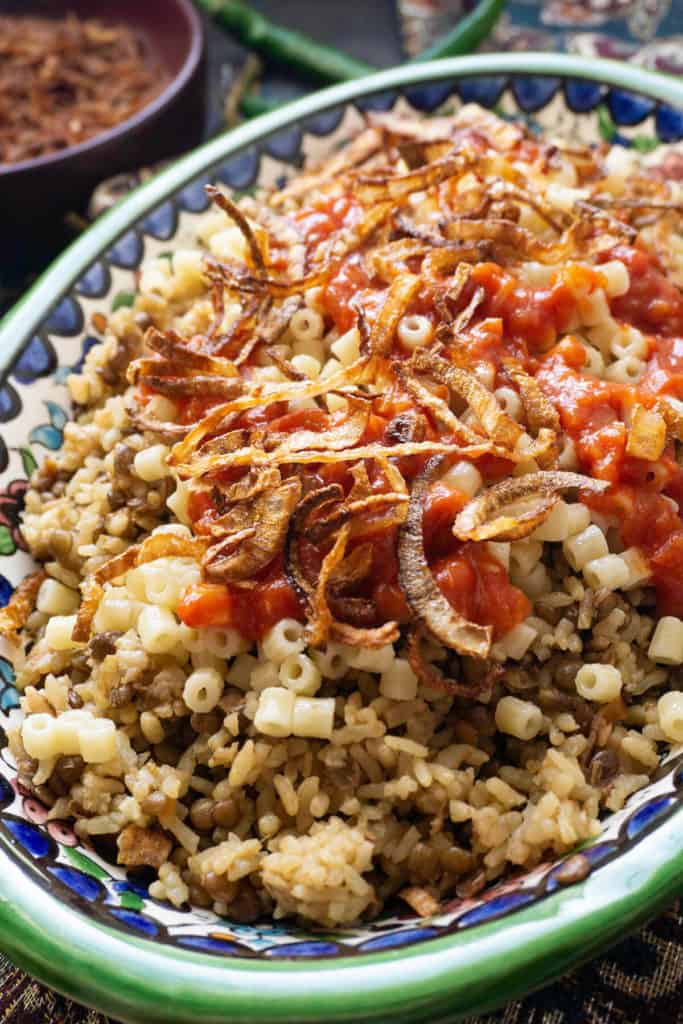 An Egyptian friend taught me her recipe for Kushari - it rivals any I have eaten in Cairo or Dubai. She's very proud of her recipe and it gets raves from anyone who eats it. She's even considered opening up her own Kushari shop.
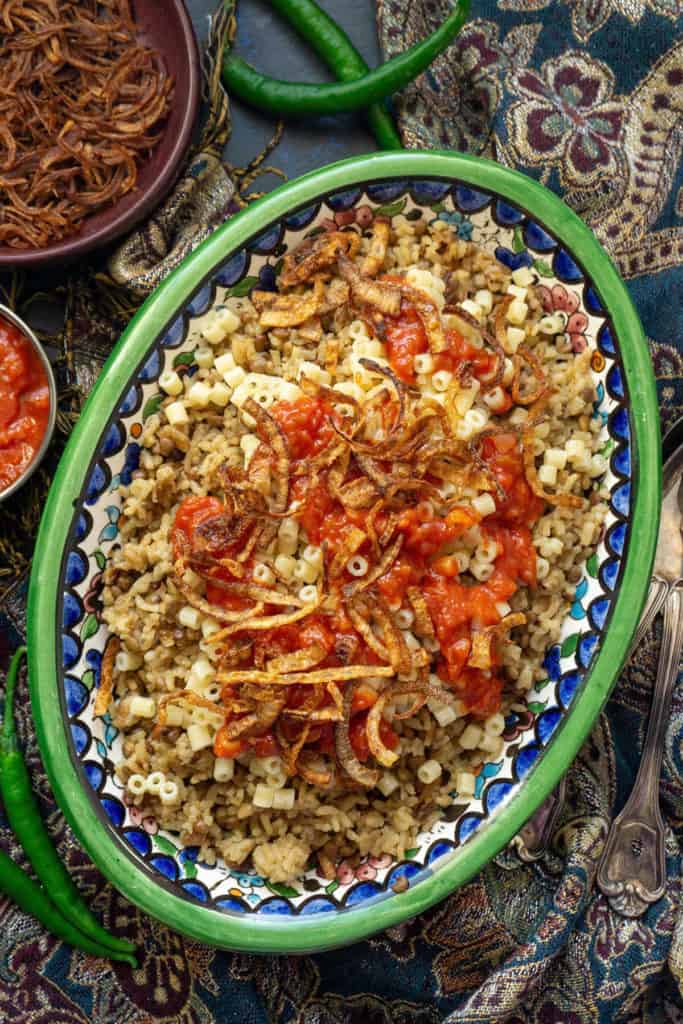
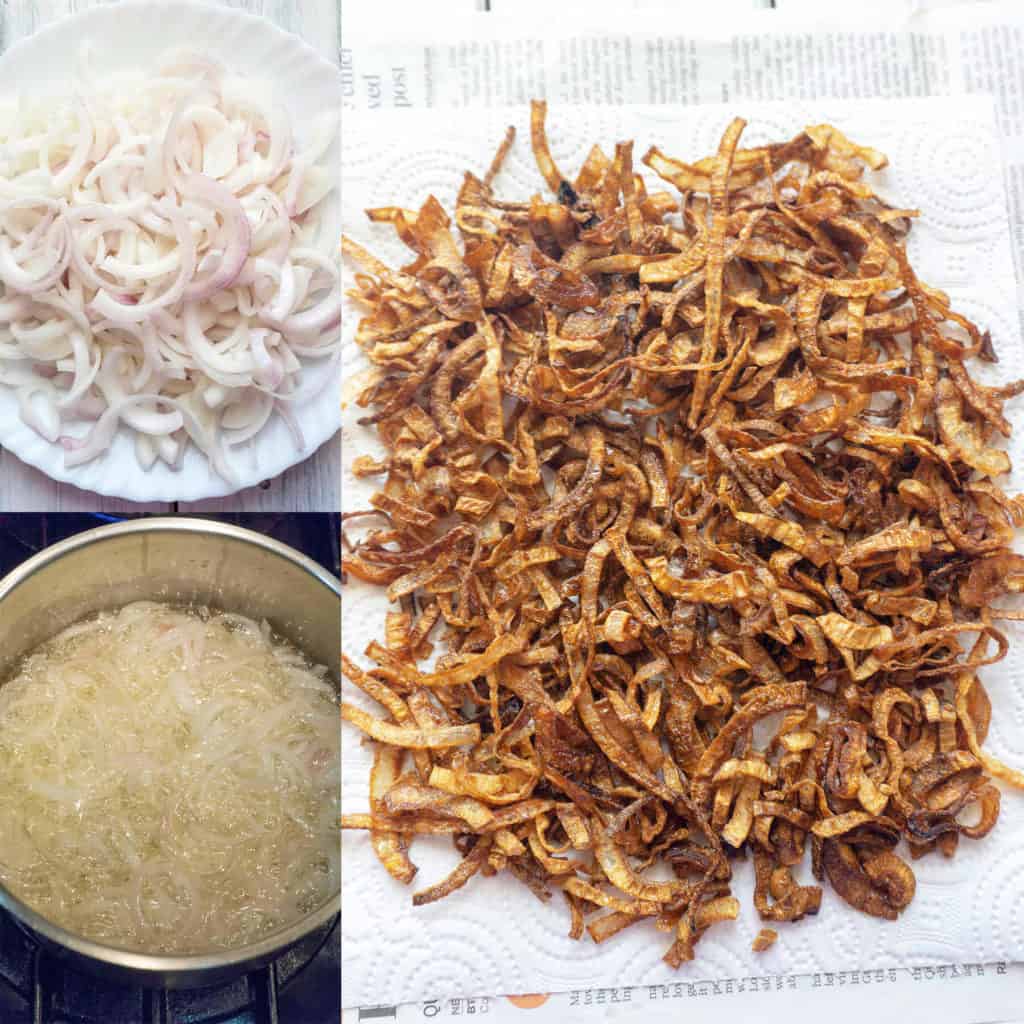 First, about a pound of onions are sliced and fried in oil until they turn golden brown. They are spread out and drained on paper towels. Keep them spread out so they stay crispy. About a third of the onions will be crushed up and added to the rice when it cooks, the rest are sprinkled over the top of the Kushari, giving it a lovely crunch and delicious flavor. Keep the onion oil - you'll use it in three other places in the Kushari (this is one of my secrets to the BEST Kushari :)).
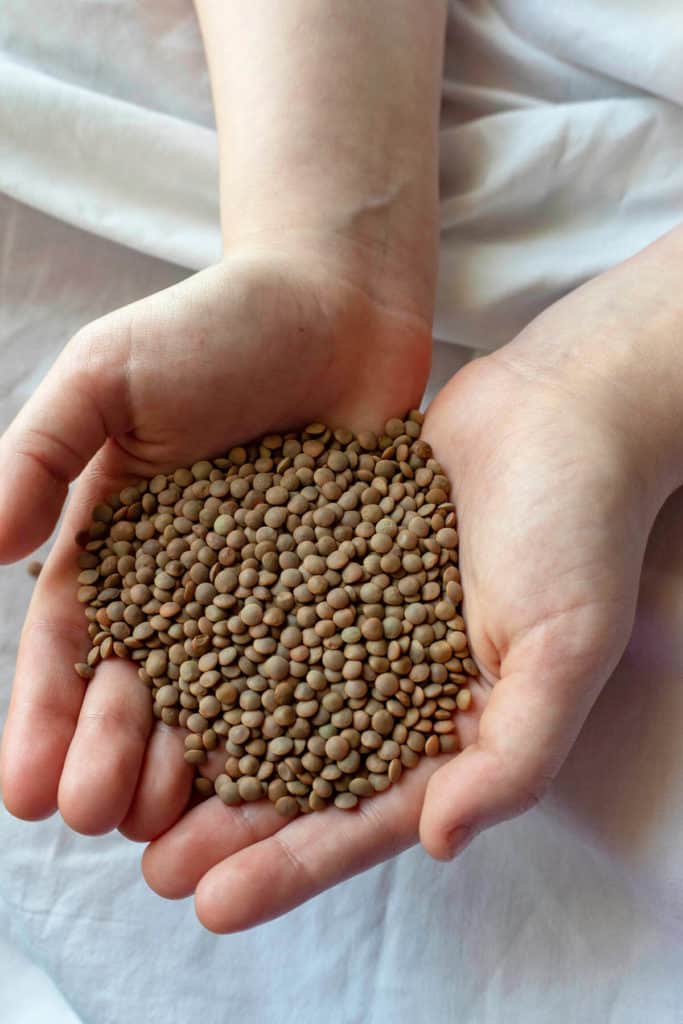 Brown lentils are used in Kushari. You can find them in Middle Eastern groceries or sometimes in the ethnic section of big supermarkets. They're sometimes called masoor daal. The lentils are simmered in water until they are almost soft, about 20 minutes, then drained. You don't want to fully cook them at this point because they will be cooked further with the rice.
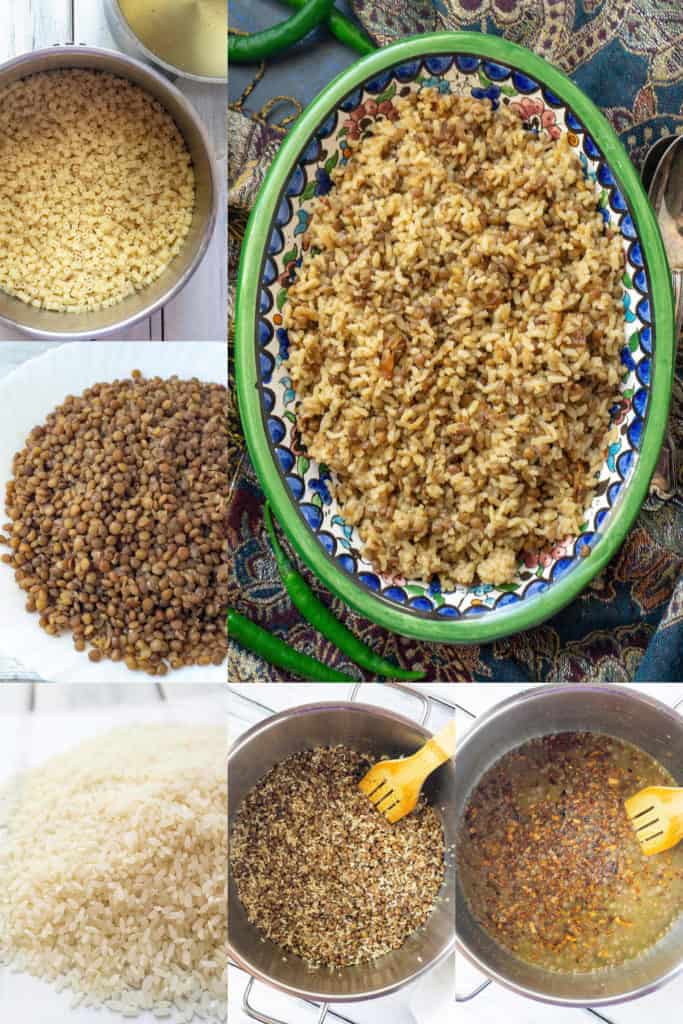 I use a medium grain rice for Kushari. My favorite is a Calrose because it's slightly sticky and the grains don't break easily. The rice is sautéed in some of the onion oil and cumin. Then the lentils are added along with the broth. Vegetarian broth can be used for vegetarian/vegan dish, or if you prefer you can use chicken broth. I like to use bouillon cubes because they make everything taste better 🙂 A handful of the fried onions are crushed and added to the rice and lentils, and they are cooked until done.
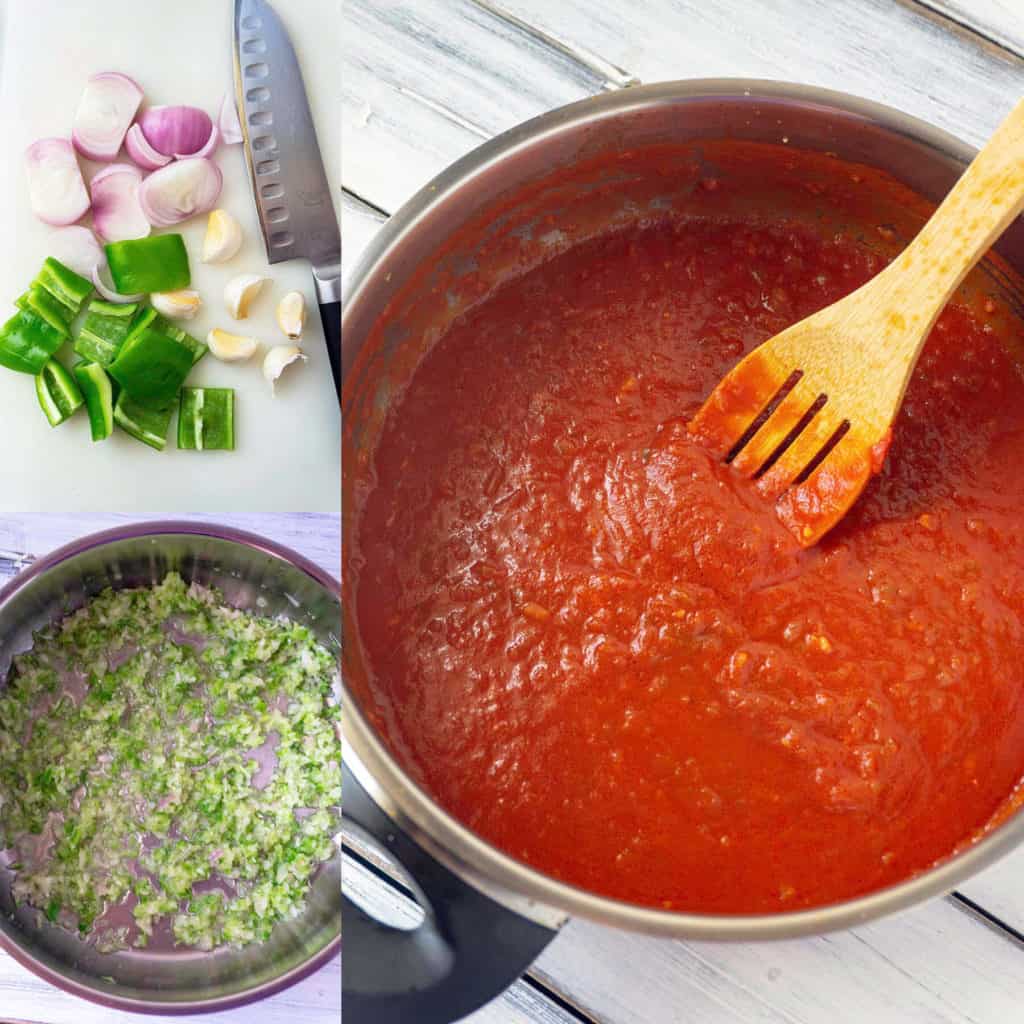 The garlicky, tangy, spicy tomato sauce for the Kushari packs a punch of flavor. You can make it as hot/spicy as you like by adjusting the kind of pepper you use. I use a larger, medium spicy pepper. If you like it spicy, use a couple of jalapenos. Onion and green pepper are sautéed in some of the onion oil until they are soft. Then the garlic and tomato are added. I use a 17.64 (500g) box of Pomi strained Italian tomatoes - they're very intense. I add a bouillon cube for extra flavor, salt, and a couple of tablespoons of white vinegar for tang.
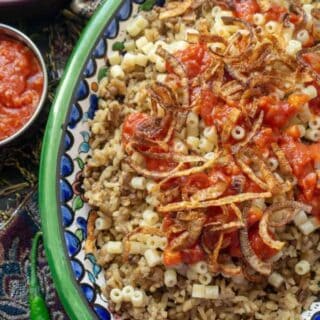


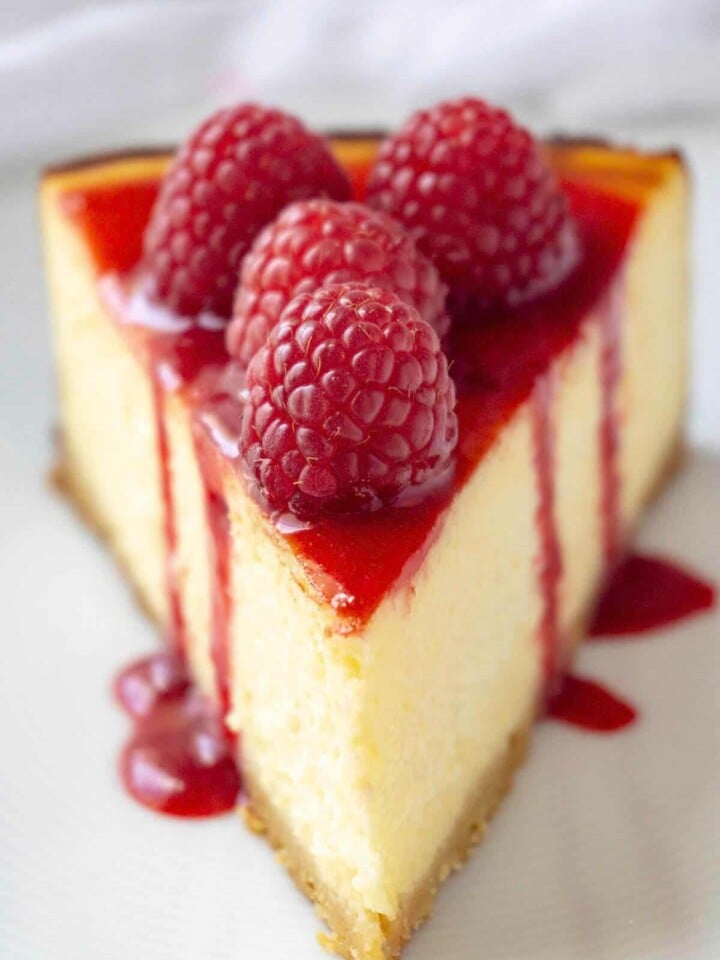
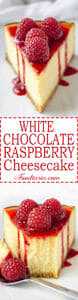
 I've kept the raspberries on the top of this White Chocolate Raspberry Cheesecake so that nothing would interfere with the creamy, ultra- smooth texture of the cheesecake. Use a good quality white chocolate, because it's flavor definitely shines through, even if it's subtle. The white chocolate also adds a delicious density to the texture of the cheesecake.
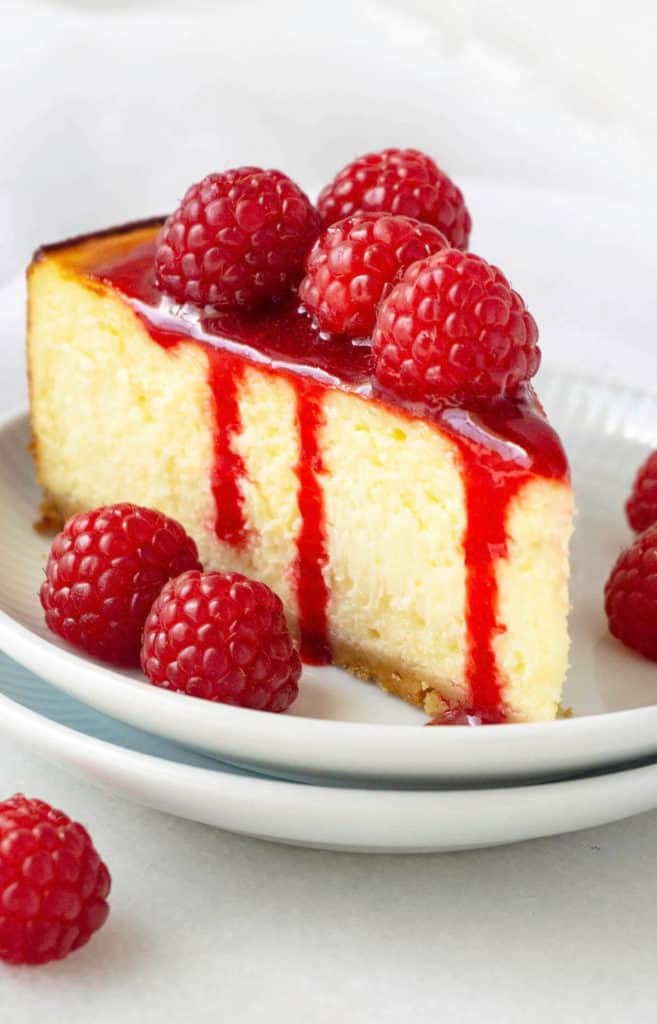 The raspberry sauce adds a sweet-tart contrast to the rich sweetness of the white chocolate. Putting the raspberries on top of the cheesecake instead of baked inside it keeps the raspberries fresh and vibrant. A rich, buttery shortbread cookie crust makes the perfect base. It's never soggy and adds a lovely flavor.
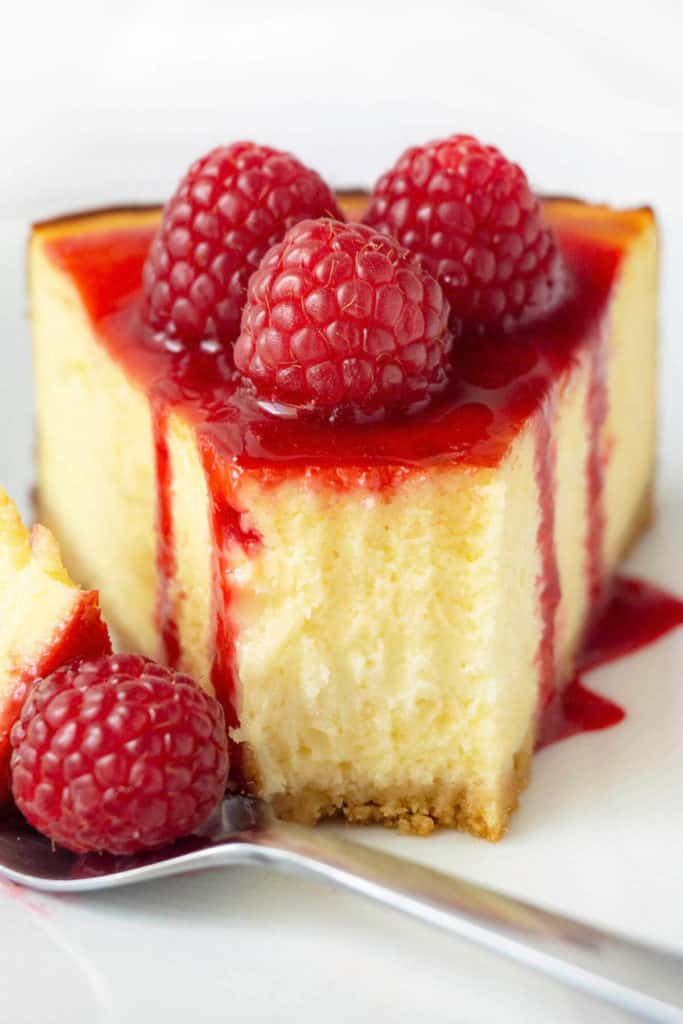 Make sure to use a good quality white chocolate that melts smoothly.


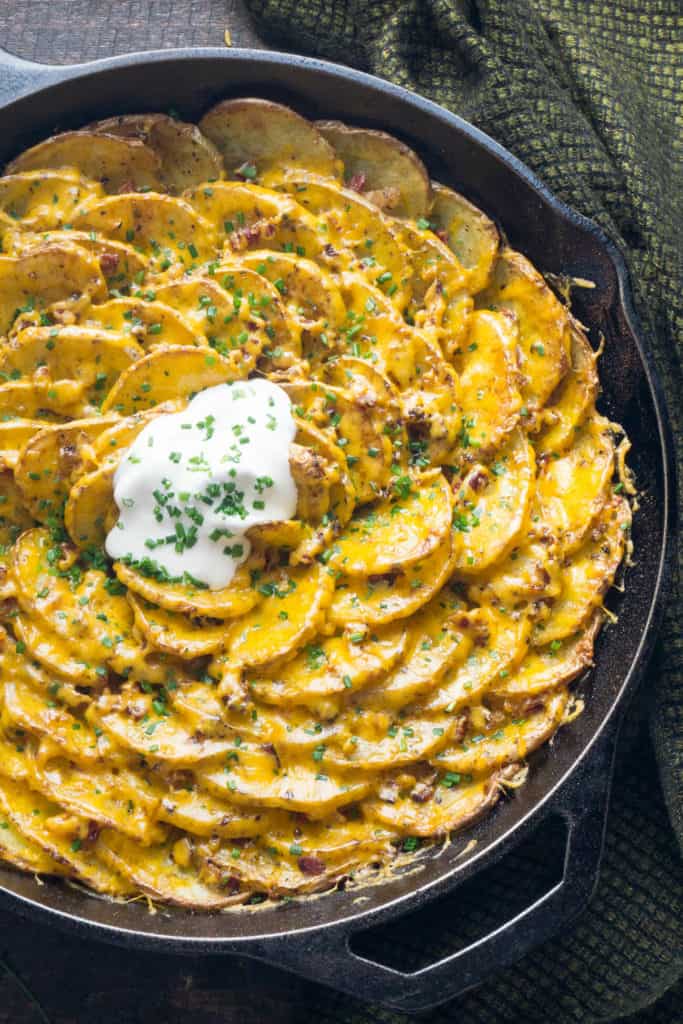
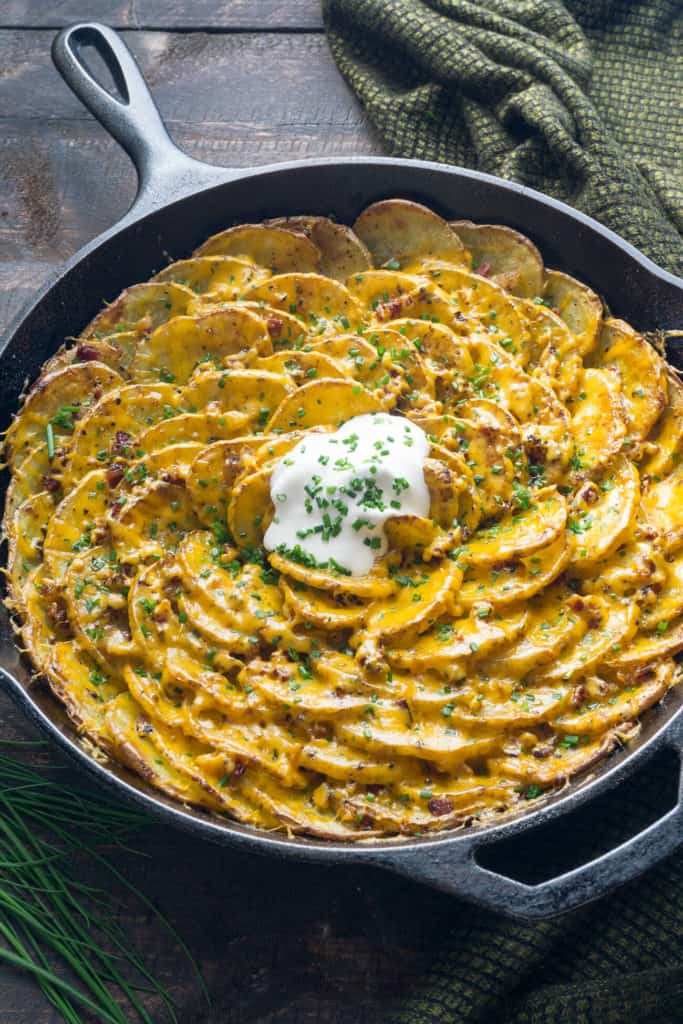

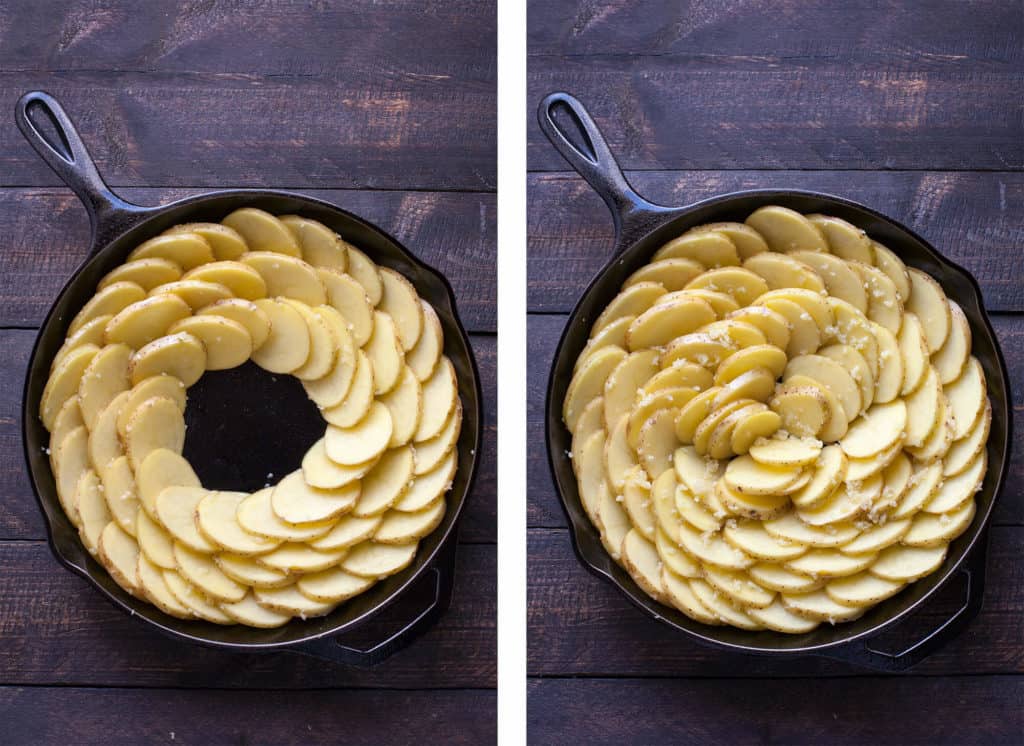
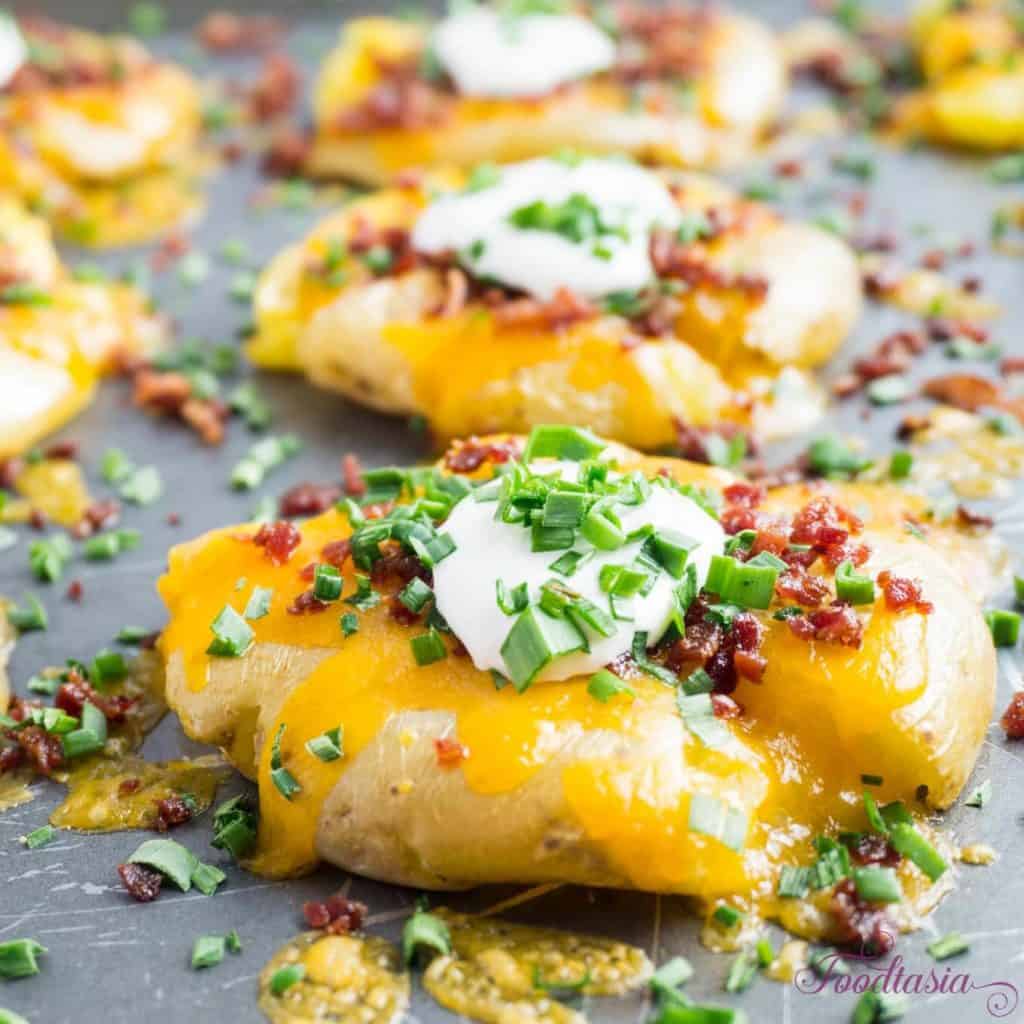
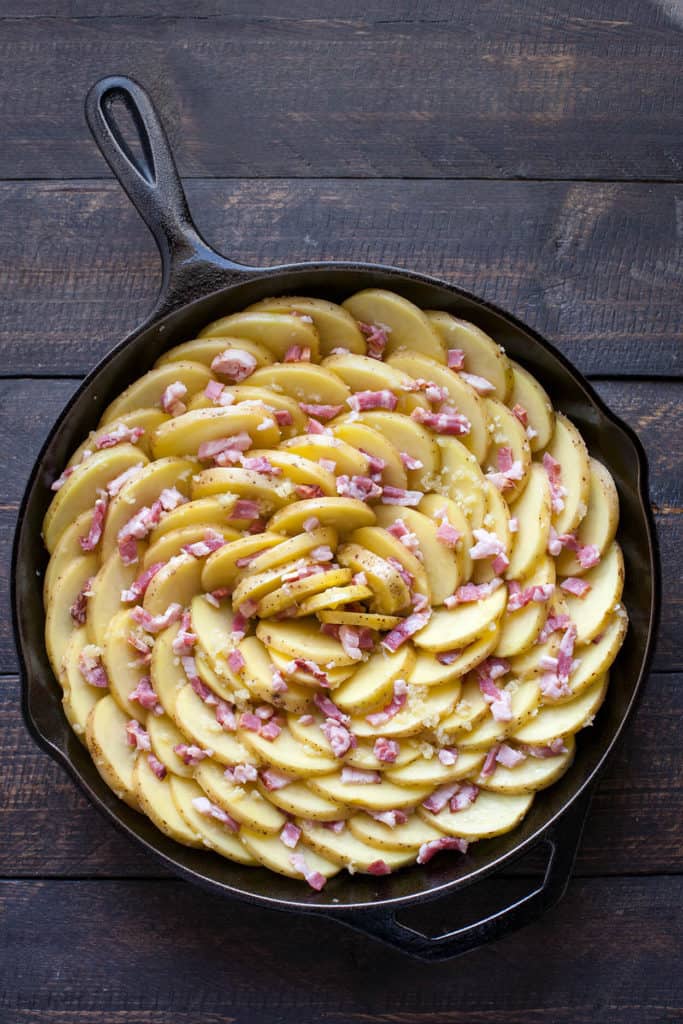 Roast in a 400 degree F oven for about 45 minutes, drizzling with butter in the last 15 minutes. The potatoes will be golden brown and crispy on the edges and tender in the middle.
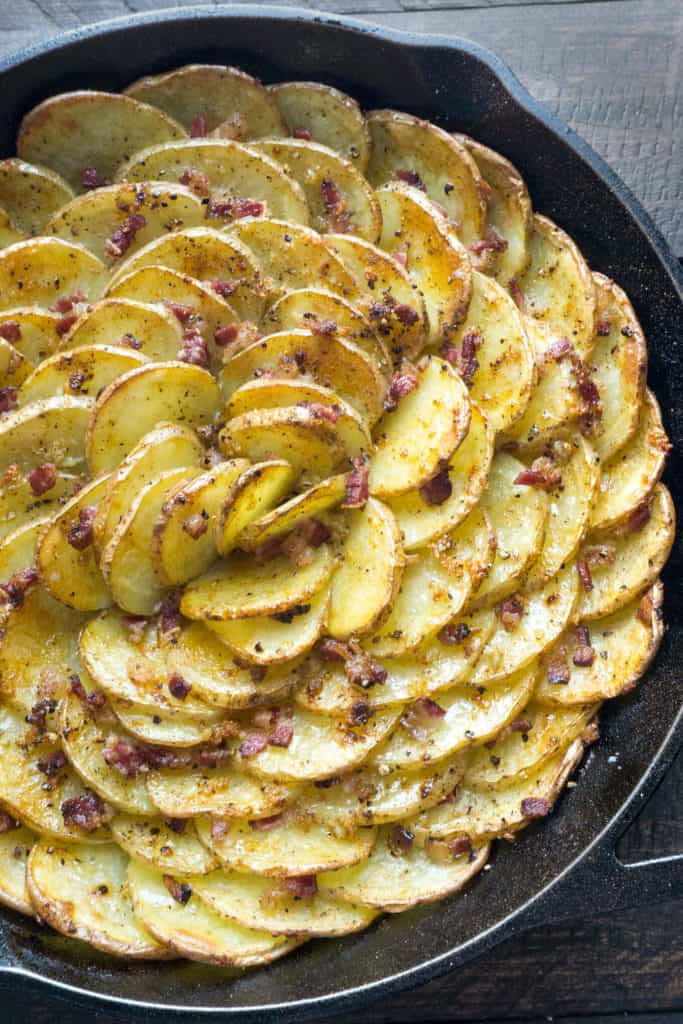 When the potatoes are done, sprinkle grated cheddar cheese over and put back in the oven for a minute or two for the cheese to melt.
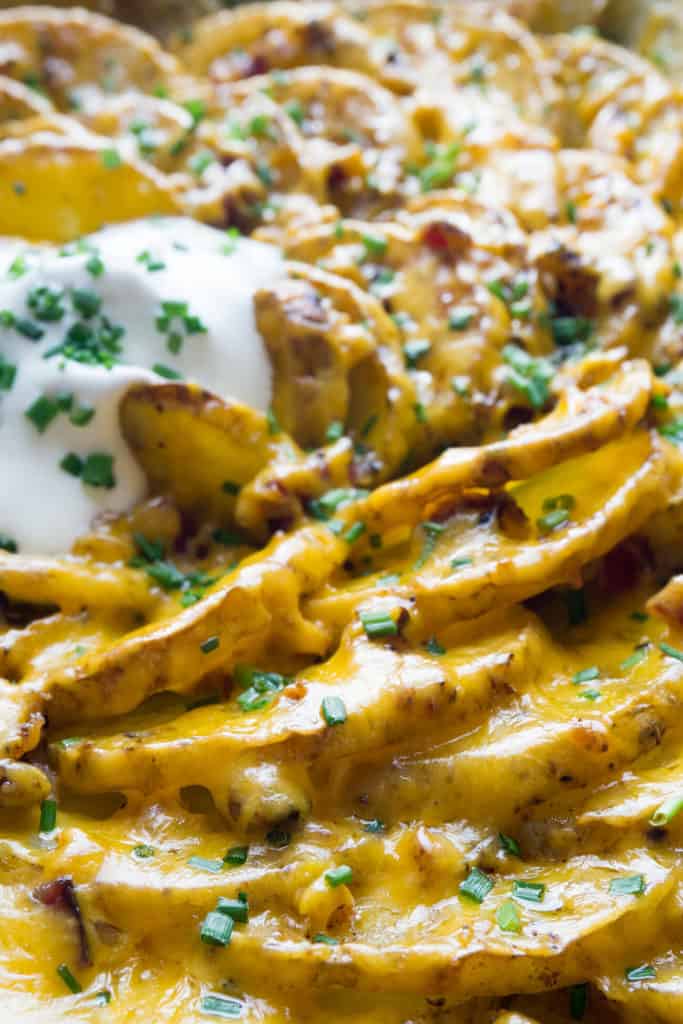
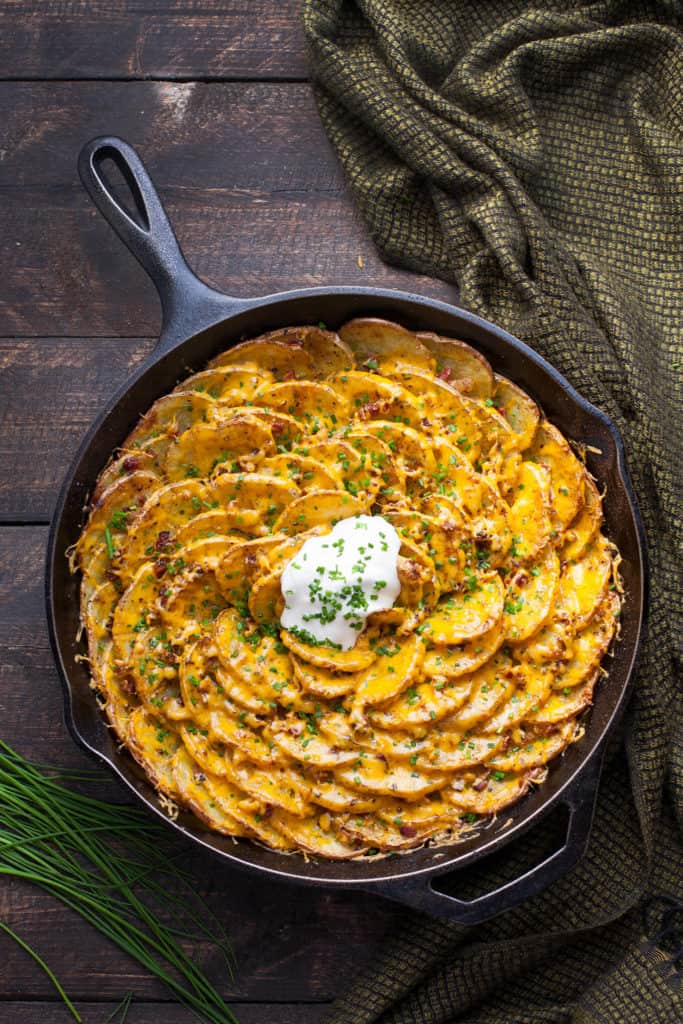 Top the Bacon and Cheddar Spiral Loaded Roasted Potatoes with sour cream and chives, then serve.
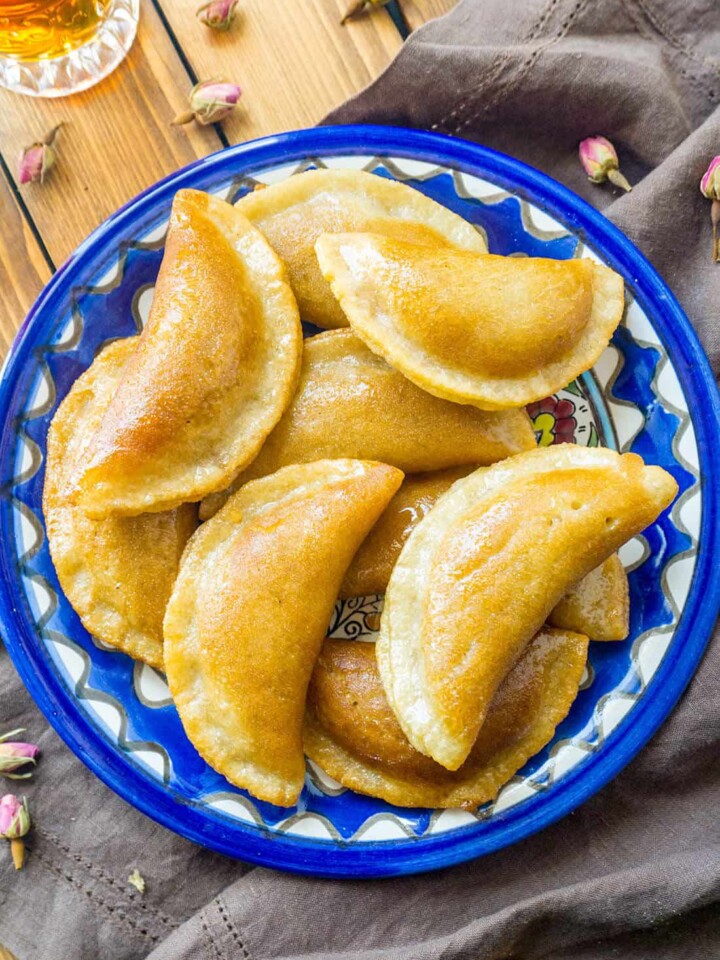


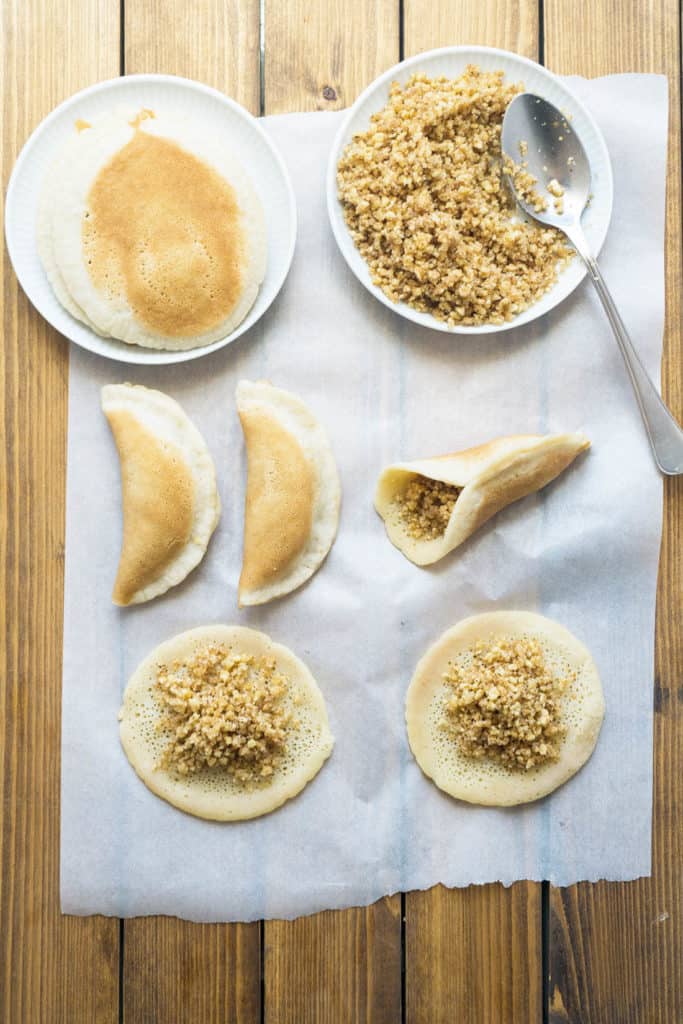


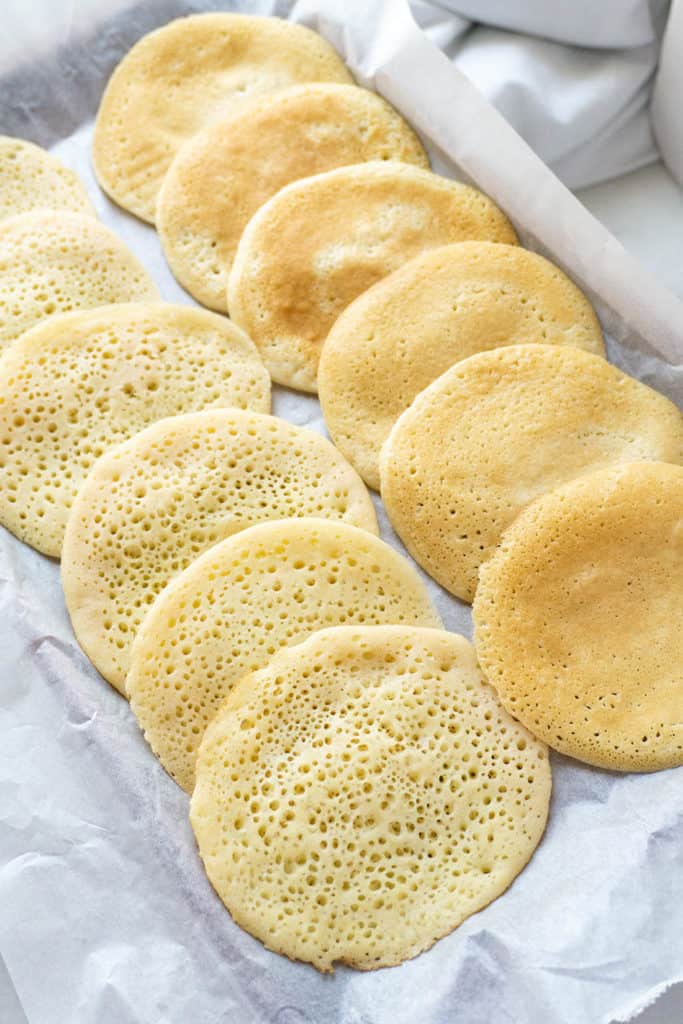

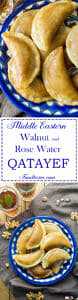
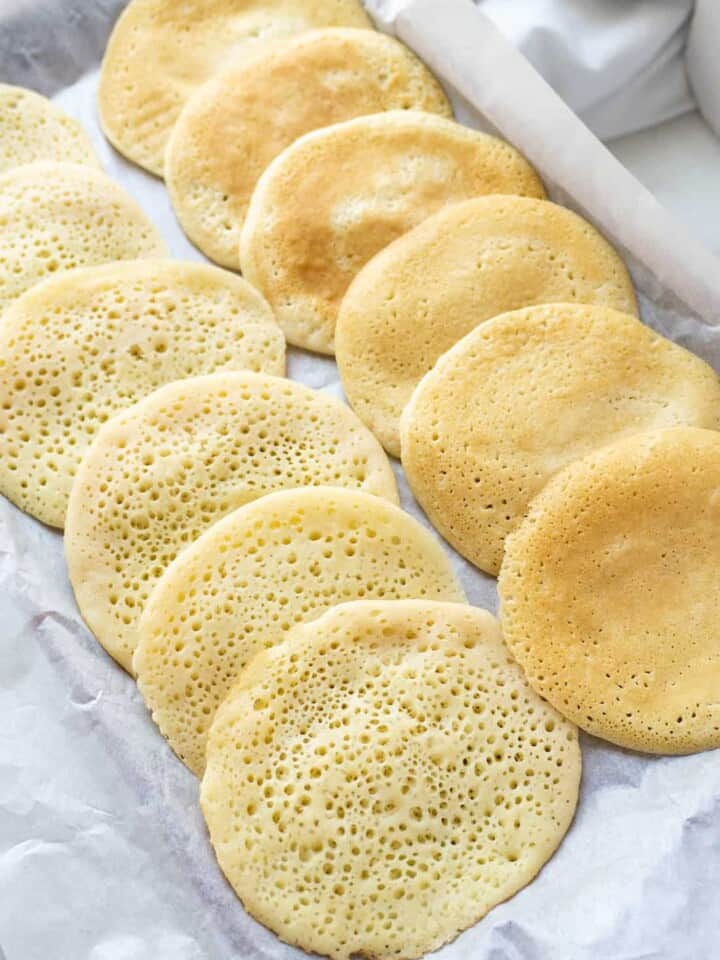
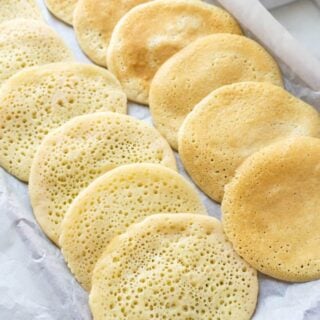
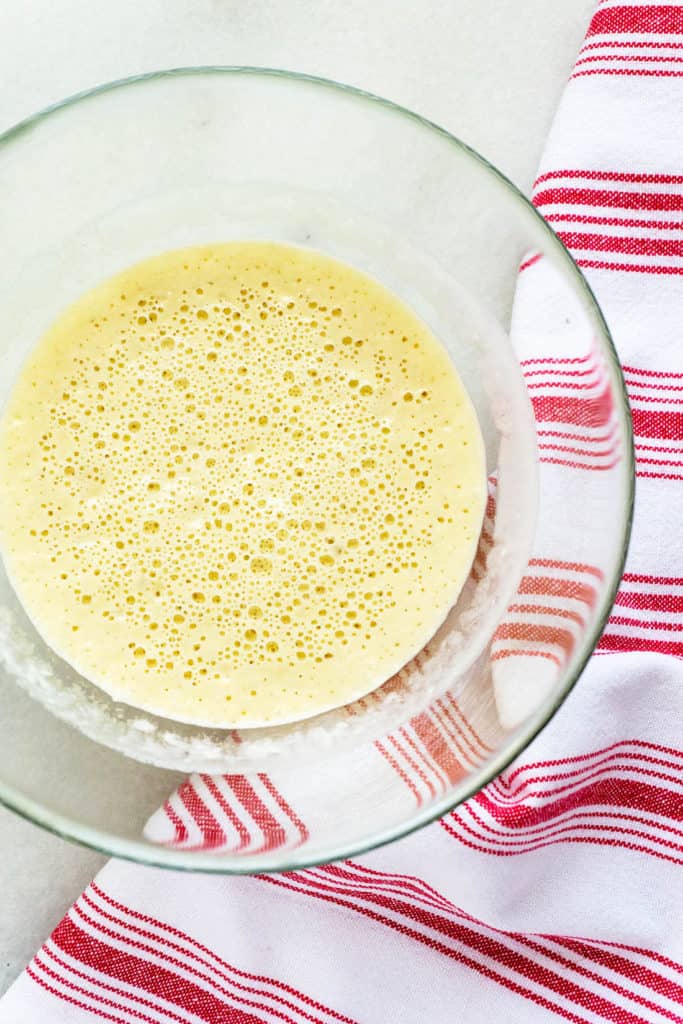 After the batter gets nice and bubbly, heat up an electric griddle to 350 degrees F or a skillet to medium. If your griddle or skillet is non-stick you may be able to cook the Qatayef with no spray. Otherwise, or if your non-stick isn't so non-stick anymore - use a little oil or cooking spray. Using a ¼ cup measure, pour batter onto griddle in neat 4 inch circles. I use the back of my ladle and, pressing very lightly and in a circular motion, help it spread out into a 4 inch circle. You want the pancake to be nice and thin. If it's too thick, it's difficult to fill.
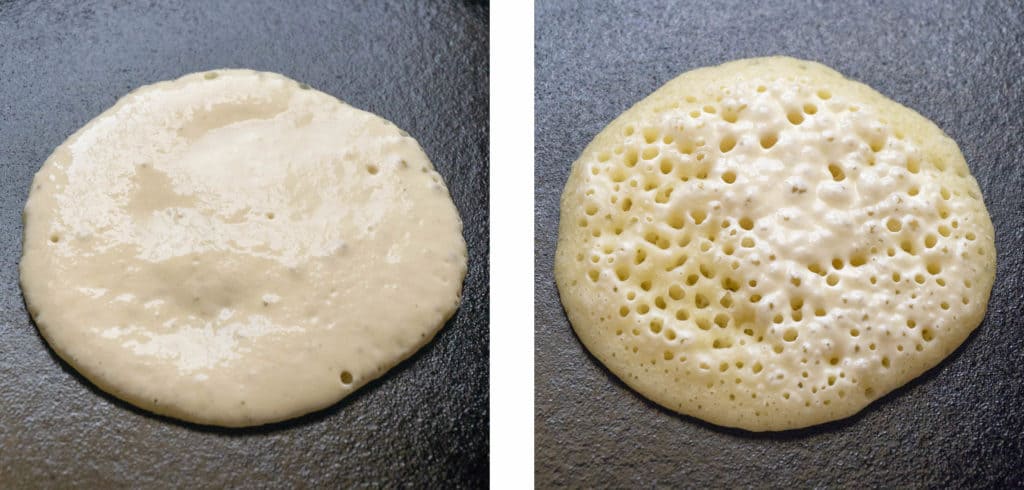 The Qatayef pancake is only cooked on one side. When the top is covered with bubbles and is no longer shiny, and the bottom is a light golden it is finished.
 Remove the Qatayef pancakes to a plate and cover with a towel while you finish the rest.
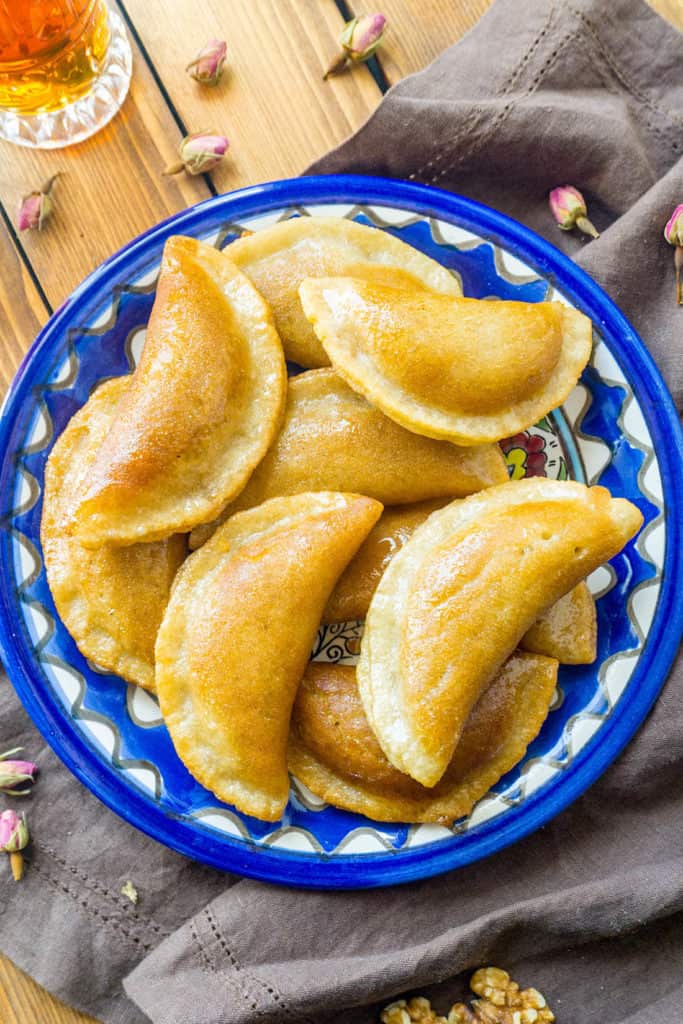
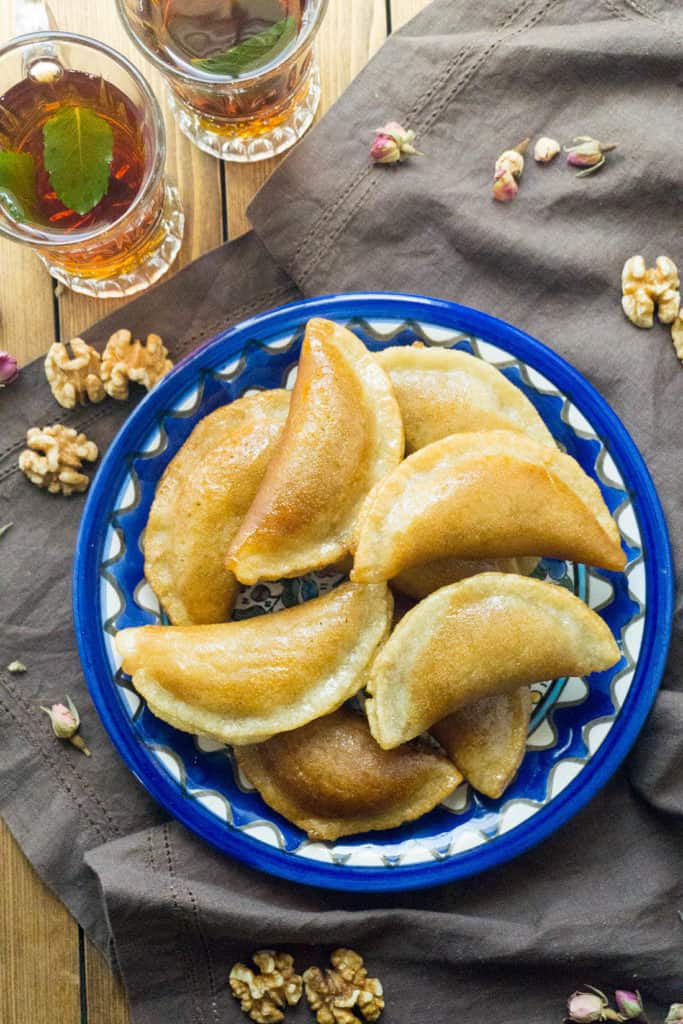
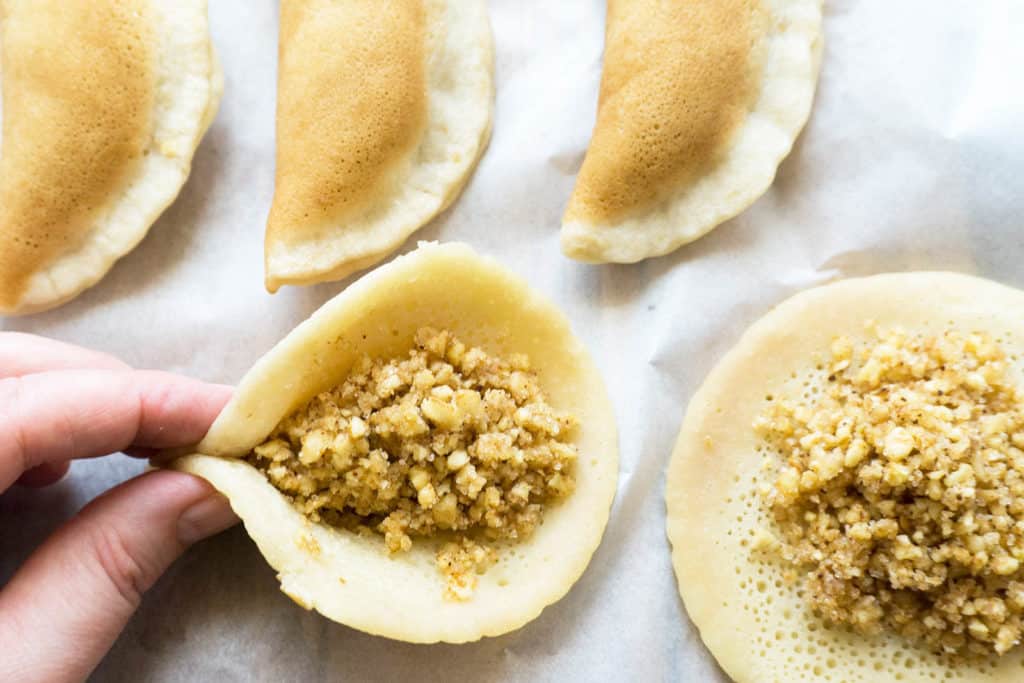
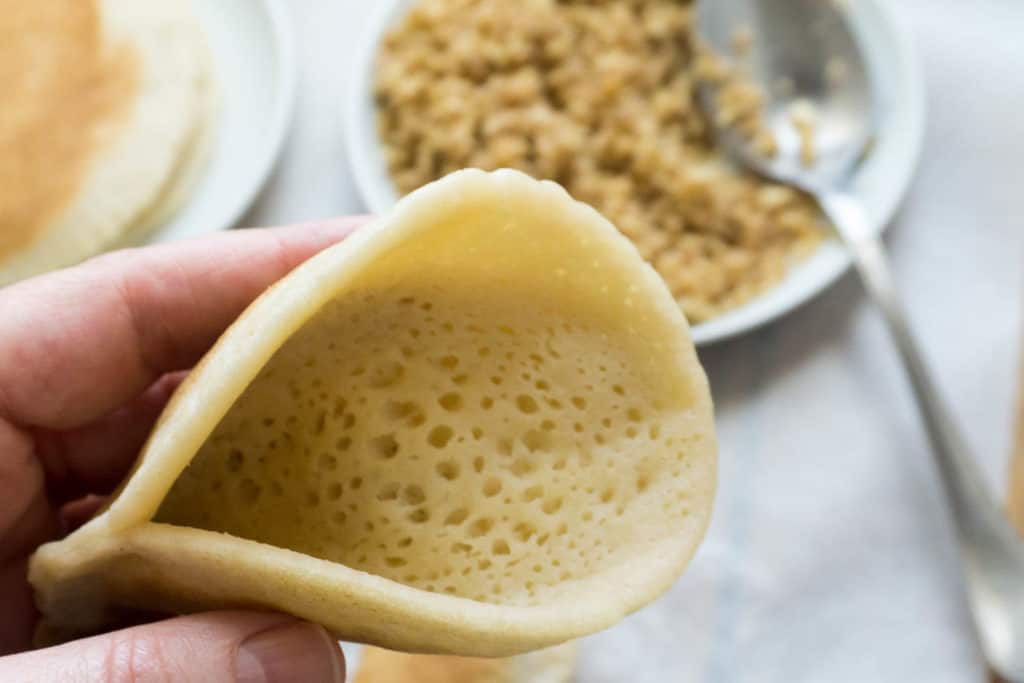
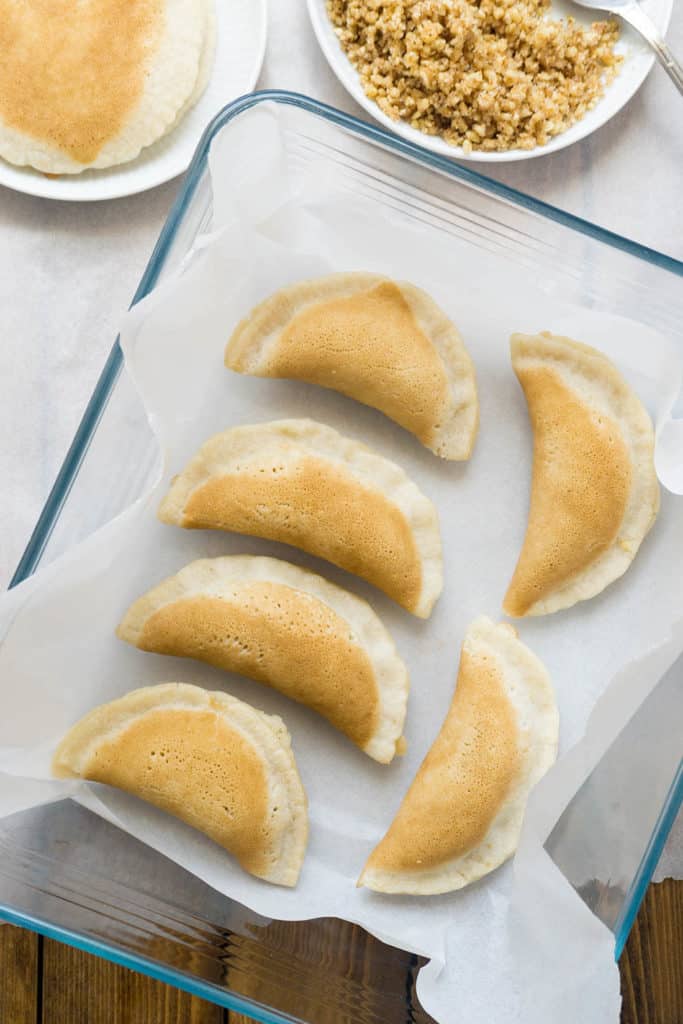
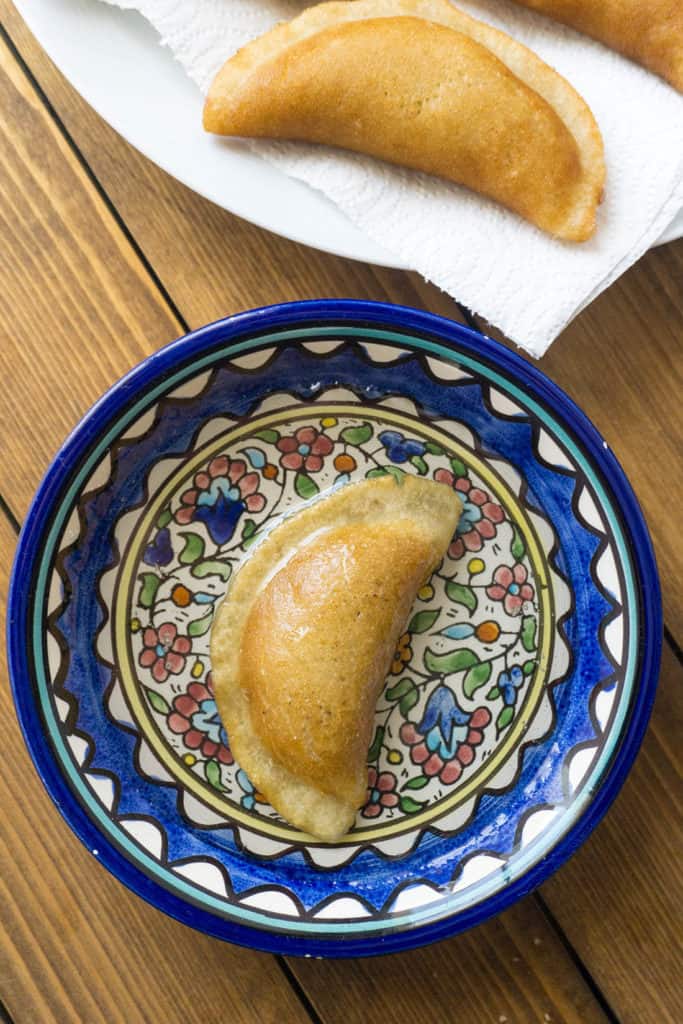
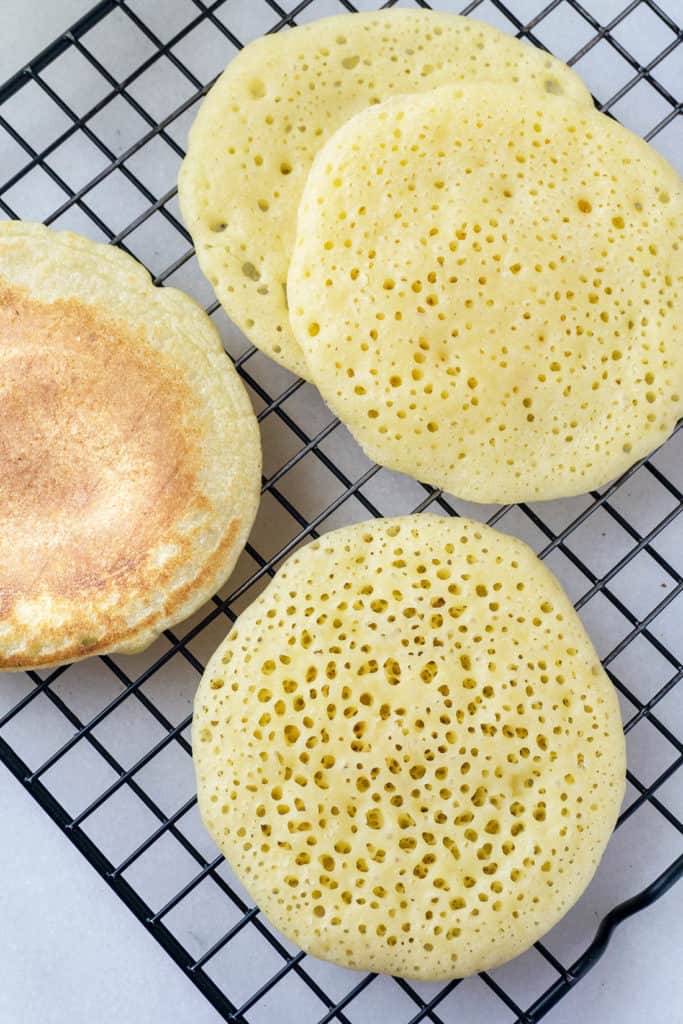 When you have finished making all the pancakes, cover them with plastic wrap so they don't dry out. The key to a perfect Qatayef semolina pancake is keeping the pancake from drying out after it's cooked. When the pancake is filled, the edges of the pancake are pinched together to seal it shut. If the pancake is dry, it won't stick.