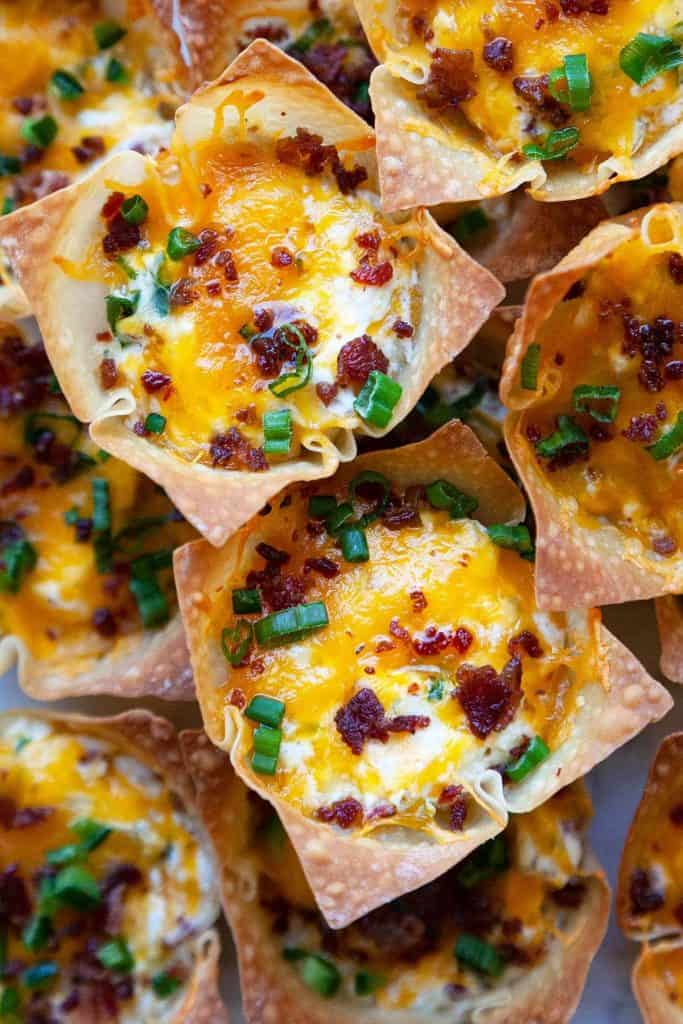
The BEST Crab Rangoon - A lush and creamy crab and cream cheese filling in a crispy wonton – the perfect party appetizer or game day snack! With instructions for frying, baking, or air frying, they’re easy to make and always a hit!
Jump to Section
What is Crab Rangoon?
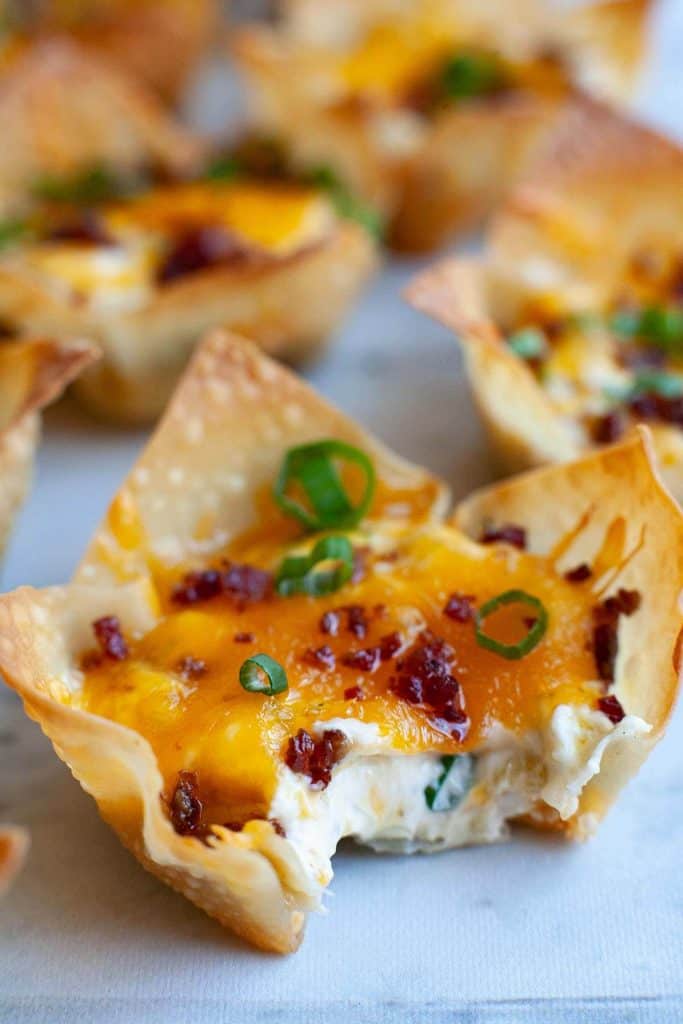
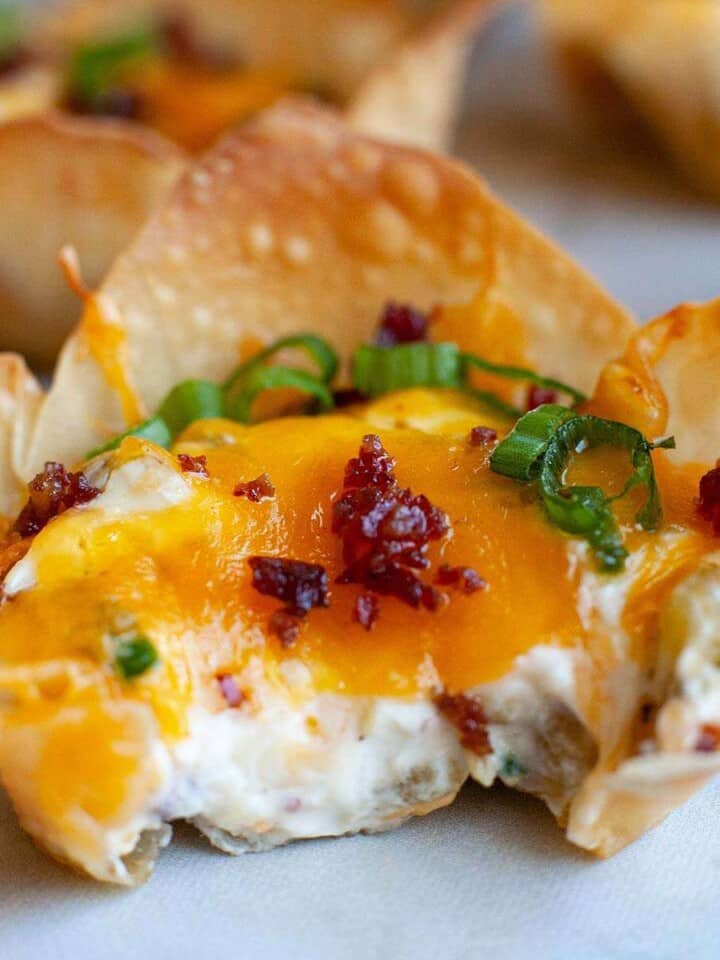
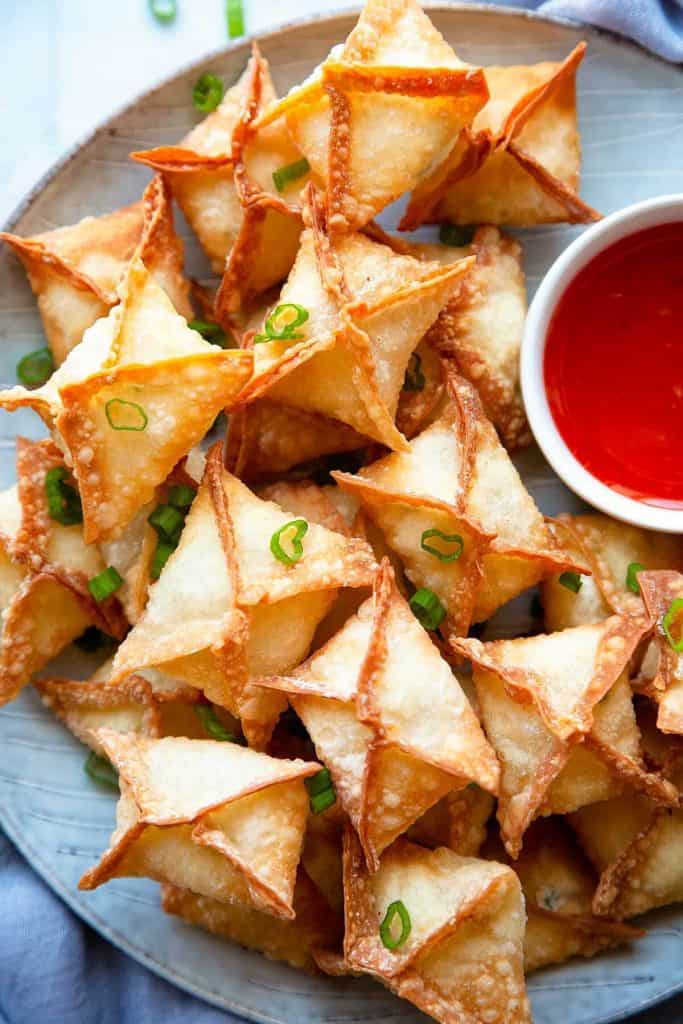
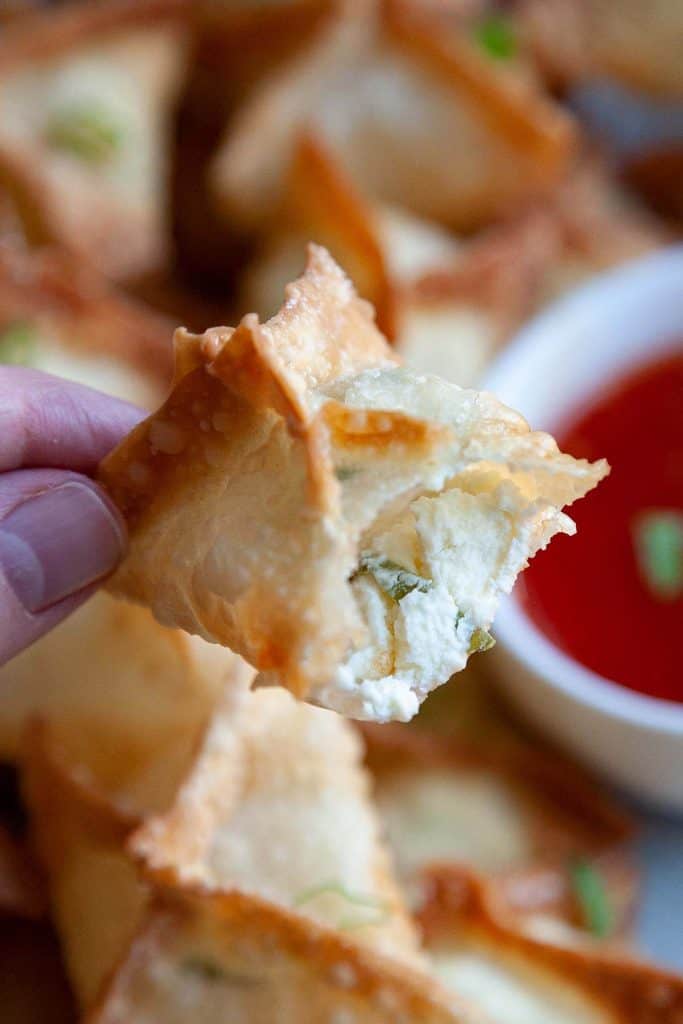
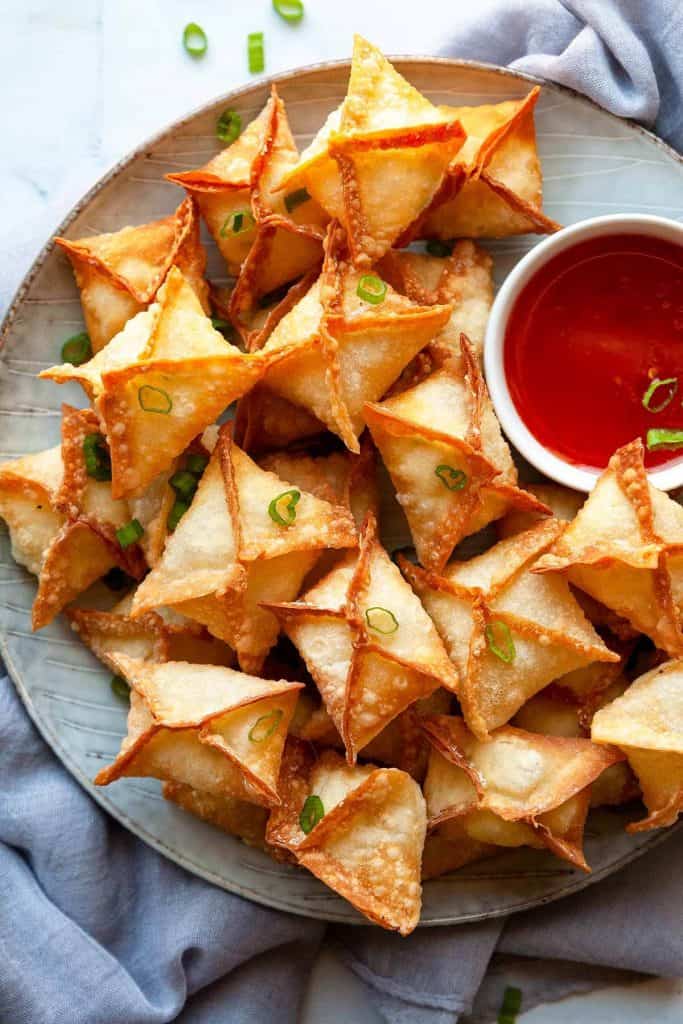
Always a favorite appetizer at our local Chinese restaurant, Crab Rangoon is a mixture of cream cheese, crab meat, and seasonings that is folded up in a wonton wrapper and deep fried. These delicious little parcels are often dipped into a Sweet and Sour Sauce or Sweet Chili Sauce.
Is Crab Rangoon authentic Chinese food? No. Crab Rangoon is a classic American creation that’s often found in many Chinese restaurants in the U.S.
Ingredients
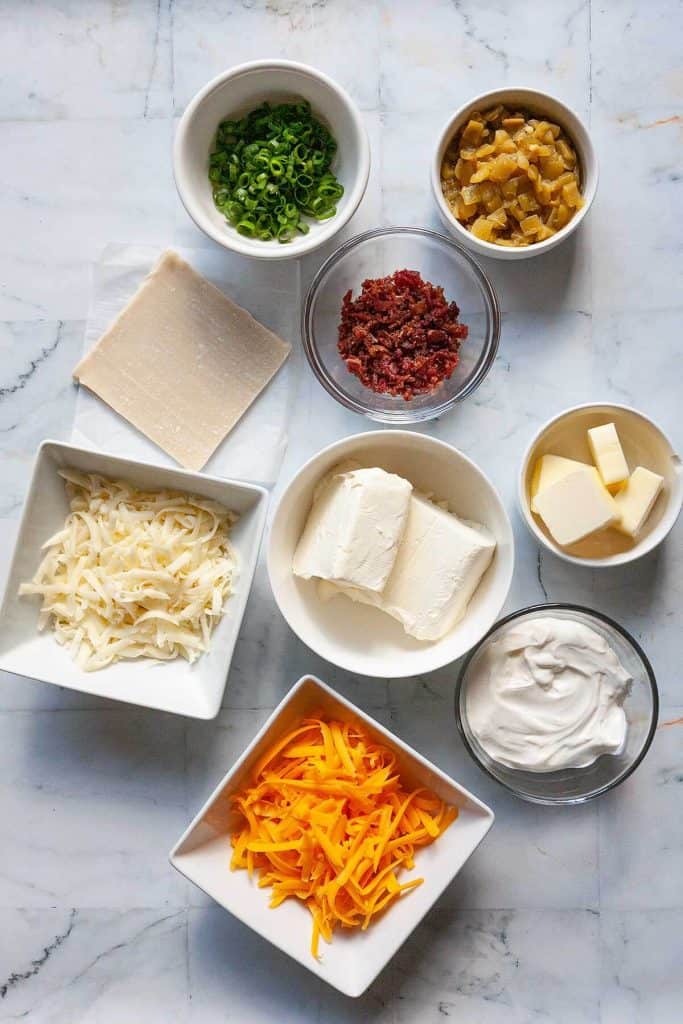
Wonton wrappers – find these in the produce section of your local supermarket or at an Asian market. If you can’t find them, you can also use eggroll wrappers cut into 4 squares each, they’ll just be a little smaller.
Cream Cheese – the base for these creamy wontons
Crab meat – you can use real crab meat or imitation krab (surimi). Real crab meat will impart a fishier flavor, imitation crab will have a less noticeable flavor. Many Chinese takeout restaurants actually use imitation crab meat in their rangoons. I’ve used a can of real crab here.
Green onions – spring onion or scallions, gives an herby flavor
Worcestershire sauce
Garlic powder
How to make Crab Rangoon
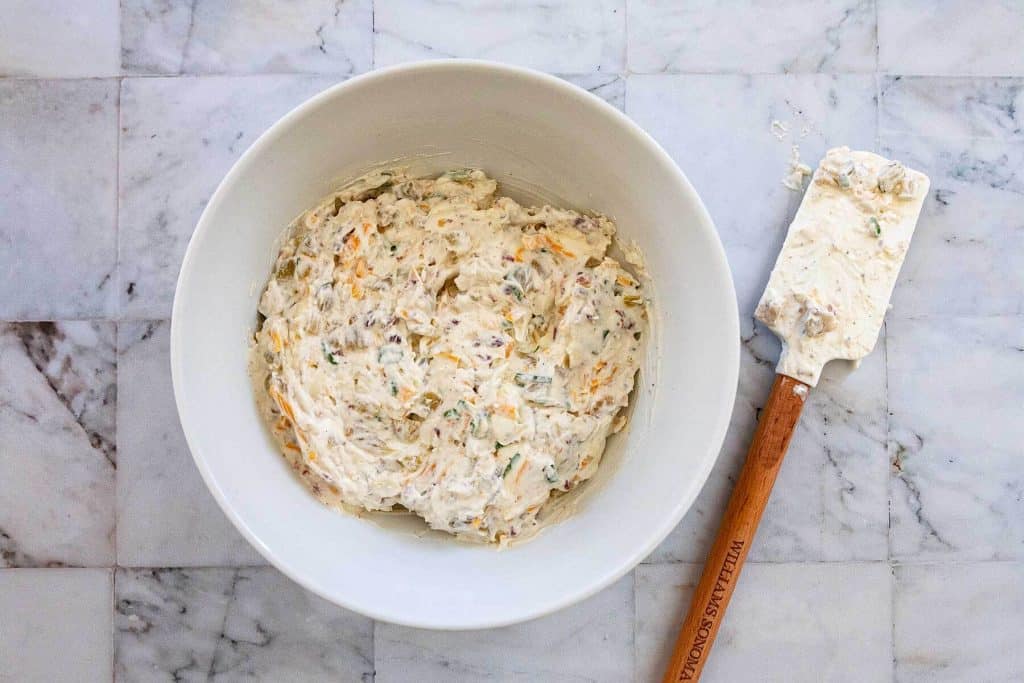
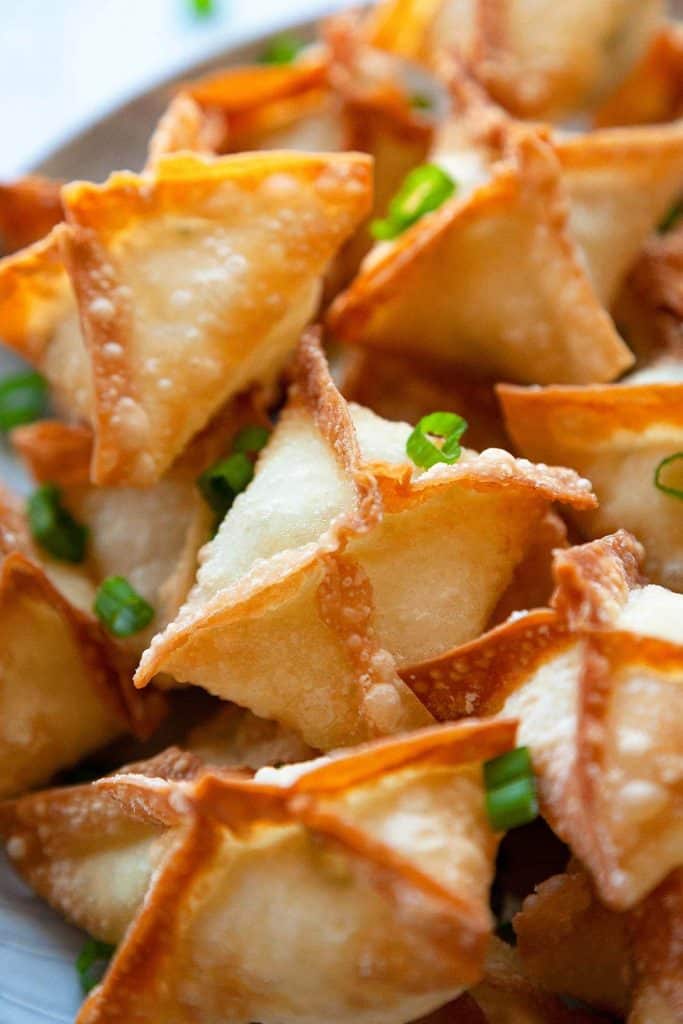
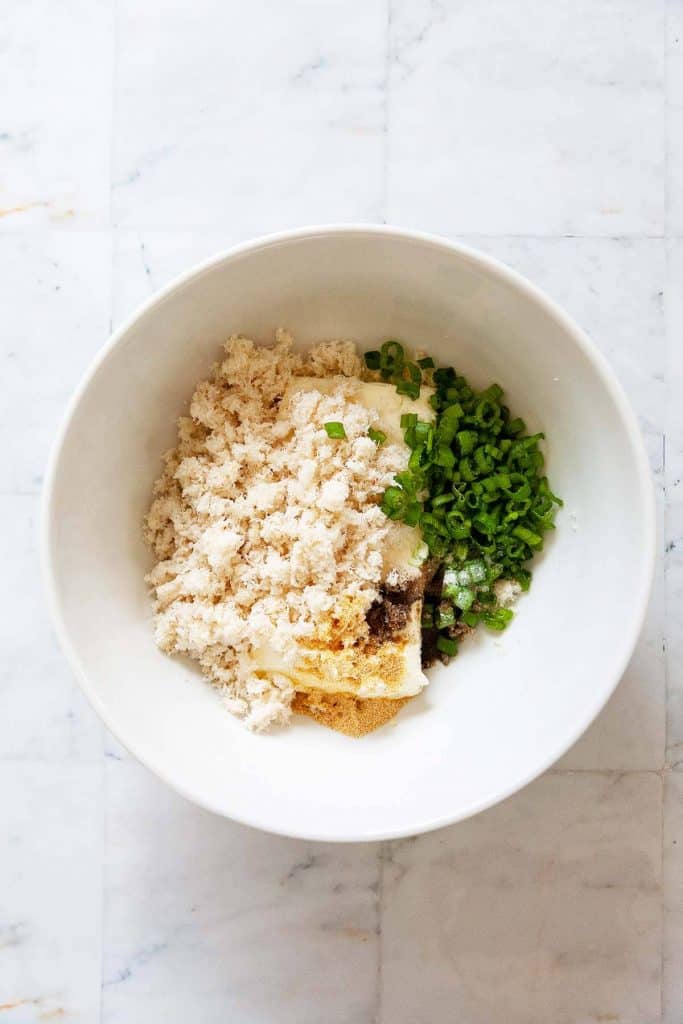
Cream cheese, crab meat, sliced green onion, Worcestershire sauce, and garlic powder are blended together, then folded into a wonton wrapper.
The wontons are then fried or baked until golden brown.
How to fold
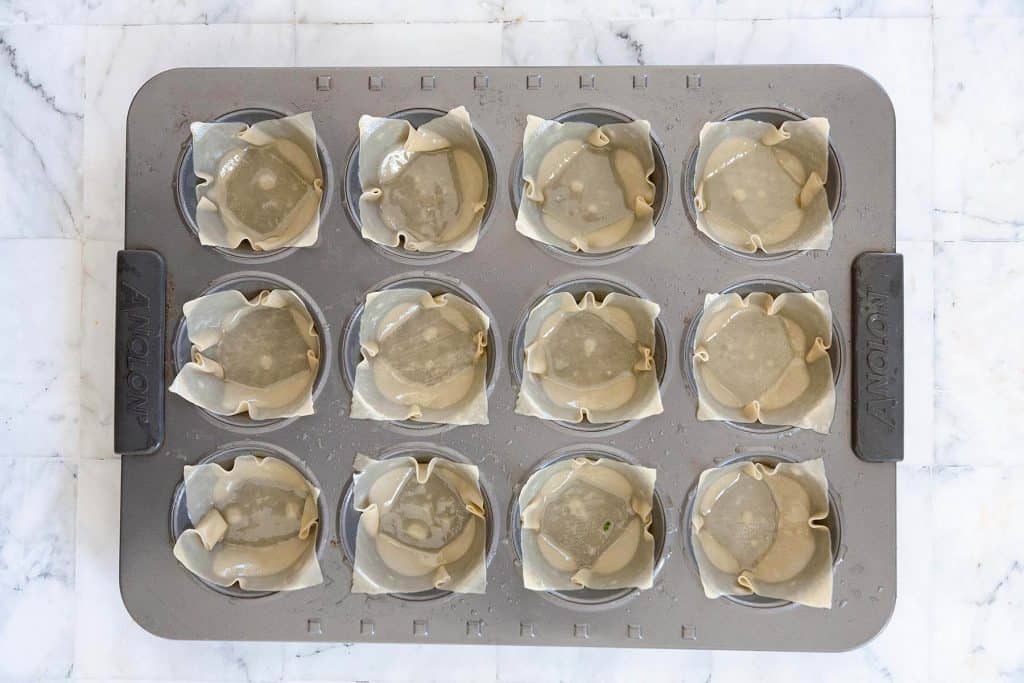
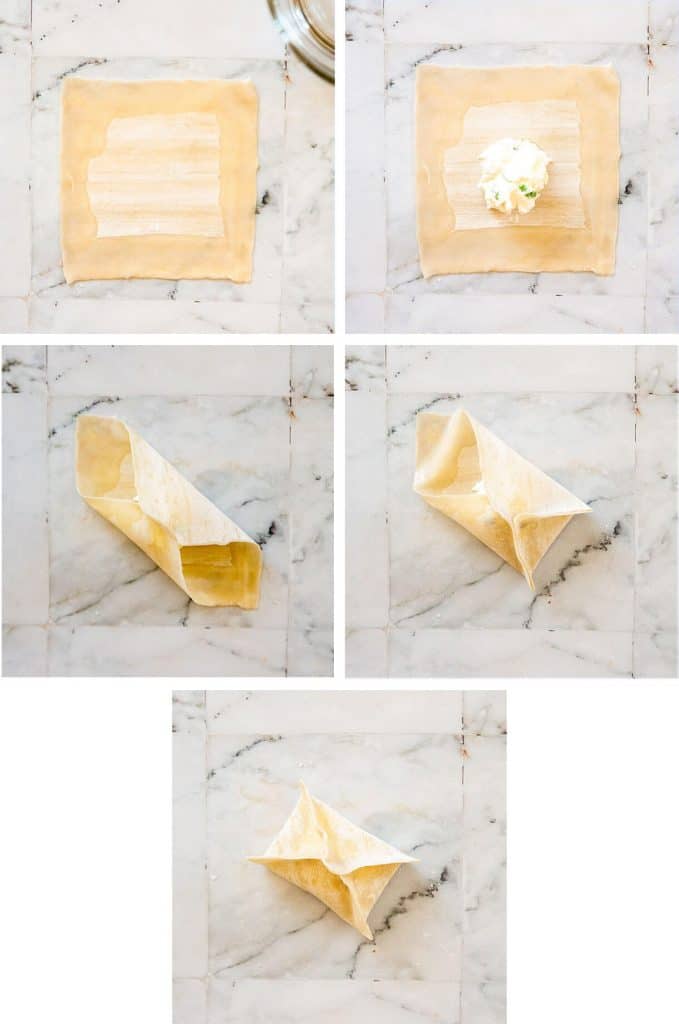
Keep the unused wonton wrappers covered during assembly so they don’t dry out.
Place a wrapper on the counter. Using your finger, wet the edges with water.
Place about 2 teaspoons of filling in the center of the wrapper.
Fold up 2 opposite corners to meet in the center. Press to seal.
Fold up the remaining 2 corners to meet in the center, trying to keep the edges lined up and even.
Press all edges again to seal carefully.
How to cook
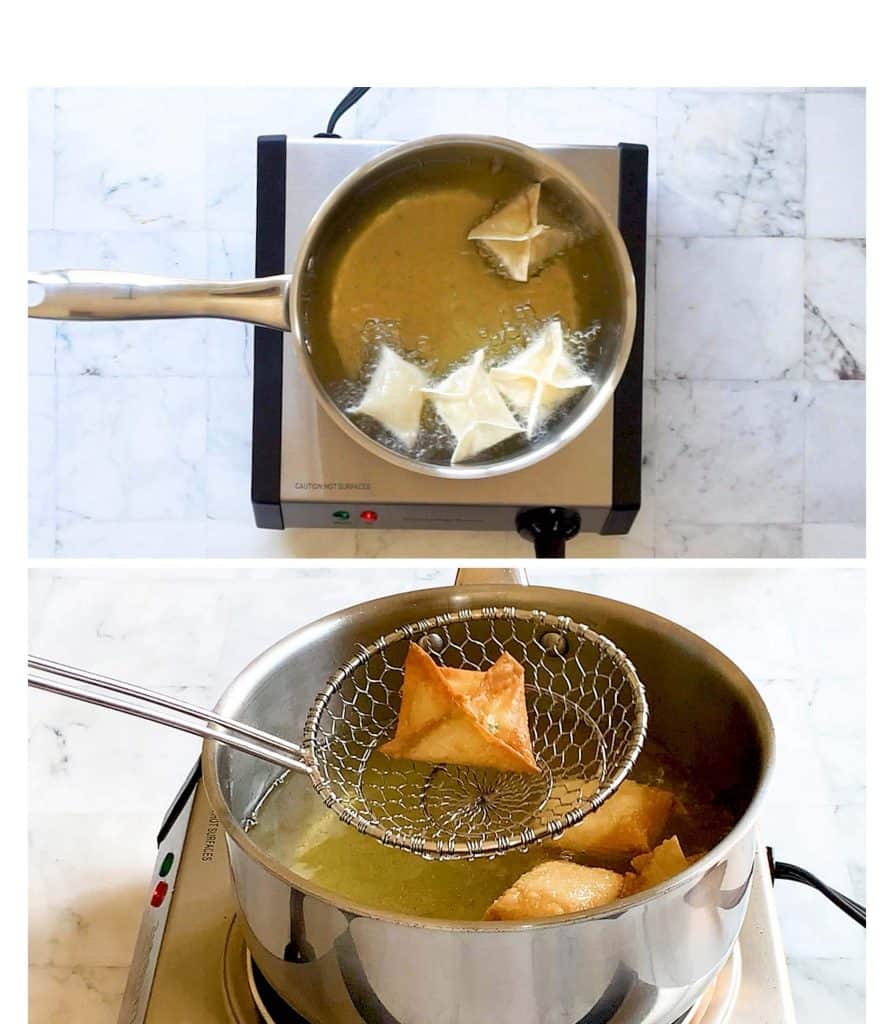
To fry the Rangoon, heat an inch of oil in a pan to 340-350° F.
Fry the Rangoon, several pieces at a time, until they’re golden and crispy.
Use a slotted spoon to remove. Let drain on paper towels.
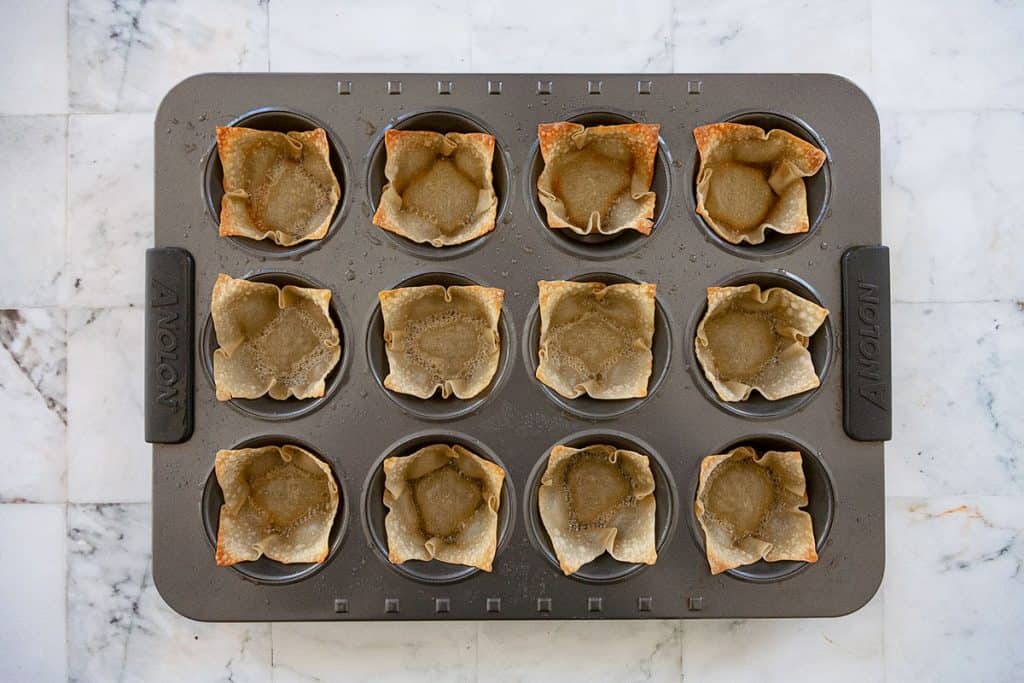
Baked
Crab Rangoon can also be baked if you’d like to save some calories. They won’t have quite the same texture, but they will still taste awesome!
Heat a baking sheet in a 375° F oven for 5 minutes. Remove the pan from oven, brush with oil or spray with cooking spray, and arrange the filled and folded wontons on it. Brush the tops of the wontons with oil or spray with cooking spray. Bake until golden, about 10-12 minutes.
Air fryer
Brush each filled wonton with vegetable oil and cook in the air fryer at 375° until golden and crispy, about 6-8 minutes.
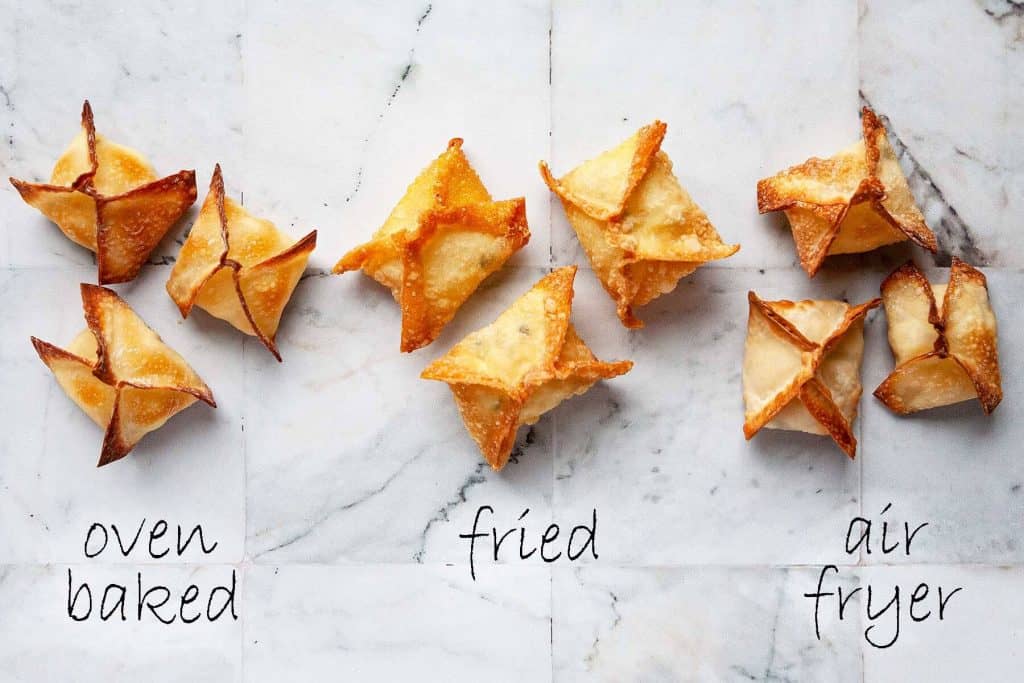
A side-by-side showing Crab Rangoon that has been baked in the oven, fried, or cooked in the air fryer. The fried Rangoon has a puffy, lighter, crispy texture. I also prefer the flavor.
Tips
- Keep the stack of wonton wrappers covered with a damp cloth while filling each one so they don’t dry out.
- Be sure the edges are sealed tight or the filling will leak when frying.
- Don’t overfill with too much filling
- Use a thermometer to bring the oil to 340-350° F before frying. If the oil isn’t hot enough, the rangoons will be greasy. If the oil is too hot, the edges will burn quickly.
How to freeze
Crab Rangoon can be filled and folded, then frozen. Freeze in a single layer then put into a plastic freezer bag or other container. Let come to room temperature before cooking.
How to make in advance
- Freeze the filled and folded wontons. Let come to room temperature before cooking.
- Refrigerate the filled and folded wontons for up to a day. Cover them with a dish towel and plastic to keep them soft.
What sauces go with Crab Rangoon?
We love dipping our Crab Rangoon into Sweet Chili Sauce or Sweet and Sour Sauce. They’re also great on their own!

More game day appetizers and party snacks:
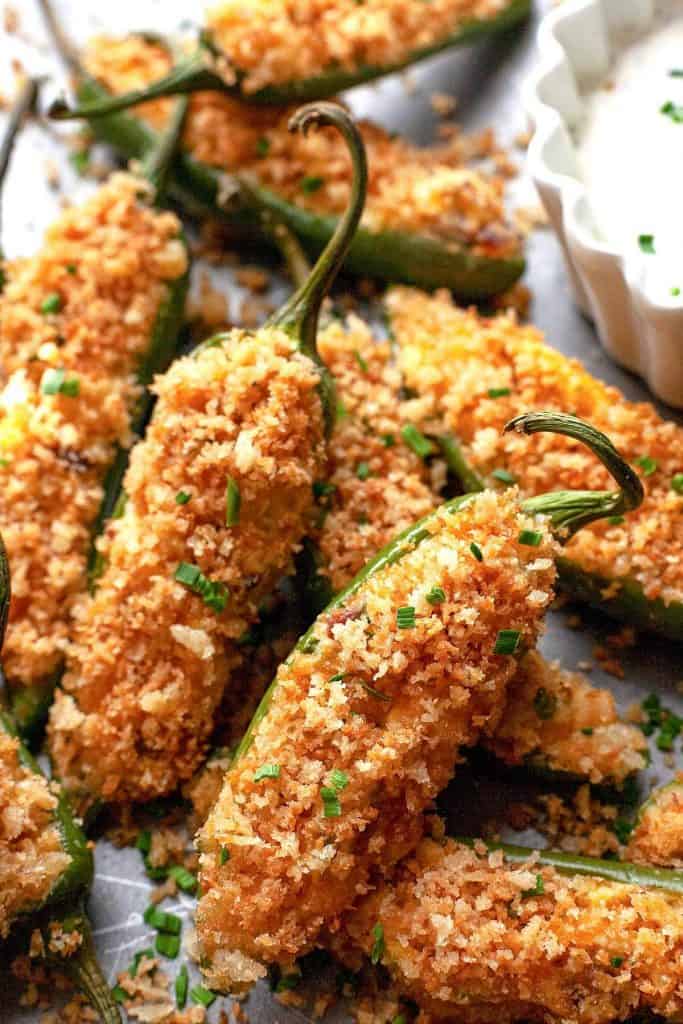
- Jalapeno Poppers
- Jalapeno Popper Dip
- Jalapeno Popper Wonton Cups
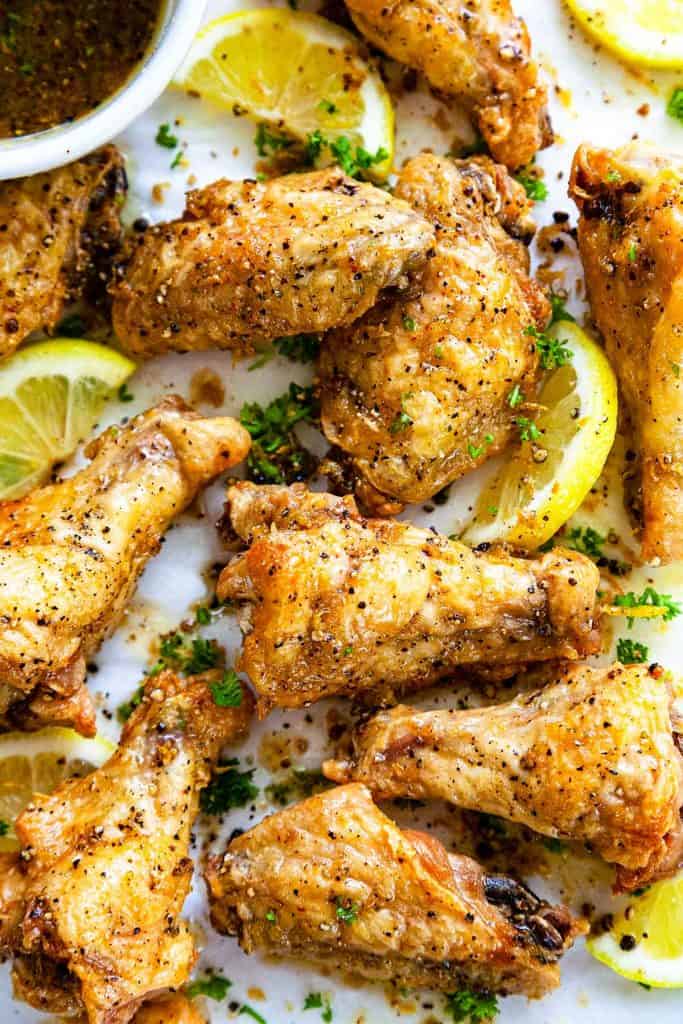
- Baked Buffalo Wings
- Lemon Pepper Wings
- Philly Cheesesteak Bread
- Loaded Smashed Potatoes
- Honey Sriracha Wings
Recipe

Crab Rangoon
Ingredients
- 8 ounces cream cheese softened 227g
- 6 ounces crab meat or chopped imitation crab, drained 170g
- 1 teaspoon Worcestershire sauce
- ½ teaspoon garlic powder
- ¼ cup sliced green onions plus more for garnish
- ½ teaspoon salt or to taste
- 25 wonton wrappers
- oil for frying
- dipping sauce for serving
Instructions
- Place the cream cheese, crab meat, Worcestershire sauce, garlic powder, green onions, and salt to taste in a bowl. Stir to combine.
- Place a wrapper on the counter. Using your finger, wet the edges with water. Place about 2 teaspoons (13g) of filling in the center of the wrapper.
- Fold up 2 opposite corners to meet in the center. Press to seal. Fold up the remaining 2 corners to meet in the center, trying to keep the edges lined up and even. Press all edges again to seal carefully.
- Repeat with the remaining wontons and filling.
- To fry the Rangoon, heat an inch of oil in a pan to 350° Fry the Rangoon, several pieces at a time, until they’re golden and crispy. Use a slotted spoon to remove. Let drain on paper towels. Repeat the frying process with remaining wontons.
- Serve immediately with dipping sauce of choice and garnish with more sliced green onions.
Notes
- To bake: Heat a baking sheet in a 375° F oven for 5 minutes. Remove the pan from oven, brush with oil or spray with cooking spray, and arrange the filled and folded wontons on it. Brush the tops of the wontons with oil or spray with cooking spray. Bake until golden, about 10-12 minutes.
- To air fry: Brush each filled wonton with vegetable oil and cook in the air fryer at 375° until golden and crispy, about 6-8 minutes.
- Keep the unused wonton wrappers covered during assembly so they don’t dry out.
- Be sure to seal the edges well so the filling doesn’t leak out when frying.
- For a Sweet Crab Rangoon recipe, add 1 tablespoon of powdered sugar to the cream cheese mixture.
Nutrition
LOVE IT? PIN IT!
Don’t forget where you found this delicious Crab Rangoon recipe! Pin it to your favorite Pinterest recipe board before you go so that you can find it easily.
Enjoy friends!
Follow me on INSTAGRAM and PINTEREST for all the latest content and recipes!
Subscribe to FOODTASIA’S NEWSLETTER to receive fresh recipes straight to your inbox.
You might also like: