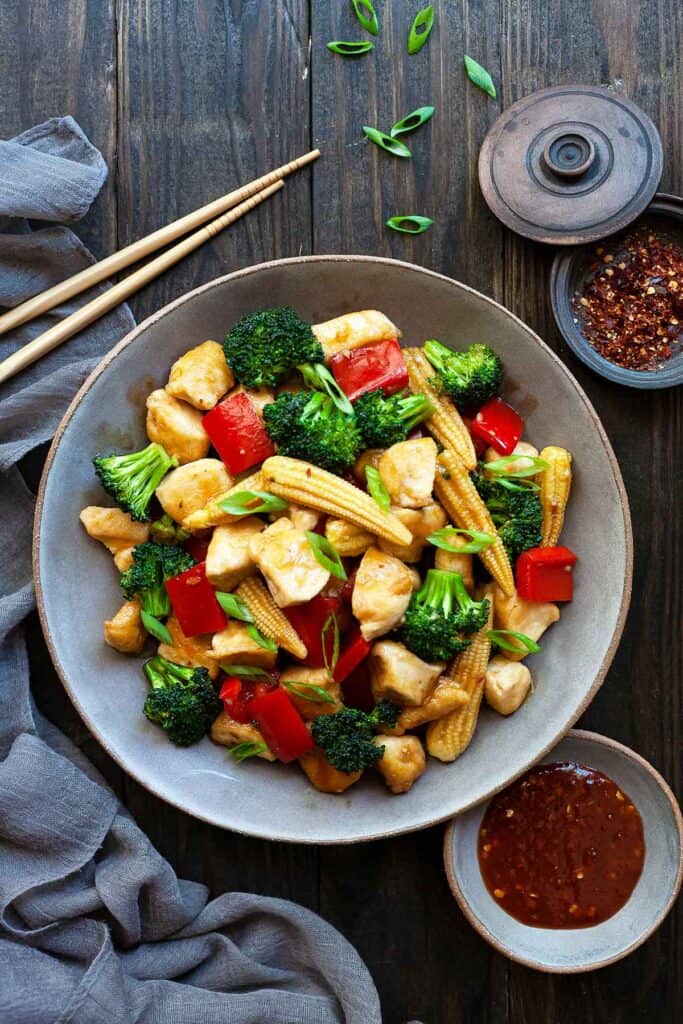
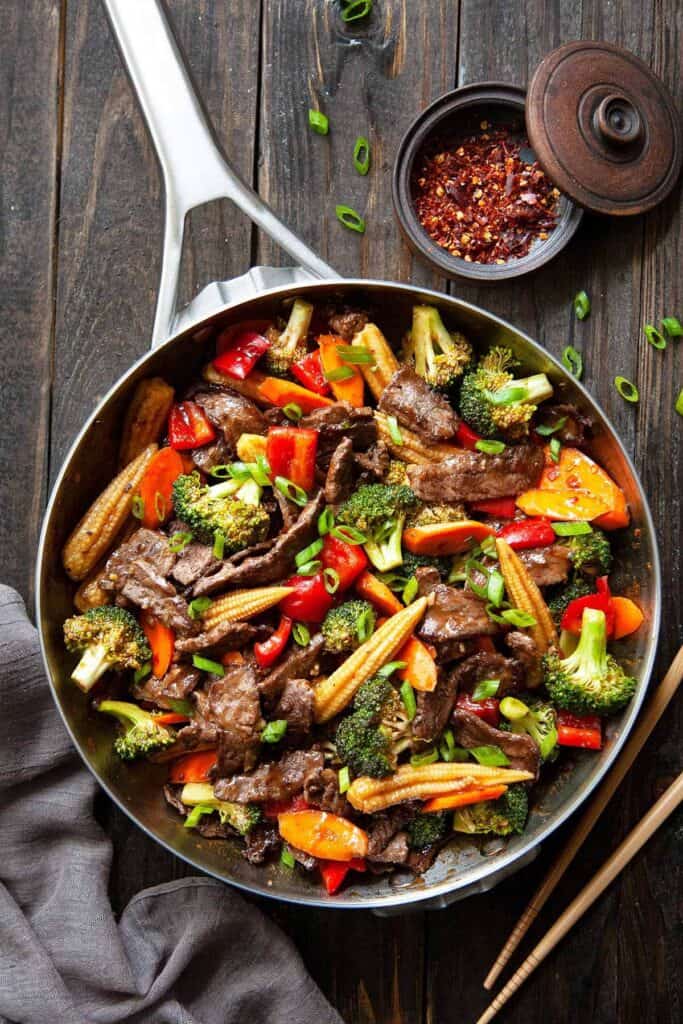
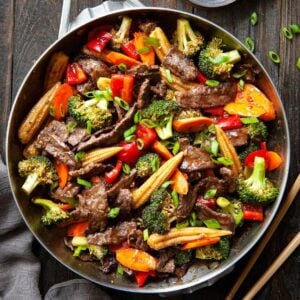
This quick and easy Hunan Beef recipe is a classic Chinese stir fry dish that’s better than takeout! Loaded with fresh veggies, tender beef, and a spicy kick, it’s always a family favorite. Ready in under 30 minutes!
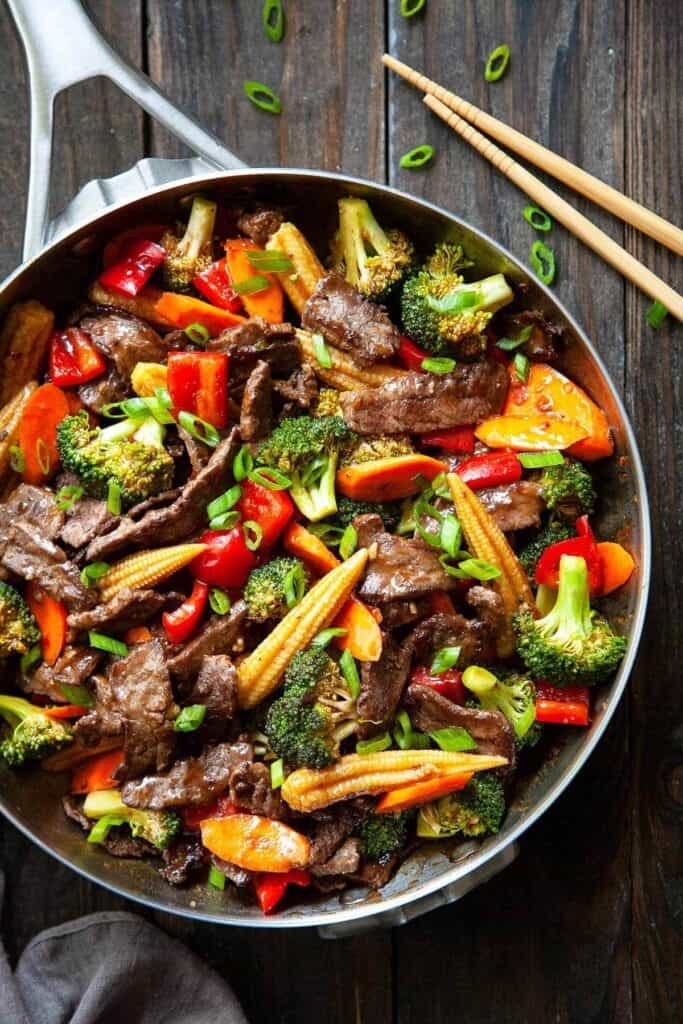
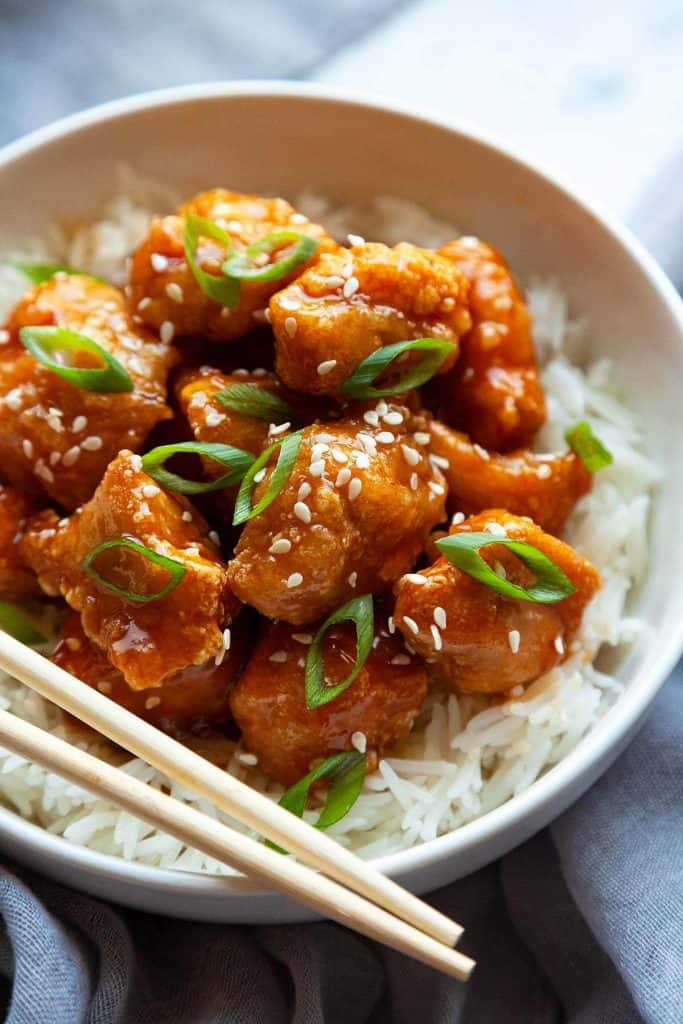
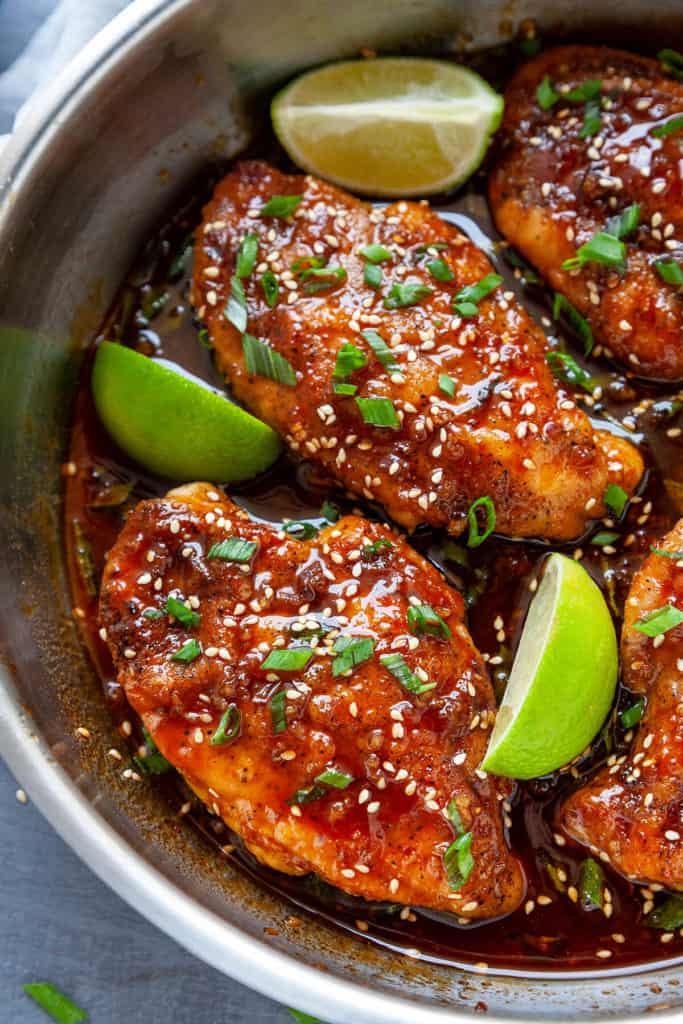
I love making our favorites from our local Chinese restaurant at home like Honey Sriracha Chicken, Sweet and Sour Chicken, or Crab Rangoon. This Hunan Beef – with its rainbow of fresh, colorful veggies and tangy, spicy sauce – is always a hit!
Jump to Section
Why you’ll LOVE this recipe
- A perfectly balanced sauce – a little tangy, a little spicy, a little sweet
- Lots of fresh, colorful veggies that are tender-crisp and not soggy
- Tender, juicy bites of beef
- Control the spice level by adding as much chili paste as you like
- Quick and easy without a long list of ingredients
- Made with ingredients easily found in your local supermarket
- Simple, fuss-free cooking method
- Ready in under 30 minutes
- A healthy meal your family will love
What is Hunan Beef?
Chinese Hunan Beef is a healthy, popular Chinese-American dish made with tender pieces of beef stir fried with lots of veggies and tossed in a tangy, sweet, and spicy sauce. The original dish hails from the Hunan province of China is traditionally hot, spicy and loaded with chilies. Chinese restaurants toned down the heat to suit the American palate so that it’s sweeter and milder. In this recipe, you can control the spice level by adding as much chili paste as you like.
Easy Chinese Stir Fry Recipe
Beef Hunan style is the perfect quick and easy weeknight dinner or a fun meal to share with friends. It’s ready in under 30 minutes and can be made as mild or spicy as you like it.
Ingredients
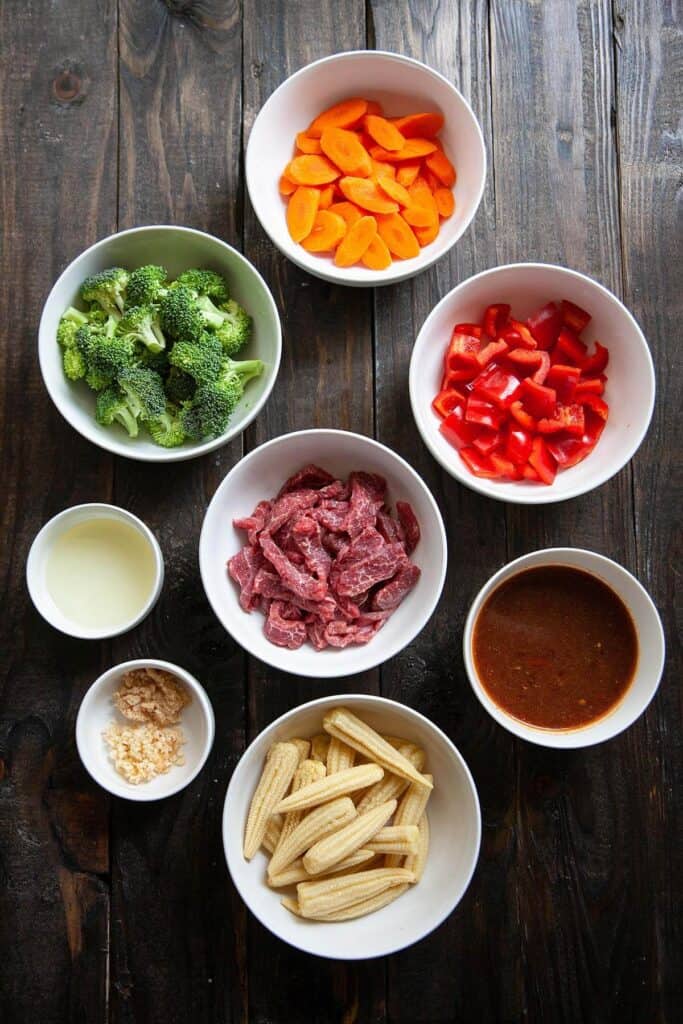
- Beef – I’ve used flank steak. Cut it in thin strips across the grain. Putting it in the freezer for 20 minutes firms it up so you can get very thin slices.
- Fresh veggies – I’ve used broccoli, baby corn, carrots, and red pepper. There’s a list for you below with ideas for other veggies you can use to customize your own Hunan Beef.
- Garlic and ginger
- Hunan Sauce – see below
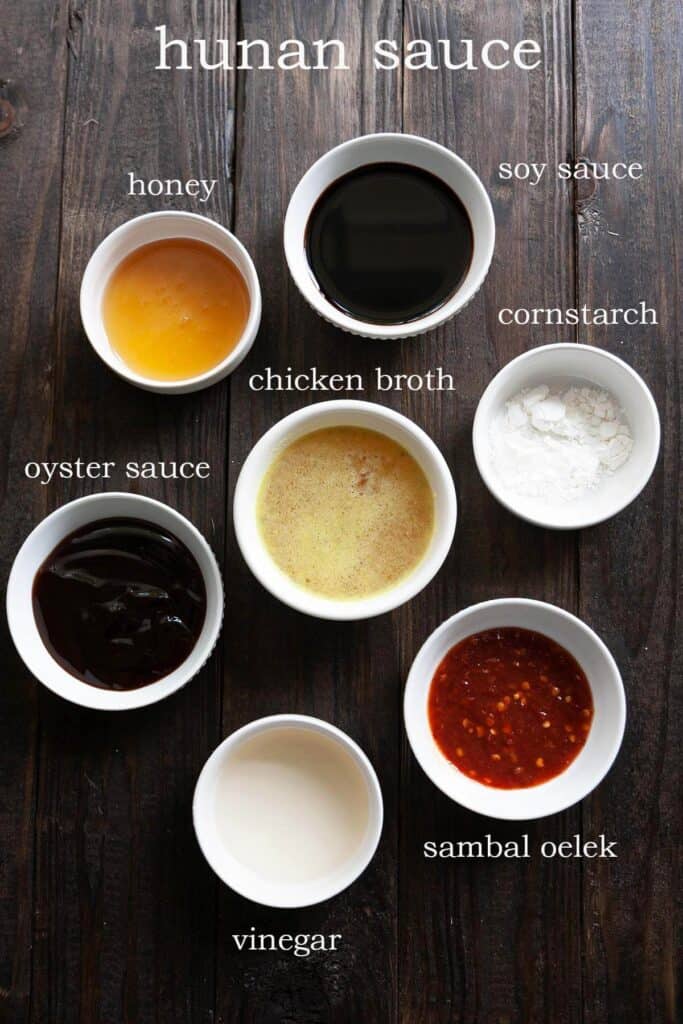
What’s in Chinese Hunan Sauce
Hunan Sauce is a classic Chinese stir fry sauce that’s a little spicy, a little tangy, and a little sweet. It contains:
- soy sauce
- oyster sauce
- rice wine vinegar
- honey (or sugar)
- Sambal Oelek chili paste
- Beef broth
- cornstarch
DoubanJiang
DoubanJiang is a spicy chili bean sauce that gives Hunan Beef its characteristic savory, spicy, salty flavor. It’s made of chili paste and fermented beans, so it really packs an umami punch.
It’s optional in this recipe because the recipe is fantastic without it, and it’s an ingredient that’s less likely to be on hand. If you’d like to try it, add a tablespoon to the sauce.
Vegetables
Use your favorite stir fry vegetables in this classic Chinese stir fry dish:
- Broccoli
- Bell pepper
- Baby corn
- Fresh chili peppers for added heat
- Mushrooms
- Bamboo shoots
- Carrots
- Zucchini
- Water chestnuts
- Snow peas
- Sugar snap peas
- Celery
- Slice red onion
- Green onion
- Asparagus
- Bok choy
How to make Hunan Beef
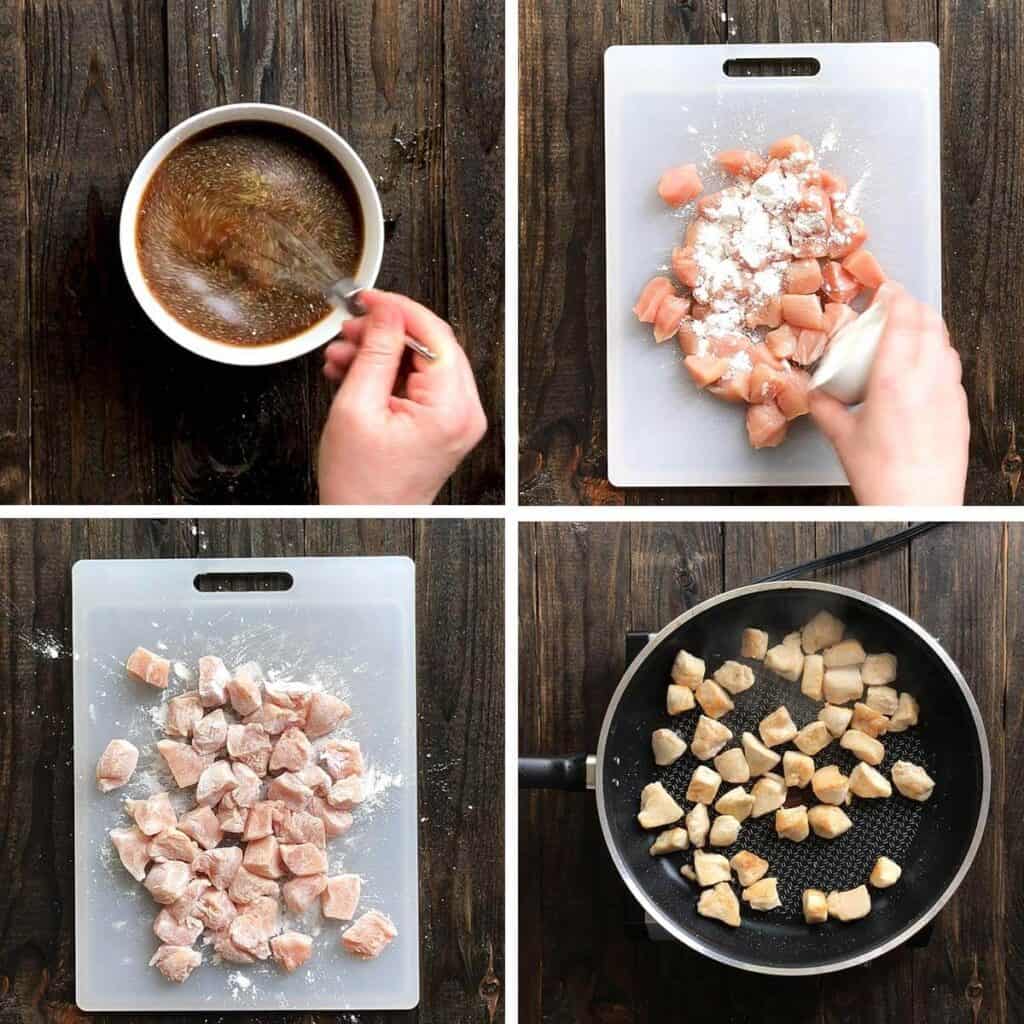
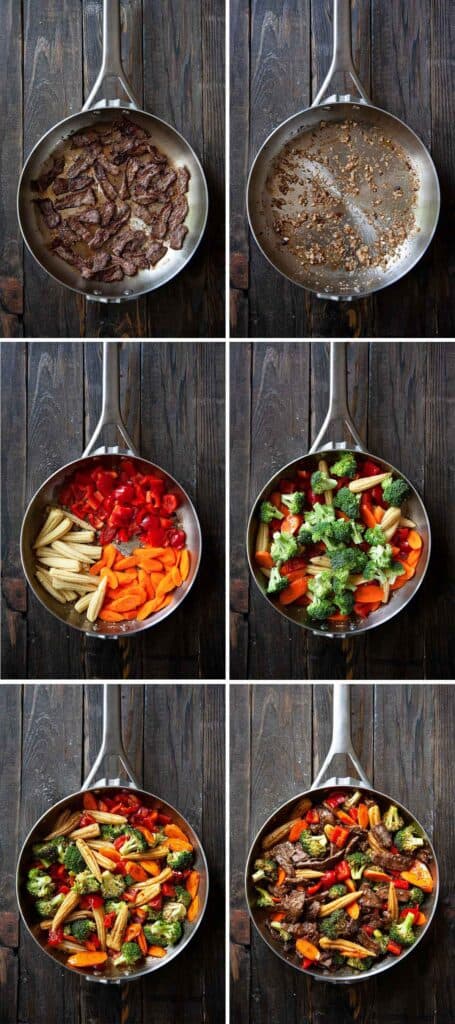
Make the Hunan sauce: Combine all of the sauce ingredients in a bowl and stir to combine.
Stir fry the sliced beef in a hot skillet or wok until it’s just done on the inside and has brown crispy bits on the outside. Don’t overcook for the most tender beef.
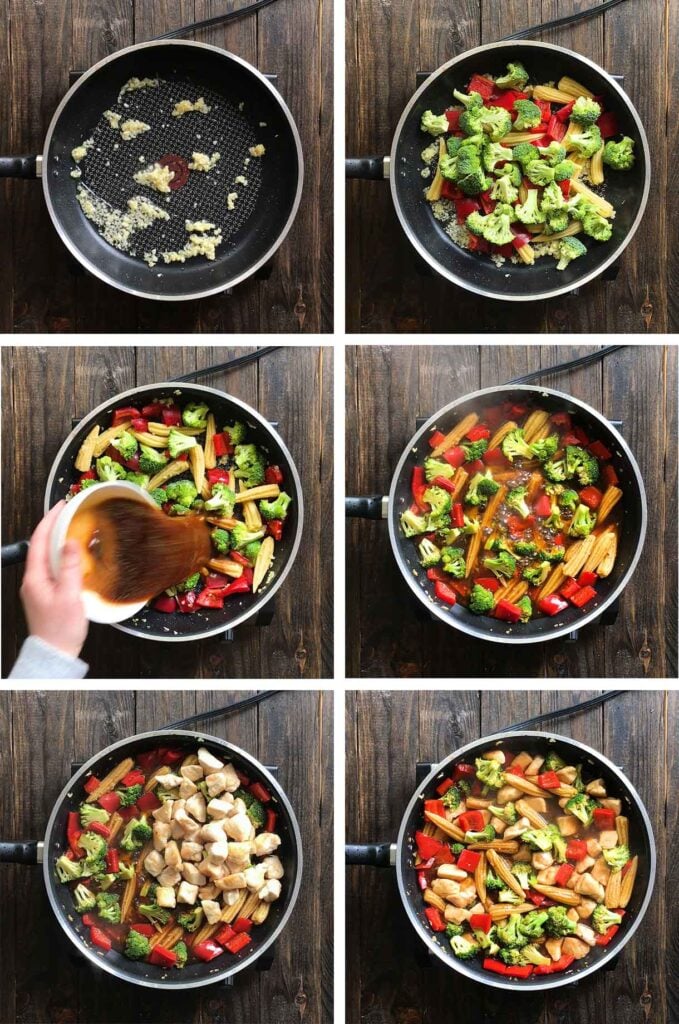
Remove the beef from the pan, add a little oil, then add the garlic and ginger. Stir fry for about 5 seconds then add the veggies. You don’t want the garlic and ginger to brown, and you don’t want to overcook the veggies.
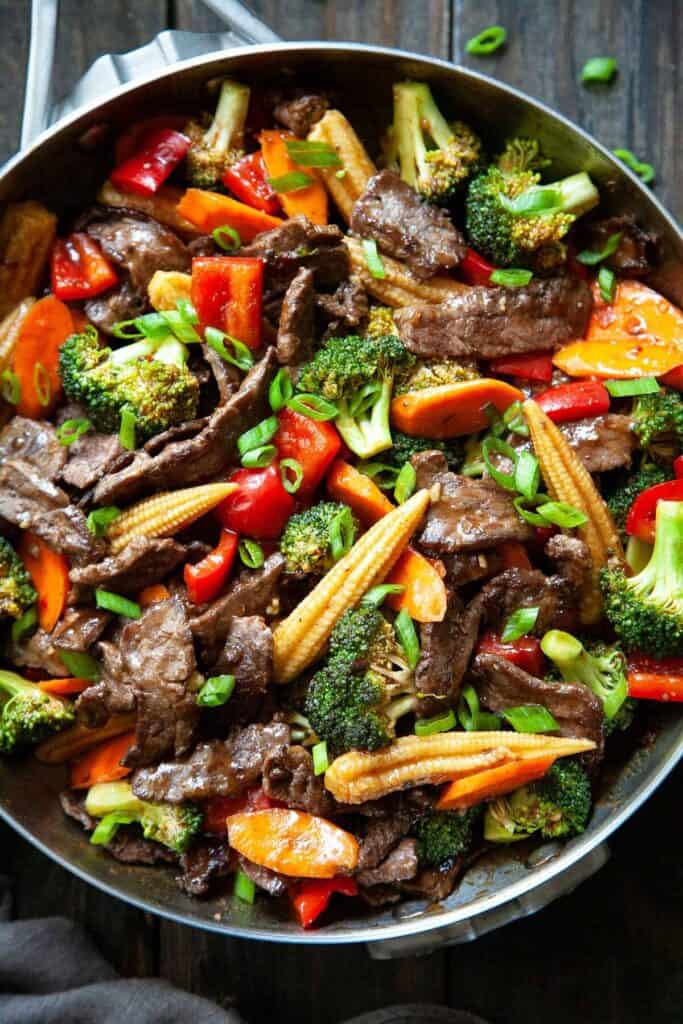
When the veggies are half way to tender crisp (about a minute for baby corn, red bell pepper, and broccoli), add the Hunan sauce. It should bubble up and thicken pretty quickly, about a minute or two. Turn off the heat, stir in the beef, and serve.
What does it taste like?
This slightly spicy Hunan Beef Chinese stir fry has a mildly spicy, tangy, and lightly sweet flavor that is perfectly balanced. The oyster sauce and soy sauce give it a rich umami, Asian flavor. Sambal oelek gives the sauce it’s spicy, garlicy flavor. The garlic and ginger round out the flavors. Using DoubanJiang (spicy chili bean sauce) gives it a unique, spicy, fermented flavor.
It’s easy to adjust the heat to make it as mild or as spicy as you like.
Classic Chinese Beef Stir Fry Variations
Hunan Beef is easy to adapt to your own taste and what you have on hand:
- Increase or decrease the heat by using more or less chili paste
- Use your favorite stir fry vegetables
- Add some whole dried red chilies
- Add a spoon of Doubanjiang (a spicy chili bean paste used to create an extra dimension of savory, sour, salty, and spicy flavor) or use it in place of the sambal oelek.
Tips
*Tender crisp veggies – The texture of the vegetables can make or break this dish. When stir frying the veggies, only cook them to about half way to their desired doneness, they will continue to cook and soften when the sauce is added.
For me, this is about 1 minute of stir frying. If they are already too soft from the stir frying, they will turn mushy and soggy.
The beauty of this dish is the colorful, fresh vegetables. Overcooking them also dulls their color. Put the veggies in the pan according to how long they take to cook. The veggies that take the longest go in first. I always put the broccoli in last because it’s the easiest to dull in color and turn mushy.
*Tender, juicy beef - The beef is sliced thin then pan-fried until done. Cut it across the grain for the most tender beef. Use a super-hot pan so that the beef gets brown bits on the outside by the time it’s done on the inside. Freezing the beef for about a half an hour makes it easier to get very thin slices.
If you’d like an even more tender beef, consider velveting and marinating it. (I skip velveting and marinating when using tender flank steak. I like how quick and easy the dish is.)
Velveting and Marinating the beef
Ever notice how beef in Chinese restaurants is incredibly tender? One easy method of velveting beef is to toss 1 pound of thinly sliced beef with ¼ teaspoon of baking soda. 1 teaspoon cornstarch, and 2 teaspoons oil. Let it marinate for 30 minutes, then continue with the recipe.
How to serve
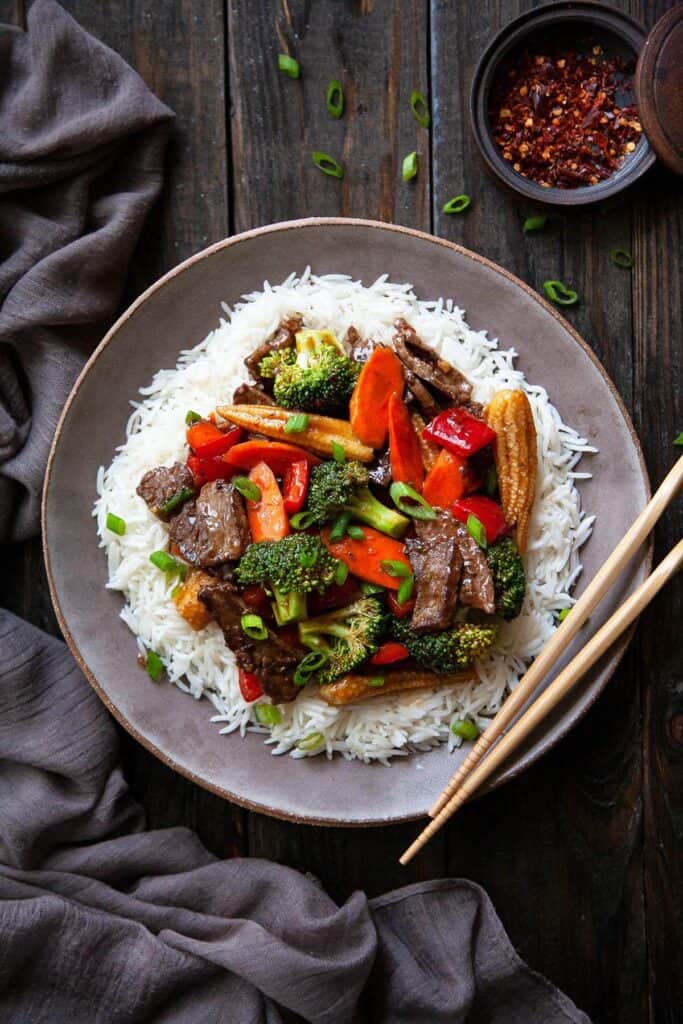
Serve Hunan Beef with steamed white rice, fried rice, or a noodle dish.
MORE FAVORITE ASIAN RECIPES:
- Honey Sriracha Chicken
- Better Than Takeout Sweet and Sour Chicken
- Crab Rangoon
- Honey Sriracha Chicken Breasts
- Hunan Chicken
Recipe
Quick and Easy Hunan Beef
Ingredients
For the Hunan Sauce:
- ½ cup beef broth
- 1 ½ teaspoons cornstarch
- 2 tablespoons low sodium soy sauce
- 2 tablespoons oyster sauce
- 1 tablespoon rice wine vinegar
- 1 tablespoon honey or sugar
- 1 tablespoon Sambal Oelek or to taste
- 1 tablespoon DoubanJiang spicy chili bean sauce, optional
For the stir fry:
- 1 pound flank steak cut into very thin slices
- 2 tablespoons cornstarch
- 2 tablespoons canola oil divided
- 1 tablespoon garlic minced
- 1 tablespoon ginger minced
- 3 cups broccoli florets
- 1 red bell pepper cut into bite sized pieces
- 15 oz baby corn
Instructions
- Make the Hunan sauce: Combine all of the sauce ingredients in a bowl and stir to combine.
- Heat 1 tablespoon oil in a skillet or wok over high heat. Stir fry until the beef is just done on the inside and getting brown, crispy bits on the outside.
- Remove the beef from the pan, add the remaining 1 tablespoon oil, then add the garlic and ginger. Stir fry for about 5 seconds then add the veggies.
- When the veggies are half way to tender crisp (about a minute for baby corn, red bell pepper, and broccoli), add the Hunan sauce. It should bubble up and thicken pretty quickly, about a minute or two. Turn off the heat, stir in the beef, and serve.
Notes
- Increase or decrease the heat by using more or less chili paste
- Use your favorite stir fry vegetables
- Add some whole dried red chilies
- Add a spoon of Doubanjiang (a spicy chili bean paste used to create an extra dimension of savory, sour, salty, and spicy flavor) or use it in place of the sambal oelek.
Nutrition
This post contains affiliate links. That means if you click on my link and buy something, I will earn a small commission from the advertiser at no additional cost to you.)
LOVE IT? PIN IT!
Don’t forget where you found this quick and easy Hunan Beef recipe! Pin it to your favorite Pinterest recipe board before you go so that you can find it easily.
Enjoy friends!
Follow me on INSTAGRAM and PINTEREST for all the latest content and recipes!
Subscribe to FOODTASIA’S NEWSLETTER to receive fresh recipes straight to your inbox.
You might also like: