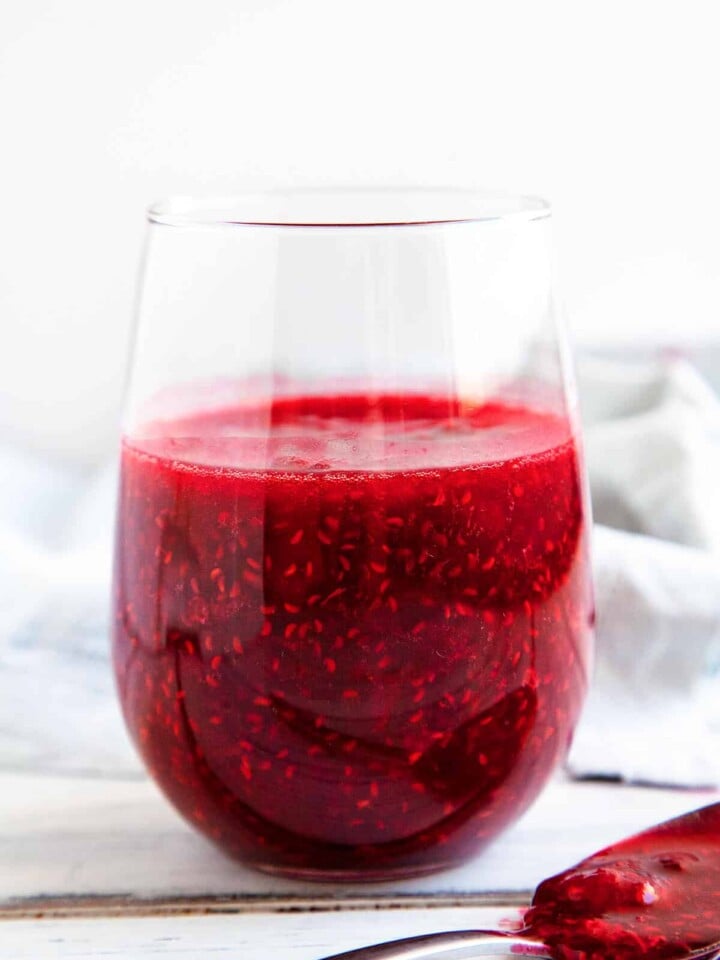
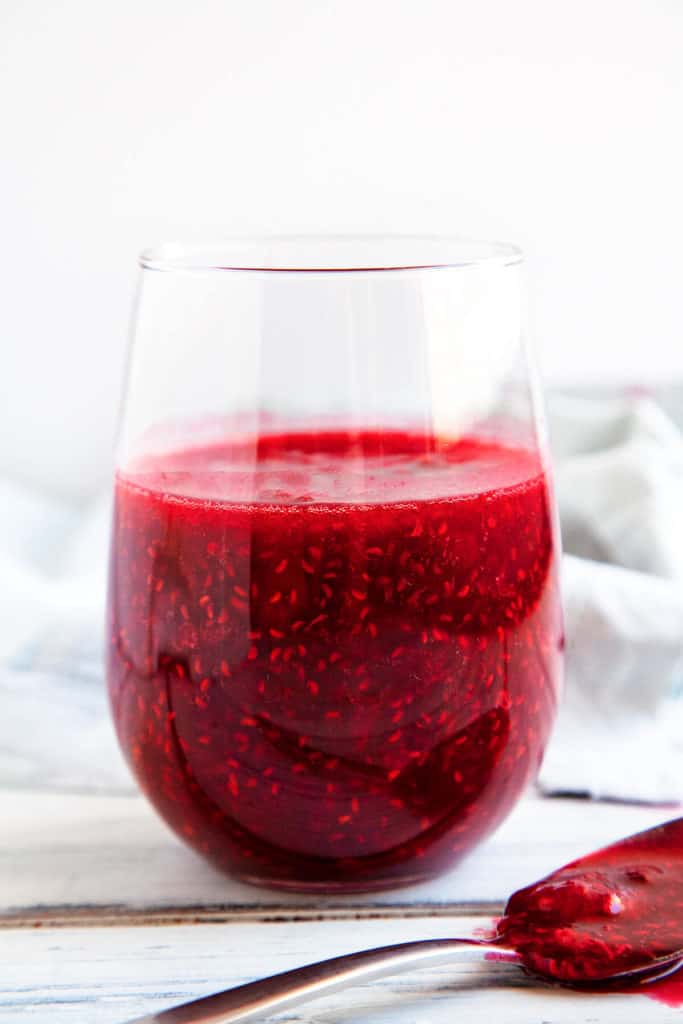
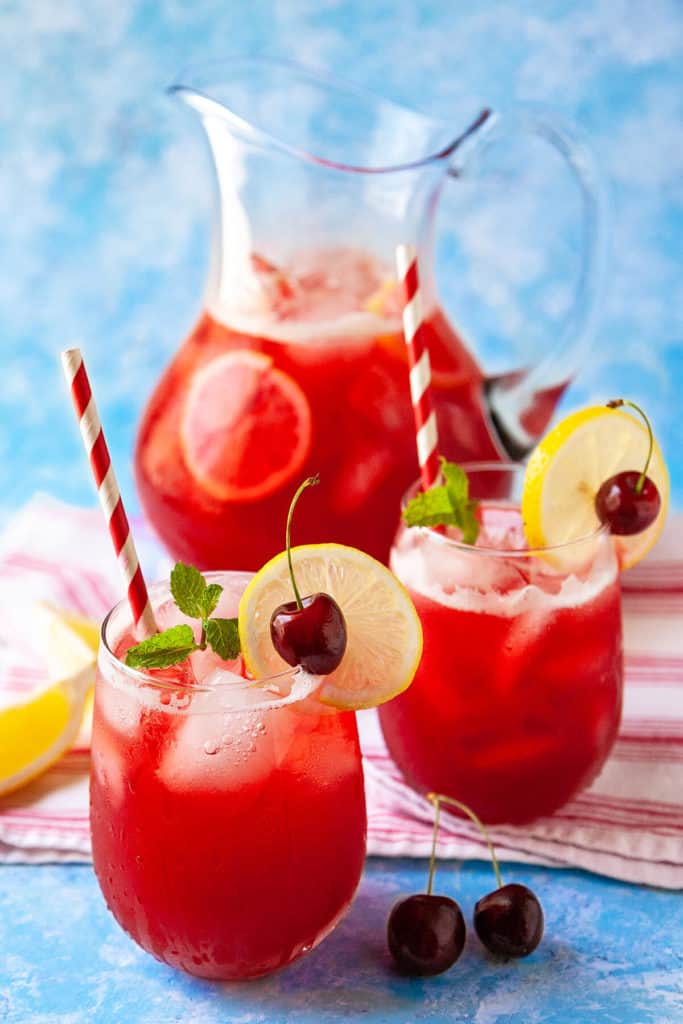
Foodtasia

  • Recipes
  • Subscribe
  • About
menu icon
go to homepage
  • Recipes
  • Subscribe
  • About
    • Facebook
    • Instagram
    • Pinterest
  • search icon
    Homepage link
    • Recipes
    • Subscribe
    • About
    • Facebook
    • Instagram
    • Pinterest
  • ร—
    Foodtasia

    Easy Cherry Lemonade

    August 11, 2019 by Kelly 54 Comments

    The BEST thirst-quenching Cherry Lemonade! Easy to make and so refreshing! #lemonade #cherry #drinks #beverages #party #familyfriendly #recipe #fresh #frozen #summerdrinks

    Thereโ€™s nothing like a big glass of thirst-quenching Cherry Lemonade on a hot summerโ€™s day. Easy to make and so refreshing. It's so good, youโ€™ll want to drink it all year long!

    The BEST thirst-quenching Cherry Lemonade! Easy to make and so refreshing! #lemonade #cherry #drinks #beverages #party #familyfriendly #recipe #fresh #frozen #summerdrinks

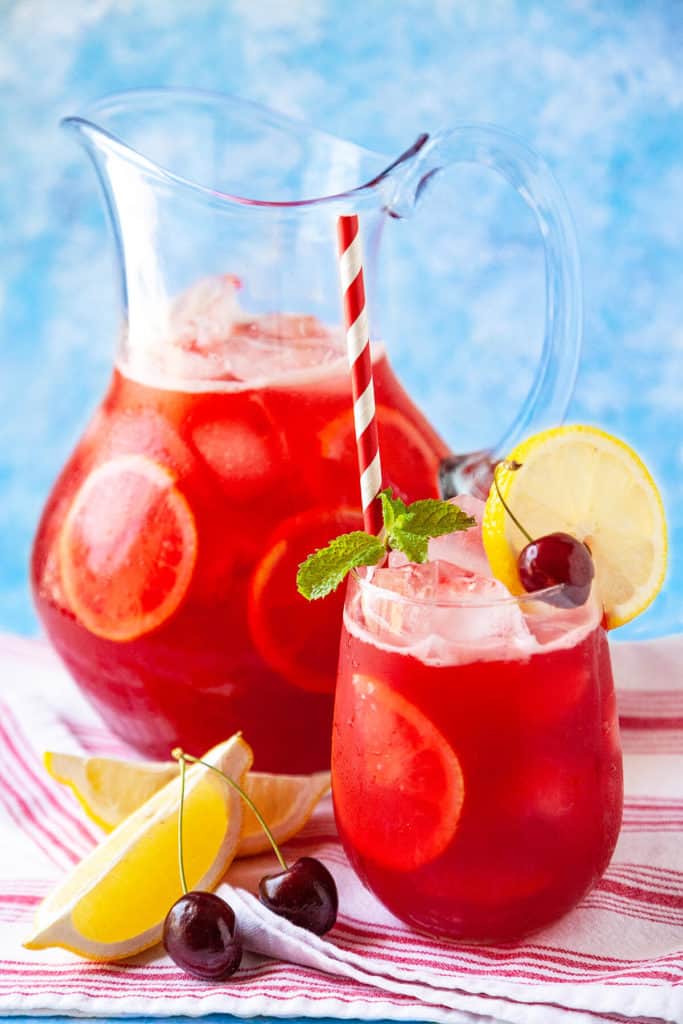
    My kids go crazy over this Cherry Lemonade. Itโ€™s all natural and looks so pretty with its bright pink color. But the best part is it tastes amazing.

    If you love cooling off with fruity, refreshing drinks, try my Hawaiian Pog juice, fresh strawberry juice, or peach iced tea. For something even colder, a frozen mangonada or banana milkshake will really hit the spot.

    The BEST thirst-quenching Cherry Lemonade! Easy to make and so refreshing! #lemonade #cherry #drinks #beverages #party #familyfriendly #recipe #fresh #frozen #summerdrinks

    Iโ€™d say itโ€™s restaurant quality, but itโ€™s way better. Iโ€™ve had pink lemonade before, but it doesnโ€™t come close to this Cherry Lemonade made with fresh cherries and lemons. Itโ€™s the perfect combination of sweet and tart.

    The BEST thirst-quenching Cherry Lemonade! Easy to make and so refreshing! #lemonade #cherry #drinks #beverages #party #familyfriendly #recipe #fresh #frozen #summerdrinks

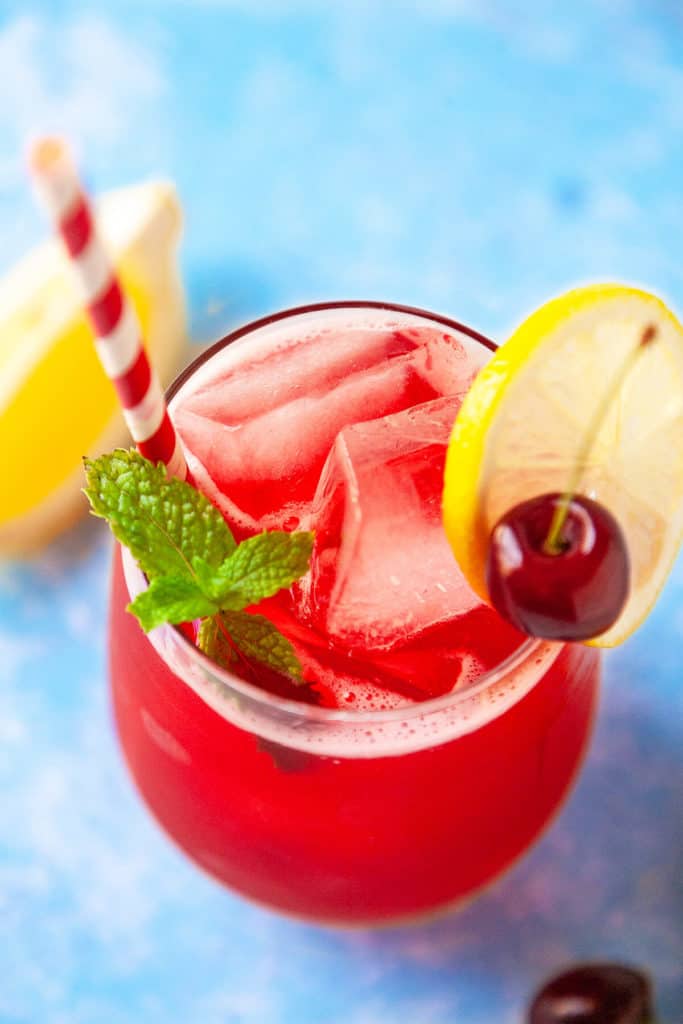
    Cherry Lemonade is a big hit at summer parties and get-togethers! Dress it up with lemon slices and few fresh cherries and itโ€™s sure to impress your guests.

    The BEST thirst-quenching Cherry Lemonade! Easy to make and so refreshing! #lemonade #cherry #drinks #beverages #party #familyfriendly #recipe #fresh #frozen #summerdrinks

    This Cherry Lemonade is super easy to make and takes less than five minutes once the cherries are pitted. No cooking, no boiling, and no sugar syrup necessary. You donโ€™t even have to strain it if you donโ€™t want to.

    Jump to Section

    • How to make Cherry Lemonade
    • How long does Cherry Lemonade syrup last in the fridge?
    • Can the syrup be frozen?
    • Recipe
    • Easy Cherry Lemonade

    How to make Cherry Lemonade

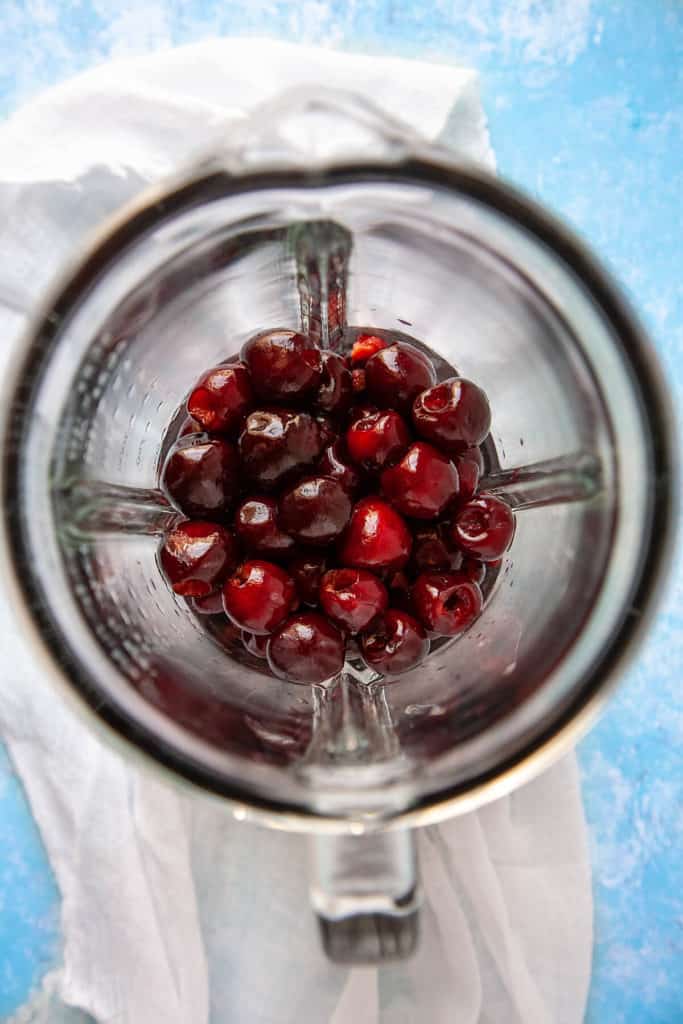
    To make the Cherry Lemonade syrup, pitted cherries are blended with fresh lemon juice and sugar. Thatโ€™s it! You can strain it to remove the bits of skin if you like, but itโ€™s not necessary.

    The BEST thirst-quenching Cherry Lemonade! Easy to make and so refreshing! #lemonade #cherry #drinks #beverages #party #familyfriendly #recipe #fresh #frozen #summerdrinks

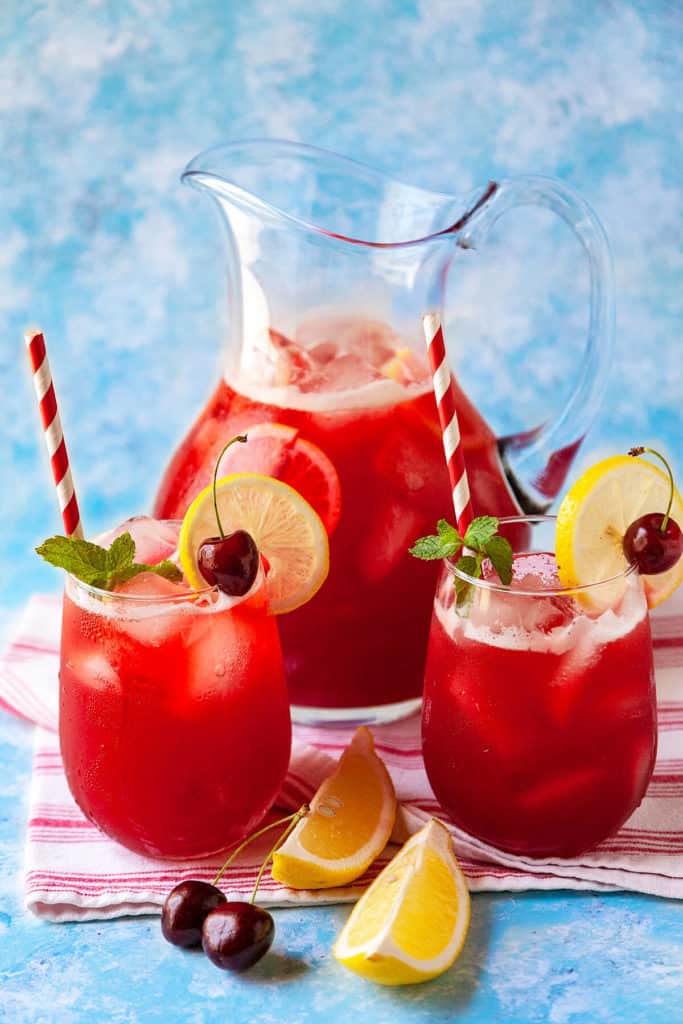
    You can make this Cherry Lemonade with still or sparkling water. When ready to serve, just pour over ice and add still or sparkling water. I like a 2 to 3 ratio (2 cups syrup to 3 cups water) of Cherry Lemonade syrup to water (especially if Iโ€™m serving it with lots of ice), but make it according to your own taste.

    You can make it by the pitcher or by the glass. I like to make it by the glass if Iโ€™m using sparkling water to keep the most fizz.

    The BEST thirst-quenching Cherry Lemonade! Easy to make and so refreshing! #lemonade #cherry #drinks #beverages #party #familyfriendly #recipe #fresh #frozen #summerdrinks

    My husband always manages to one-up me in the kitchen. He makes it with lime juice instead of lemon and then blitzes up the Cherry syrup in the blender with ice cubes and for a Cherry Limeade slushie. It's so good!

    How long does Cherry Lemonade syrup last in the fridge?

    Cherry Lemonade is great for making in advance because it can keep in the refrigerator for up to a week. I love having a jar of the syrup in the fridge to make up a quick glass whenever I need a pick-me-up or the kids come in for a play break on a hot summerโ€™s day.

    The BEST thirst-quenching Cherry Lemonade! Easy to make and so refreshing! #lemonade #cherry #drinks #beverages #party #familyfriendly #recipe #fresh #frozen #summerdrinks

    Can the syrup be frozen?

    Cherry Lemonade syrup can definitely be frozen. It will keep in the freezer for several months. Itโ€™s a great way to use up fresh cherries before they go bad.

    Recipe

    The BEST thirst-quenching Cherry Lemonade! Easy to make and so refreshing! #lemonade #cherry #drinks #beverages #party #familyfriendly #recipe #fresh #frozen #summerdrinks

    Easy Cherry Lemonade

    Kelly
    Thereโ€™s nothing like a big glass of thirst-quenching Cherry Lemonade on a hot summerโ€™s day. Easy to make and so refreshing! Youโ€™ll want to drink it all year long.
    5 from 14 votes
    Print Recipe Pin Recipe
    Prep Time 15 minutes mins
    Total Time 15 minutes mins
    Course Drinks
    Cuisine American
    Servings 8 servings
    Calories 139 kcal

    Ingredients
      

    For the Cherry Lemonade syrup:

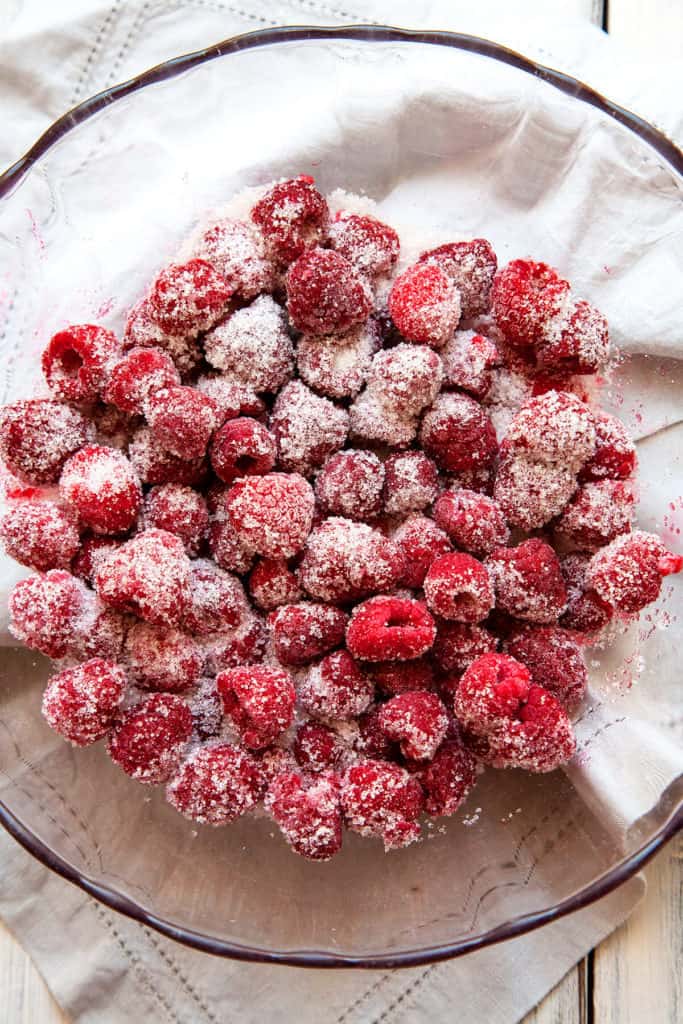
    • 1 lb fresh or frozen cherries pitted (3 cups, 454g)
    • 1 cup sugar (7oz, 198g)
    • 1 cup fresh lemon juice (8oz, 227g)

    For the Cherry Lemonade:

    • 5 - 6 cups still or sparkling water or to taste
    • Glasses of ice

    Instructions
     

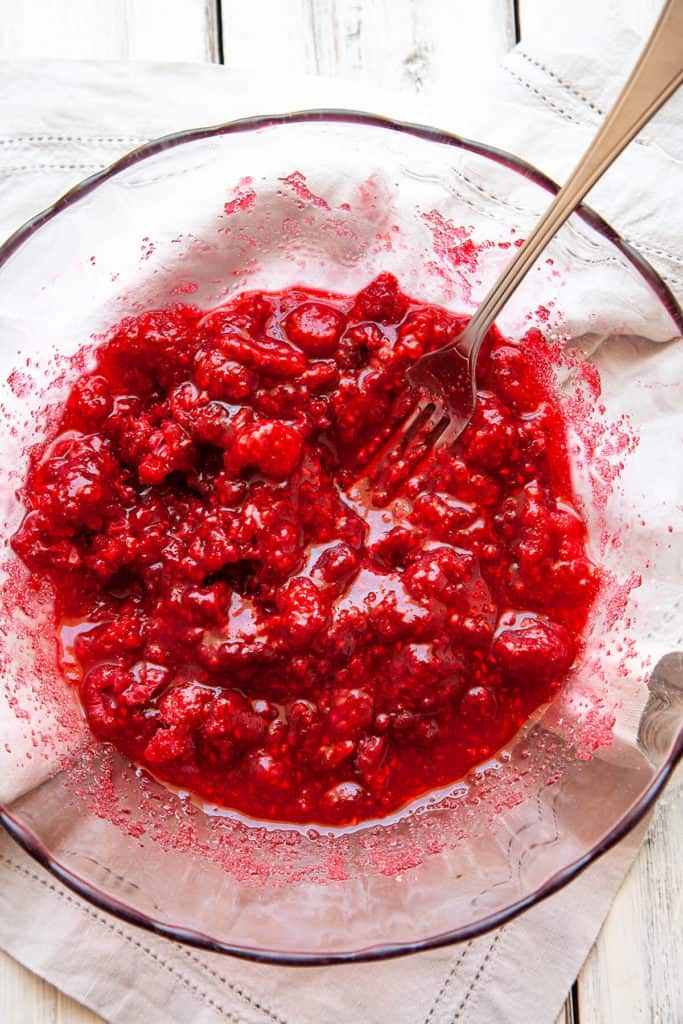
    • Combine the pitted cherries, sugar, and lemon juice in a blender and blend until smooth and there are no bits of cherries left. Strain if desired, but itโ€™s not really necessary.
    • Combine the Cherry Lemonade syrup with still or sparkling water in a 2 to 3 ratio (2 parts syrup for 3 parts water), or to taste.
    • Serve over ice.

    Notes

    • I like my lemonade full-flavored and served over lots of ice. Since it gets a bit diluted from the ice, I use a 2 to 3 ratio of syrup to water. If you want it less strong, use a 1 to 3 ratio of syrup to water.
    • Makes 3 ยฝ cups of Cherry Lemonade syrup.
    • For Cherry Limeade, substitute lime juice for the lemon juice.
    • For a Cherry Lemonade or Limeade Slushie, blend the cherry syrup with ice in a blender.ย 

    Nutrition

    Calories: 139kcalCarbohydrates: 36gProtein: 1gFat: 0.3gSaturated Fat: 0.03gPolyunsaturated Fat: 0.04gMonounsaturated Fat: 0.03gSodium: 1mgPotassium: 158mgFiber: 1gSugar: 33gVitamin A: 38IUVitamin C: 16mgCalcium: 9mgIron: 0.2mg
    Keyword cherry lemonade
    Tried this recipe?Let us know how it was!
    The BEST thirst-quenching Cherry Lemonade! Easy to make and so refreshing! #lemonade #cherry #drinks #beverages #party #familyfriendly #recipe #fresh #frozen #summerdrinks

    Enjoy, friends!

    Follow me on INSTAGRAM and PINTEREST for all the latest content and recipes!

    Subscribe to FOODTASIAโ€™S NEWSLETTER to receive fresh recipes straight to your inbox.

    You might also like:

    Homemade Cherry Pie is a summertime classic with its buttery, flaky crust and a beautiful, juicy cherry filling #cherry #pie #easy #lattice #tapioca #cornstarch #best #tart #sweet #homemade #fresh #recipe #fromscratch #bing
    Homemade Cherry Pie
    This Dreamy Cherry Ice Cream is smooth and luscious with the delicate flavor of fresh cherries.
    Dreamy Cherry Ice Cream
    Roasted Cherry Basil Sorbet
    Roasted Cherry Basil Sorbet
    Roasted Cherries
    Roasted Cherries
    The BEST thirst-quenching Cherry Lemonade! Easy to make and so refreshing! #lemonade #cherry #drinks #beverages #party #familyfriendly #recipe #fresh #frozen #summerdrinks

    Creamy Mushroom Chicken Pasta with Red Pepper

    July 30, 2019 by Kelly 60 Comments

    Creamy Red Pepper and Mushroom Chicken Pasta - pasta in a creamy, garlicky sauce with slices of juicy chicken, mushrooms, and red peppers. A quick and easy pasta dish full of amazing flavor. Ready in under 30 minutes. #pasta #easy #recipe #dinner #quick #creamy #mushroom #chicken #under30minutes

    Creamy Mushroom Chicken Pasta with Red Pepper - pasta in a creamy, garlicky sauce with slices of juicy chicken, mushrooms, and red peppers. A quick and easy pasta dish full of amazing flavor. Ready in under 30 minutes.

    Creamy Red Pepper and Mushroom Chicken Pasta - pasta in a creamy, garlicky sauce with slices of juicy chicken, mushrooms, and red peppers. A quick and easy pasta dish full of amazing flavor. Ready in under 30 minutes. #pasta #easy #recipe #dinner #quick #creamy #mushroom #chicken #under30minutes

    Jump to Section

    • Mushroom Chicken Pasta is a family favorite
    • Whatโ€™s my secret to amazing pasta dishes?
    • How to make Mushroom Chicken Pasta
    • Recipe
    • Creamy Mushroom Chicken Pasta with Red Pepper and Thyme

    Mushroom Chicken Pasta is a family favorite

    Pasta is my go-to dish when I want a quick and easy dinner that the whole family loves. And nothing satisfies a carb craving like a big bowl of creamy, garlicky pasta with chicken. Flavored with mushrooms, red bell peppers, and parmesan โ€“ a wonderful combination. Itโ€™s definitely a family favorite!

    Creamy Red Pepper and Mushroom Chicken Pasta - pasta in a creamy, garlicky sauce with slices of juicy chicken, mushrooms, and red peppers. A quick and easy pasta dish full of amazing flavor. Ready in under 30 minutes. #pasta #easy #recipe #dinner #quick #creamy #mushroom #chicken #under30minutes

    Whatโ€™s my secret to amazing pasta dishes?

    It starts off with a good quality, al dente pasta. Next is my garlicky cream sauce thatโ€™s a base for many of my pasta sauces. Itโ€™s seasoned perfectly with garlic, cream, and parmesan โ€“ that umami flavor bomb. The real secret? Flavor combinations that perfectly balance each other.

    Creamy Red Pepper and Mushroom Chicken Pasta - pasta in a creamy, garlicky sauce with slices of juicy chicken, mushrooms, and red peppers. A quick and easy pasta dish full of amazing flavor. Ready in under 30 minutes. #pasta #easy #recipe #dinner #quick #creamy #mushroom #chicken #under30minutes

    In this case, I wanted a mushroom pasta. What pairs well with mushroom? Definitely butter and cream. And for delicious depth of flavor that complements the mushrooms, to scent the sauce, and add color and texture: red bell peppers and a sprinkling of thyme and parsley. Thyme adds an earthy, woodsy flavor. Parsley adds a bright, fresh flavor.

    Creamy Red Pepper and Mushroom Chicken Pasta - pasta in a creamy, garlicky sauce with slices of juicy chicken, mushrooms, and red peppers. A quick and easy pasta dish full of amazing flavor. Ready in under 30 minutes. #pasta #easy #recipe #dinner #quick #creamy #mushroom #chicken #under30minutes

    How to make Mushroom Chicken Pasta

    For quicker, more even cooking, slightly flatten breasts with a kitchen mallet. If they are very thick, slice them in half horizontally before flattening. Season with salt and pepper. Sautรฉ chicken breasts in a little oil until golden brown. Remove the chicken from the pan and slice. Skinless, boneless chicken thighs work great in this recipe, too.

    Mushroom Chicken Pasta

    Add remaining tablespoon oil to pan. Add onions and cook until softened. Add mushrooms and cook until golden brown. Add the red pepper and garlic, stir, and cook for about 2 minutes.

    Creamy Red Pepper and Mushroom Chicken Pasta - pasta in a creamy, garlicky sauce with slices of juicy chicken, mushrooms, and red peppers. A quick and easy pasta dish full of amazing flavor. Ready in under 30 minutes. #pasta #easy #recipe #dinner #quick #creamy #mushroom #chicken #under30minutes

    Deglaze pan with water and bouillon cube, scraping bottom to release any bits sticking to the bottom of the pan. Add cream and thyme. Bring to a simmer. Let simmer 2-3 minutes then turn off heat. Add parmesan slowly, whisking constantly until melted. Salt and pepper to taste. I like to add the sliced chicken to the sauce so it gets good and covered with sauce.

    Creamy Red Pepper and Mushroom Chicken Pasta - pasta in a creamy, garlicky sauce with slices of juicy chicken, mushrooms, and red peppers. A quick and easy pasta dish full of amazing flavor. Ready in under 30 minutes. #pasta #easy #recipe #dinner #quick #creamy #mushroom #chicken #under30minutes

    Sprinkle with parsley, then toss with pasta.

    Creamy Red Pepper and Mushroom Chicken Pasta - pasta in a creamy, garlicky sauce with slices of juicy chicken, mushrooms, and red peppers. A quick and easy pasta dish full of amazing flavor. Ready in under 30 minutes. #pasta #easy #recipe #dinner #quick #creamy #mushroom #chicken #under30minutes

    Recipe

    Creamy Red Pepper and Mushroom Chicken Pasta - pasta in a creamy, garlicky sauce with slices of juicy chicken, mushrooms, and red peppers. A quick and easy pasta dish full of amazing flavor. Ready in under 30 minutes. #pasta #easy #recipe #dinner #quick #creamy #mushroom #chicken #under30minutes

    Creamy Mushroom Chicken Pasta with Red Pepper and Thyme

    Kelly
    Creamy Mushroom Chicken Pasta with Red Pepper and Thyme- pasta in a creamy, garlicky sauce with slices of juicy chicken, mushrooms, and red peppers. A quick and easy pasta dish full of amazing flavor. Ready in under 30 minutes.
    5 from 17 votes
    Print Recipe Pin Recipe
    Prep Time 10 minutes mins
    Cook Time 20 minutes mins
    Total Time 30 minutes mins
    Course Main Course
    Cuisine American
    Servings 4 servings
    Calories 988 kcal

    Ingredients
      

    • 1 lb penne 500g or other pasta (cooked until al dente and tossed with 2 tablespoons butter)
    • 2 tablespoons olive or canola oil
    • 1 lb chicken breasts (or boneless, skinless thighs) 500g
    • 1 medium onion chopped
    • ยฝ lb mushrooms sliced (250g)
    • 1 red bell pepper chopped
    • 5 cloves garlic minced fine
    • 1 chicken bouillon cube
    • 1 cup water (8oz, 227g)
    • 1 ยผ cups heavy cream (10oz, 283g)
    • ยพ cup grated parmesan cheese (3oz, 85g)
    • 2 tablespoons fresh thyme or 1 teaspoon dried
    • 3 tablespoons fresh parsley chopped
    • Salt and pepper to taste

    Instructions
     

    • For quicker, more even cooking, slightly flatten breasts with a kitchen mallet. If they are very thick, slice them in half horizontally before flattening. Season with salt and pepper.
    • Heat a skillet over high heat. When pan is hot, add 1 tablespoon oil.
    • When oil is hot, put chicken in pan and cook until golden brown on both sides and cooked through. Remove chicken from pan and slice.
    • Add remaining tablespoon oil to pan. Add onions and cook until softened.
    • Add mushrooms and cook until golden brown.
    • Add the red pepper and garlic, stir, and cook for about 2 minutes.
    • Deglaze pan with water and bouillon cube, scraping bottom to release any bits sticking to the bottom of the pan.
    • Add cream and thyme. Bring to a simmer. Let simmer 2-3 minutes then turn off heat.
    • Add parmesan slowly, whisking constantly until melted.
    • Salt and pepper to taste.
    • Add sliced chicken and parsley to sauce, then toss with pasta.
    • Serve.

    Notes

    • You can use white or yellow onions.
    • Feel free to use white or cremini or a mix of mushrooms.

    Nutrition

    Calories: 988kcalCarbohydrates: 98gProtein: 50gFat: 44gSaturated Fat: 22gPolyunsaturated Fat: 3gMonounsaturated Fat: 14gTrans Fat: 0.01gCholesterol: 173mgSodium: 736mgPotassium: 1117mgFiber: 6gSugar: 9gVitamin A: 2641IUVitamin C: 54mgCalcium: 283mgIron: 3mg
    Keyword creamy mushroom pasta
    Tried this recipe?Let us know how it was!
    Creamy Red Pepper and Mushroom Chicken Pasta - pasta in a creamy, garlicky sauce with slices of juicy chicken, mushrooms, and red peppers. A quick and easy pasta dish full of amazing flavor. Ready in under 30 minutes. #pasta #easy #recipe #dinner #quick #creamy #mushroom #chicken #under30minutes

    Enjoy, friends!

    Follow me on INSTAGRAM and PINTEREST for all the latest content and recipes!

    Subscribe to FOODTASIAโ€™S NEWSLETTER to receive fresh recipes straight to your inbox.

    You might also like:

    Creamy, Cheesy Sausage and Basil Penne
    Creamy, Cheesy Italian Sausage and Basil Penne
    Italian sausage, sundried tomatoes, and red pepper in a creamy, cheesy sauce, this Creamy Italian Sausage and Tomato Pasta is quick and easy, and it tastes amazing. It's sure to be your new go-to dinner on busy weeknights. A family favorite!
    Creamy Italian Sausage and Tomato Pasta
    Creamy Spinach Artichoke Pasta - hot buttered pasta tossed with spinach and artichokes in a creamy, garlicky, parmesan sauce. Simple, yet elegant. Perfect for date night or a quick weeknight dinner. Ready in under 30 minutes. #pasta #dinner #easy #recipe #artichoke #spinach #under30minutes #quick #weeknight
    Light and Fresh, Creamy Spinach Artichoke Pasta
    Pasta Caprese
    Pasta Caprese with Pesto and Fresh Mozzarella
    Creamy Italian Sausage Pasta - pasta with sausage and spinach in the creamiest, garlicky parmesan sauce. Pure comfort food on the table in under 30 minutes! #pasta #recipe #easy #quick #under30minutes #easydinner #easyrecipes #sausage #creamy #weeknight #datenight
    Creamy Italian Sausage Pasta
    Creamy Tuscan Chicken Pasta is loaded with the flavors of the Mediterranean โ€“ sundried tomato, baby spinach, garlic, red pepper, and parmesan. Itโ€™s super quick and easy. A restaurant quality dish on the table in under 30 minutes. #pasta #recipe #recipeeasyfast #chicken #chickenrecipes #chickendinner #chickendishes #easy #easyrecipe #easydinner
    Creamy Tuscan Chicken Pasta
    Creamy, Cheesy Mushroom Spinach Pasta - sautรฉed mushrooms and baby spinach tossed with buttered fettucine in a garlicky, parmesan cream sauce. So delicious and so quick and easy to make! This dish is all flavor. You've got to love a restaurant quality meal that's ready in under 30 minutes.
    Creamy, Cheesy Mushroom Spinach Pasta
    Creamy Butternut Squash Pasta with Bacon and Crispy Sage - the ultimate bowl of comfort to keep you cozy all winter long. Quick, easy, and on the table in under 30 minutes, itโ€™s perfect for a weeknight dinner. #butternutsquash #butternutsquashrecipes #pasta #pastafoodrecipes #recipesfordinner #recipeseasyfast #easy #easydinner #easydinnerrecipes #easydinnerideas
    Creamy Butternut Squash Pasta with Bacon and Crispy Sage
    Creamy Red Pepper and Mushroom Chicken Pasta - pasta in a creamy, garlicky sauce with slices of juicy chicken, mushrooms, and red peppers. A quick and easy pasta dish full of amazing flavor. Ready in under 30 minutes. #pasta #easy #recipe #dinner #quick #creamy #mushroom #chicken #under30minutes

    Easy, Homemade Cherry Pie

    July 22, 2019 by Kelly 57 Comments

    Homemade Cherry Pie is a summertime classic with its buttery, flaky crust and a beautiful, juicy cherry filling #cherry #pie #easy #lattice #tapioca #cornstarch #best #tart #sweet #homemade #fresh #recipe #fromscratch #bing

    Homemade Cherry Pie is a summertime classic with its buttery, flaky crust and a beautiful, juicy cherry filling. It's sure to be a family favorite!

    Homemade Cherry Pie is a summertime classic with its buttery, flaky crust and a beautiful, juicy cherry filling #cherry #pie #easy #lattice #tapioca #cornstarch #best #tart #sweet #homemade #fresh #recipe #fromscratch #bing

    Jump to Section

    • Why I love this recipe
    • Which Cherries to Use
    • How to pit cherries
    • Can I use frozen cherries?
    • Which thickener to use
    • Use a good quality pie crust
    • Keep the pastry ingredients cold
    • How to make Homemade Cherry Pie
    • How to make a lattice crust
    • How to bake
    • How to prevent a soggy bottom
    • Let the pie cool before cutting
    • How to freeze
    • How to bake a frozen pie
    • Recipe
    • Homemade Cherry Pie

    Why I love this recipe

    Cherry is my absolutely favorite pie and this recipe is the best Iโ€™ve ever tasted. It has a pure, bright cherry flavor, heightened and made more complex by the perfect balance of sugar, lemon juice, and salt.  Salt is all too often left out of or under used in sweets, but itโ€™s essential to bring out the natural, complex flavors. This Cherry Pie is perfectly thickened with tapioca or corn starch, it's never runny or goopy.

    Homemade Cherry Pie is a summertime classic with its buttery, flaky crust and a beautiful, juicy cherry filling #cherry #pie #easy #lattice #tapioca #cornstarch #best #tart #sweet #homemade #fresh #recipe #fromscratch #bing

    Which Cherries to Use

    The cherry filling can be made with your favorite cherry variety. I made this recipe with dark sweet cherries because theyโ€™re the most widely available variety. You can use rainier or a mix of rainier and dark sweet. If youโ€™re lucky enough to find sour cherries, reduce the amount of lemon juice and use a little extra sugar if needed.

    How to pit cherries

    Cherries are a snap to pit with a cherry pitter. Itโ€™s a great investment if you plan to pit a lot of cherries. I use a hand pitter thatโ€™s pretty cheap. If you pit lots and lots of cherries, thereโ€™s a model that can pit 25 pounds of cherries an hour. How awesome is that?!

    Homemade Cherry Pie is a summertime classic with its buttery, flaky crust and a beautiful, juicy cherry filling #cherry #pie #easy #lattice #tapioca #cornstarch #best #tart #sweet #homemade #fresh #recipe #fromscratch #bing

    Can I use frozen cherries?

    You can definitely use frozen cherries or even jarred sour cherries for Cherry Pie. I use fresh cherries when they're in season in the summer. And a Cherry Pie using frozen cherries always shows up on the Thanksgiving table. If using frozen pitted cherries, you can let them thaw to soften first, however that's not absolutely necessary. If using jarred sour cherries, be sure to drain them well.

    Which thickener to use

    I use quick cooking tapioca because it keeps the filling clear and shiny without getting gloopy. If you donโ€™t have tapioca on hand, cornstarch is the next best option. Iโ€™ve given measurements for both below.

    Use a good quality pie crust

    Because the crust is such an important part of a pie, itโ€™s important for it to be mouthwateringly good. I use my no-fuss, all-butter Flaky Pie Crust. Itโ€™s light, tender, and full of melt-in-your-mouth butter flavor. Best of all, itโ€™s dependable and easy to work with. Check out my step by step tutorial here.

    How to Make Pie Crust

    Keep the pastry ingredients cold

    Itโ€™s important to keep the ingredients for the pie crust cold. The pastry will be tender and flaky. Cold pie dough is so much easier to work with and keeps its shape better. This is especially helpful when transferring the rolled crust to the pie dish and creating the lattice on top. Freezing the pie for 30 minutes before putting it into the oven helps keep the shape of the crimped edges when baking.

    Putting the chilled pie into a 425 F degree oven also helps keep the shape of the crimped edges. A not cold enough pie and a not hot enough oven lead to the pretty crimped edges melting into a not-so-pretty blob.

    How to make Homemade Cherry Pie

    Making Homemade Cherry Pie is pretty easy. I like to pit the cherries over a mixing bowl that has the sugar and lemon juice already in it. This catches any of the juices, and stirring the cherries into the lemon and sugar every so often prevents the cherries from browning.

    Mix in the tapioca and salt. It will look like wet sand on the cherries.

    Homemade Cherry Pie is a summertime classic with its buttery, flaky crust and a beautiful, juicy cherry filling #cherry #pie #easy #lattice #tapioca #cornstarch #best #tart #sweet #homemade #fresh #recipe #fromscratch #bing

    If you are using cornstarch instead of tapioca, pour off some of the juices that collect on the bottom of the mixing bowl into a smaller bowl. Dissolve the cornstarch into this juice, then pour it all back on the cherries. Add the salt.

    How to Make Pie Crust

    Roll out the chilled pie crust to a 13-inch circle, working quickly and keeping everything as cold as possible. Check out my step by step instructions here. Lift the pie crust and fit onto a 9-inch deep dish pie dish. Trim the overhang to about a half an inch all around. Pour the cherry filling into the prepared crust and gently press down to even out the cherries. Dot the top of the pie with cubes of butter.

    Homemade Cherry Pie is a summertime classic with its buttery, flaky crust and a beautiful, juicy cherry filling #cherry #pie #easy #lattice #tapioca #cornstarch #best #tart #sweet #homemade #fresh #recipe #fromscratch #bing

    How to make a lattice crust

    Homemade Cherry Pie is a summertime classic with its buttery, flaky crust and a beautiful, juicy cherry filling #cherry #pie #easy #lattice #tapioca #cornstarch #best #tart #sweet #homemade #fresh #recipe #fromscratch #bing

    Roll out the second chilled pie crust to a 13-inch circle. Cut the circle into 1-inch wide strips.

    Place 5 strips of dough horizontally over the pie filling, with the longer strips in the center and shorter strips towards edges. Donโ€™t forget to save some of the longer strips for the vertical rows.

    Fold the 2nd and 4th strips halfway back and place a long vertical strip of dough in the center of the pie. Fold the 2nd and 4th strips back over the vertical strip.

     Next, fold back the 1st, 3rd, and 5th strips and place a vertical strip next to the first one. Fold the 1st, 3rd, and 5th strips back over the second vertical strip.

    Next, fold the 2nd and 4th strips back and place a short vertical strip of dough on the outer edge of the pie. Fold the 2nd and 4th strips back over the third vertical strip.

    Complete the same steps for the other half of the pie.

    Fold the edges of the lattice under the excess of the bottom crust. Press into an even rim of dough and flute or crimp as desired.

    Homemade Cherry Pie is a summertime classic with its buttery, flaky crust and a beautiful, juicy cherry filling #cherry #pie #easy #lattice #tapioca #cornstarch #best #tart #sweet #homemade #fresh #recipe #fromscratch #bing

    How to bake

    Freeze the pie for about 30 minutes before baking. This helps the top crust and crimped edge to keep its shape while baking.

    Brush the top crust of the pie with egg wash. I use an egg white mixed with 1 tablespoon water. For an even more golden color, you can use the whole egg. You can also mix the egg with milk or cream. Sprinkle regular granulated sugar or coarse raw sugar over the top crust.

    Bake the pie on a non-insulated, metal baking sheet on the bottom third of a 425 F oven for 20 minutes. Lower the heat to 375 F and continue baking until the crust is golden brown and the cherry filling is bubbling steadily, even in the center of the pie. If the crust starts to over-brown, cover the top with a tented piece of aluminum foil.

    The baking time can vary considerably depending on the thickness and type of pie plate, the amount of top crust, how long the pie was in the freezer, and variations in oven temperatures. A rough time is about an hour, but judge the doneness of the pie based on how the pie looks, not the time.

    Homemade Cherry Pie is a summertime classic with its buttery, flaky crust and a beautiful, juicy cherry filling #cherry #pie #easy #lattice #tapioca #cornstarch #best #tart #sweet #homemade #fresh #recipe #fromscratch #bing

    How to prevent a soggy bottom

    Here are a few tips that have helped me over the years to avoid the dreaded soggy bottom on a pie crust:

    The amount of thickener in the pie should be suitable for the juiciness of the fruit you are using. Cherries are pretty juicy and need the perfect balance of thickener so the filling is juicy but not watery.

    Brushing egg wash on the bottom crust before putting in the filling can help waterproof the crust. I use the same egg-white wash that I use on the top of the pie.

    Baking the pie on a metal baking sheet helps the bottom crust cook more quickly so itโ€™s less likely to become soggy. It also catches any spills. Be sure not to use an insulated baking sheet.

    Freezing the pie before baking for about 30 minutes, or longer if desired.

    A glass pie dish conducts heat more quickly and evenly to the dough, producing a crispier crust than heavy ceramic or stoneware.

    Homemade Cherry Pie is a summertime classic with its buttery, flaky crust and a beautiful, juicy cherry filling #cherry #pie #easy #lattice #tapioca #cornstarch #best #tart #sweet #homemade #fresh #recipe #fromscratch #bing

    Let the pie cool before cutting

    This is easily the hardest part of making Cherry Pie! The pie needs to cool for several hours until itโ€™s almost room temperature, no higher than 85 degrees F. This allows the thickener to set. If you cut into the pie too early, it will be runny and thin. More like cherry soup than cherry pie.

    How to freeze

    Cherry Pie can be frozen whole before baking, or after baking, either whole or in slices. Put the pie in the freezer. When itโ€™s firm enough, wrap it well with several layers of plastic wrap. It will keep frozen for several months.

    To freeze slices of baked Cherry Pie, let the pie cool completely. Slice the pie into slices. I like to remove at least one piece for now so that I can spread the pieces out in the pie dish so they donโ€™t stick when frozen. Put the pie still in the pie dish into the freezer and freeze the pie. When it is firm, remove the individual slices and wrap individually in plenty of plastic wrap.

    Homemade Cherry Pie is a summertime classic with its buttery, flaky crust and a beautiful, juicy cherry filling #cherry #pie #easy #lattice #tapioca #cornstarch #best #tart #sweet #homemade #fresh #recipe #fromscratch #bing

    How to bake a frozen pie

    If the pie was frozen unbaked, just bake the frozen pie straight from the freezer following the same directions given. It may take a little longer to finish.

    If the pie was baked before freezing, you can either put it in the oven straight from the freezer or let it sit on the counter for a while to thaw before heating in the oven. Heat at 350 F until the pie is warmed through. Put a piece of tented foil on top of the pie if it begins to brown too much.

    Individual pieces of frozen pie can be heated in the microwave until warm.

    Recipe

    Homemade Cherry Pie is a summertime classic with its buttery, flaky crust and a beautiful, juicy cherry filling #cherry #pie #easy #lattice #tapioca #cornstarch #best #tart #sweet #homemade #fresh #recipe #fromscratch #bing

    Homemade Cherry Pie

    Kelly
    Homemade cherry pie features a buttery flaky pie crust and juicy cherry filling.
    5 from 16 votes
    Print Recipe Pin Recipe
    Prep Time 20 minutes mins
    Cook Time 1 hour hr
    Total Time 1 hour hr 20 minutes mins
    Course Dessert
    Cuisine American
    Servings 8 servings
    Calories 398 kcal

    Ingredients
      

    Cherry Pie Ingredients:

    • 6 cups cherries pitted [from 2.25 lbs (1021g fresh, unpitted cherries])
    • 2 tablespoons lemon juice 28g
    • 1 cup sugar 198g
    • 3 ยฝ tablespoons quick-cooking tapioca 42g (OR 5 tablespoons (35g) corn starch)
    • ยฝ teaspoon salt 3g
    • 1 tablespoon butter diced (to dot the top) 14g
    • 1 Recipe for Flaky Double Pie Crust

    Egg Wash:

    • 1 egg white (or 1 whole egg)
    • 1 tablespoon water (or milk or cream if using whole egg)
    • 1 tablespoon regular or coarse sugar

    Instructions
     

    • Put the sugar and lemon juice into a large mixing bowl. Pit the cherries over the bowl, stirring the cherries into the lemon and sugar every to prevent the cherries from browning.
    • Mix in the tapioca and salt. It will look like wet sand on the cherries.
    • OR
    • If you are using cornstarch instead of tapioca, pour off some of the juices that collect on the bottom of the mixing bowl into a smaller bowl. Dissolve the cornstarch into this juice, then pour it all back on the cherries. Add the salt.
    • Roll out the chilled pie crust to a 13-inch circle, working quickly and keeping everything as cold as possible. See notes for the link to my step-by-step tutorial on how to make a Flaky Pie Crust.
    • Lift the pie crust and fit onto a 9-inch deep dish pie dish. Trim the overhang to about a half an inch all around.
    • Pour the cherry mixture into the prepared crust and press down gently to even out the cherries. Dot the top of the pie with cubes of butter.

    To make the lattice crust:

    • Roll out the second chilled pie crust to a 13-inch circle. Cut the circle into 1-inch wide strips.
    • Place 5 strips of dough horizontally over the pie filling, with the longer strips in the center and shorter strips towards edges. Donโ€™t forget to save some of the longer strips for the vertical rows.
    • Fold the 2nd and 4th strips halfway back and place a long vertical strip of dough in the center of the pie. Fold the 2nd and 4th strips back over the vertical strip.
    • Next, fold back the 1st, 3rd, and 5th strips and place a vertical strip next to the first one. Fold the 1st, 3rd, and 5th strips back over the second vertical strip.
    • Next, fold the 2nd and 4th strips back and place a short vertical strip of dough on the outer edge of the pie. Fold the 2nd and 4th strips back over the third vertical strip.
    • Complete the same steps for the other half of the pie.
    • Fold the edges of the lattice under the excess of the bottom crust. Press into an even rim of dough and flute or crimp as desired.

    To bake the pie:

    • Freeze the pie for about 30 minutes before baking. This helps the top crust and crimped edge to keep its shape while baking.
    • Brush the top crust of the pie with egg wash. I use an egg white mixed with 1 tablespoon water. For an even more golden color, you can use the whole egg. You can also mix the egg with milk or cream. Sprinkle regular granulated sugar or coarse raw sugar over the top crust.
    • Bake the pie on a non-insulated, metal baking sheet on the bottom third of a 425 F oven for 20 minutes. Lower the heat to 375 F and continue baking until the crust is golden brown and the cherry filling is bubbling steadily, even in the center of the pie. If the crust starts to over-brown, cover the top with a tented piece of aluminum foil.
    • The baking time can vary considerably depending on the thickness and type of pie plate, the amount of top crust, how long the pie was in the freezer, and variations in oven temperatures. A rough time is about an hour, but judge the doneness of the pie based on how the pie looks, not the time.
    • Let the pie cool completely to room temperature, no more than 85 degrees before slicing.
    • The pie will keep for 3 days at room temperature or in the refrigerator.

    Notes

    • See my Flaky Pie Crust post for recipe and a step by step tutorial on making pie crust.
    • About 2 pounds (900g) of frozen cherries can be used. Let thaw until softened.

    Nutrition

    Calories: 398kcalCarbohydrates: 69gProtein: 4gFat: 13gSaturated Fat: 4gPolyunsaturated Fat: 1gMonounsaturated Fat: 6gTrans Fat: 0.1gCholesterol: 4mgSodium: 340mgPotassium: 283mgFiber: 3gSugar: 40gVitamin A: 111IUVitamin C: 9mgCalcium: 23mgIron: 2mg
    Keyword cherry pie
    Tried this recipe?Let us know how it was!
    Homemade Cherry Pie is a summertime classic with its buttery, flaky crust and a beautiful, juicy cherry filling #cherry #pie #easy #lattice #tapioca #cornstarch #best #tart #sweet #homemade #fresh #recipe #fromscratch #bing

    Enjoy, friends!

    Follow me on INSTAGRAM and PINTEREST for all the latest content and recipes!

    Subscribe to FOODTASIAโ€™S NEWSLETTER to receive fresh recipes straight to your inbox.

    You might also like:

    This Dreamy Cherry Ice Cream is smooth and luscious with the delicate flavor of fresh cherries.
    Dreamy Cherry Ice Cream
    Roasted Cherries
    Roasted Cherries
    Roasted Cherry Greek Yogurt Bowl
    Roasted Cherry Greek Yogurt Bowl
    New York Cheesecake with Roasted Cherries
    Homemade Cherry Pie is a summertime classic with its buttery, flaky crust and a beautiful, juicy cherry filling #cherry #pie #easy #lattice #tapioca #cornstarch #best #tart #sweet #homemade #fresh #recipe #fromscratch #bing
    Homemade Cherry Pie is a summertime classic with its buttery, flaky crust and a beautiful, juicy cherry filling #cherry #pie #easy #lattice #tapioca #cornstarch #best #tart #sweet #homemade #fresh #recipe #fromscratch #bing

    Ricotta Pesto Pasta - Pappardelle with Creamy Ricotta Pesto

    July 6, 2019 by Kelly 60 Comments

    Pappardelle with Creamy Ricotta Pesto โ€“ pappardelle pasta in a creamy, garlicky pesto sauce infused with ricotta. Who would have thought that pesto could get any better? #pesto #pasta #pappardelle #italian #easy #quick #dinner #ricotta #sauce

    Ricotta Pesto Pasta - Pappardelle with Creamy Ricotta Pesto โ€“ pappardelle pasta in a creamy, garlicky pesto sauce infused with ricotta. Who would have thought that pesto could get any better?

    Pappardelle with Creamy Ricotta Pesto โ€“ pappardelle pasta in a creamy, garlicky pesto sauce infused with ricotta. Who would have thought that pesto could get any better? #pesto #pasta #pappardelle #italian #easy #quick #dinner #ricotta #sauce

    Pesto alla Genovese โ€“ Classic Basil Pesto โ€“ has been called the most seductive of all sauces for pasta. Vibrant and fragrant, itโ€™s bursting with fresh, garlicky, summery flavor. But add a couple of spoons of creamy ricotta, and it becomes sublime. The texture is so creamy and decadent.

    Pappardelle with Creamy Ricotta Pesto โ€“ pappardelle pasta in a creamy, garlicky pesto sauce infused with ricotta. Who would have thought that pesto could get any better? #pesto #pasta #pappardelle #italian #easy #quick #dinner #ricotta #sauce

    Jump to Section

    • What is Ricotta Pesto and Pesto alla Genovese?
    • Mortar and pestle or food processor?
    • Recipe
    • Pappardelle with Creamy Ricotta Pesto

    What is Ricotta Pesto and Pesto alla Genovese?

    Pesto alla Genovese originated in Genoa, the capital city of Liguria, Italy. It is traditionally made from basil leaves, crushed garlic, pine nuts, parmigiano-reggiano, pecorino sardo, and olive oil.

    Ricotta Pesto is Pesto alla Genovese, made deliciously creamy with the addition of ricotta cheese.

    Pappardelle with Creamy Ricotta Pesto โ€“ pappardelle pasta in a creamy, garlicky pesto sauce infused with ricotta. Who would have thought that pesto could get any better? #pesto #pasta #pappardelle #italian #easy #quick #dinner #ricotta #sauce

    Mortar and pestle or food processor?

    Pesto, coming from the Italian word pestare, means to pound or crush, referring to the original method of preparation. Traditionally the ingredients are crushed in a mortar and pestle. While pesto is a generic term for anything made by pounding and there are quite a lot of variations of pesto, Pesto alla Genovese remains the most popular.

    Classic Basil Pesto is traditionally made with a mortar and pestle. While this makes a superior pesto, itโ€™s also more work and more time consuming. The food processor rends making pesto nearly effortless, and it still tastes amazing. I have given directions for both methods below.

    Pappardelle with Creamy Ricotta Pesto โ€“ pappardelle pasta in a creamy, garlicky pesto sauce infused with ricotta. Who would have thought that pesto could get any better? #pesto #pasta #pappardelle #italian #easy #quick #dinner #ricotta #sauce

    If you do use the food processor method, stir in the cheese, butter, and ricotta by hand because with a slight effort, it produces a noticeably superior pesto.

    Pappardelle with Creamy Ricotta Pesto โ€“ pappardelle pasta in a creamy, garlicky pesto sauce infused with ricotta. Who would have thought that pesto could get any better? #pesto #pasta #pappardelle #italian #easy #quick #dinner #ricotta #sauce

    Iโ€™ve adapted this recipe from Marcella Hazanโ€™s Lasagne with Ricotta Pesto found in Essentials of Classic Italian Cooking. Itโ€™s not a typical baked lasagna, but itโ€™s made with 3-inch by 5-inch fresh pasta noodles called piccagge, which means napkin or dish cloth.

    Pappardelle with Creamy Ricotta Pesto โ€“ pappardelle pasta in a creamy, garlicky pesto sauce infused with ricotta. Who would have thought that pesto could get any better? #pesto #pasta #pappardelle #italian #easy #quick #dinner #ricotta #sauce

    Iโ€™ve used pappardelle in this recipe to make it more accessible to busy cooks so you can enjoy this glorious dish in about 20 minutes.

    For most luscious, creamiest Ricotta Pesto, I've used my Homemade Ricotta made with milk and cream. It's so rich and creamy and it's easy to make. Click here to read the post.

    I've added an optional teaspoon of lemon juice to the original recipe because I think a little acid brightens the flavor and helps to keep the basil bright green.

    If you have the time or inclination to make the homemade piccagge noodles, just roll out fresh pasta dough and cut into 3-inch by 5-inch rectangles.

    Pappardelle with Creamy Ricotta Pesto โ€“ pappardelle pasta in a creamy, garlicky pesto sauce infused with ricotta. Who would have thought that pesto could get any better? #pesto #pasta #pappardelle #italian #easy #quick #dinner #ricotta #sauce

    Recipe

    Pappardelle with Creamy Ricotta Pesto โ€“ pappardelle pasta in a creamy, garlicky pesto sauce infused with ricotta. Who would have thought that pesto could get any better? #pesto #pasta #pappardelle #italian #easy #quick #dinner #ricotta #sauce

    Pappardelle with Creamy Ricotta Pesto

    Kelly
    Pappardelle with Creamy Ricotta Pesto โ€“ pappardelle pasta in a creamy, garlicky pesto sauce infused with ricotta.
    5 from 20 votes
    Print Recipe Pin Recipe
    Prep Time 5 minutes mins
    Cook Time 20 minutes mins
    Total Time 25 minutes mins
    Course Main Course
    Cuisine Italian
    Servings 6 servings
    Calories 594 kcal

    Ingredients
      

    • 1 pound pappardelle pasta or other variety (500g)
    • 1 tablespoon butter (14g)
    • 2 cups tightly packed fresh basil leaves (100g)
    • 2 cloves garlic finely minced
    • ยฝ cup extra virgin olive oil (100g)
    • 3 tablespoons pine nuts (33g)
    • 1 teaspoon lemon juice optional
    • Salt to taste
    • ยฝ cup freshly grated parmigiano-reggiano cheese (56g)
    • 2 tablespoons freshly grated pecorino romano cheese (14g)
    • 2 tablespoons butter softened to room temperature (28g)
    • ยผ cup ricotta cheese (57g)

    Instructions
     

    For the pasta:

    • Over high heat, boil the pasta in salted water in a large pot until al dente. The water should be as salty as sea water. I use about 2 tablespoons.
    • Drain pasta, reserve some of the cooking liquid to thin the Ricotta Pesto as needed to the desired consistency.
    • Toss drained pasta with 1 tablespoon butter.

    To make in the food processor:

    • In the bowl of a food processor, combine basil, olive oil, pine nuts, minced garlic, optional lemon juice, and salt to taste. Process until creamy.
    • Transfer to a bowl and mix in the two cheeses, butter, and ricotta.

    To make with mortar and pestle:

    • Combine basil, pine nuts, minced garlic, and salt to taste (coarse is better in the mortar). Using the pestle with a rotary, grinding motion, grind the ingredients into a paste against the sides of the mortar.
    • Add both cheeses and the optional lemon and using the pestle grind into the paste.
    • Pour in olive oil in a thin stream and beat until incorporated with a wooden spoon.
    • Stir in butter and ricotta.

    Combine pasta and sauce:

    • Toss the Ricotta Pesto with the hot, buttered pasta, adding reserved pasta water as necessary to make a sauce that clings to the pasta. I stir about ยฝ cup of the reserved water into the pesto before adding to the pasta. Salt as needed to taste.

    Notes

    • Top with extra parmesan cheese if desired.
    • A little lemon zest in the pesto will add a bright flavor.
    • If youโ€™d like to add some leafy greens (in addition to the basil), feel free to blend up some baby spinach, kale, or arugula.
    • For added protein, try topping with grilled salmon, chicken, or shrimp.
    • For gluten free, use a gluten free pasta.

    Nutrition

    Calories: 594kcalCarbohydrates: 56gProtein: 16gFat: 34gSaturated Fat: 10gPolyunsaturated Fat: 5gMonounsaturated Fat: 18gTrans Fat: 0.3gCholesterol: 91mgSodium: 224mgPotassium: 265mgFiber: 3gSugar: 2gVitamin A: 763IUVitamin C: 2mgCalcium: 183mgIron: 2mg
    Keyword pesto pasta, ricotta pesto
    Tried this recipe?Let us know how it was!

    Enjoy, friends!

    Follow me on INSTAGRAM and PINTEREST for all the latest content and recipes!

    Subscribe to FOODTASIAโ€™S NEWSLETTER to receive fresh recipes straight to your inbox.

    You might also like:

    Pesto alla Genovese
    Pesto alla Genovese
    Pasta Caprese
    Pasta Caprese with Pesto
    Pasta with Pesto, Green Beans, and Potatoes

    Chocolate Raspberry Yogurt Parfait

    June 30, 2019 by Kelly 48 Comments

    Chocolate Raspberry Parfaits filled with layers of crunchy chocolate granola, creamy yogurt, and a fresh, sweet-tart raspberry sauce. Perfect for breakfast or dessert. #yogurt #parfait #easy #breakfast #raspberry #chocolate #granola #healthy #recipe #greek #fruit #desserts #brunch, #toppings #vanilla #berry #bowl

    Chocolate Raspberry Yogurt Parfait filled with layers of crunchy chocolate granola, creamy yogurt, and a fresh, sweet-tart raspberry sauce. Perfect for breakfast or dessert.

    Chocolate Raspberry Parfaits filled with layers of crunchy chocolate granola, creamy yogurt, and a fresh, sweet-tart raspberry sauce. Perfect for breakfast or dessert. #yogurt #parfait #easy #breakfast #raspberry #chocolate #granola #healthy #recipe #greek #fruit #desserts #brunch, #toppings #vanilla #berry #bowl

    This Chocolate Raspberry Yogurt Parfait has become something of an obsession of mine. I know, obsession seems like an exaggeration. But considering that Iโ€™ve been eating these for breakfast, afternoon snack, and dessert (and sometimes bedtime snack) โ€ฆ..

    Theyโ€™re very addictive.

    Chocolate Raspberry Yogurt Parfaits filled with layers of crunchy chocolate granola, creamy yogurt, and a fresh, sweet-tart raspberry sauce. Perfect for breakfast or dessert. #yogurt #parfait #easy #breakfast #raspberry #chocolate #granola #healthy #recipe #greek #fruit #desserts #brunch, #toppings #vanilla #berry #bowl

    The components for this Chocolate Raspberry Yogurt Parfait are easy to prepare and easy to keep on hand for whenever the craving strikes. Or when you want breakfast. Whichever comes first.

    Chocolate Raspberry Yogurt Parfaits filled with layers of crunchy chocolate granola, creamy yogurt, and a fresh, sweet-tart raspberry sauce. Perfect for breakfast or dessert. #yogurt #parfait #easy #breakfast #raspberry #chocolate #granola #healthy #recipe #greek #fruit #desserts #brunch, #toppings #vanilla #berry #bowl

    It all starts with the chocolatiest Double Chocolate Granola. Sweet, crunchy, and super chocolatey. Itโ€™s baked with a chocolatey coating. Then chocolate chips are sprinkled on top of the warm granola. You can either let the chips cool and they will keep their shape, while being fused to the granola. Or you can stir the melted chips into the granola and all of the clusters will be covered with chocolate. A sprinkling of raw sugar after everything has cooled gives added crunch.

    Double Chocolate Granola - crunchy chocolate oat clusters, sliced almonds, flakes of coconut, and best of all โ€“ a decadent chocolate coating. Sprinkled with raw sugar for even more crunch. Chocolate for breakfast? Yes, please! #granola #recipe #chocolate #cocoa #breakfast #easy #quick

    And what could be better with sweet, crunchy chocolate than a tart, intensely raspberry, Raspberry Sauce. My Raspberry Sauce that Practically Makes Itself was developed specifically with this parfait in mind. Itโ€™s perfectly syrupy with pieces of raspberries and a pure, fresh raspberry flavor. And as its name implies, it practically makes itself. Itโ€™s made with frozen raspberries that are macerated in sugar. Thereโ€™s no stove-top cooking involved so the berries retain their fresh flavor.

    A bright and tangy Raspberry Sauce that needs about 30 seconds of hands on time. It practically makes itself. Once you taste it, youโ€™ll start dreaming of all the things you can drizzle it over. #raspberry #sauce #easy #quick #desserts #recipe #homemade #foricecream #forwaffles #microwave #simple

    There are several choices for the yogurt to use in this parfait: plain, Greek, or vanilla. I like mine made with plain yogurt. I like the light and fluid texture of plain yogurt. I also like its tangy flavor. The amount of sugar I use in the Raspberry Sauce is perfect (for me) with unsweetened yogurt. Of course, adjust the amount of sugar to your own taste. If you use a sweetened vanilla yogurt, you may want to put less sugar in the Raspberry Sauce.

    Chocolate Raspberry Yogurt Parfaits filled with layers of crunchy chocolate granola, creamy yogurt, and a fresh, sweet-tart raspberry sauce. Perfect for breakfast or dessert. #yogurt #parfait #easy #breakfast #raspberry #chocolate #granola #healthy #recipe #greek #fruit #desserts #brunch, #toppings #vanilla #berry #bowl

    Jump to Section

    • Recipe
    • Chocolate Raspberry Yogurt Parfait

    Recipe

    Chocolate Raspberry Parfaits filled with layers of crunchy chocolate granola, creamy yogurt, and a fresh, sweet-tart raspberry sauce. Perfect for breakfast or dessert. #yogurt #parfait #easy #breakfast #raspberry #chocolate #granola #healthy #recipe #greek #fruit #desserts #brunch, #toppings #vanilla #berry #bowl

    Chocolate Raspberry Yogurt Parfait

    Kelly
    Chocolate Raspberry Parfait filled with layers of crunchy chocolate granola, creamy yogurt, and a fresh, sweet-tart raspberry sauce. Perfect for breakfast or dessert.
    5 from 11 votes
    Print Recipe Pin Recipe
    Prep Time 5 minutes mins
    Total Time 5 minutes mins
    Course Breakfast
    Cuisine American
    Servings 2 servings
    Calories 430 kcal

    Ingredients
      

    • 100 g Double Chocolate Granola
    • 100 g Raspberry Sauce sweetened to taste
    • 227 g yogurt: plain, Greek, or vanilla 1 cup

    Instructions
     

    • Layer the yogurt, raspberry sauce, and granola in glasses or small bowls.
    • Best assembled shortly before eating so the granola stays crunchy.

    Notes

    • Use any of your favorite granola, fruit, nuts, etc. as toppings.

    Nutrition

    Calories: 430kcalCarbohydrates: 71gProtein: 18gFat: 9gSaturated Fat: 1gPolyunsaturated Fat: 2gMonounsaturated Fat: 3gTrans Fat: 0.01gCholesterol: 6mgSodium: 68mgPotassium: 380mgFiber: 3gSugar: 28gVitamin A: 14IUVitamin C: 7mgCalcium: 172mgIron: 2mg
    Keyword raspberry sauce, yogurt parfait
    Tried this recipe?Let us know how it was!
    Chocolate Raspberry Parfaits filled with layers of crunchy chocolate granola, creamy yogurt, and a fresh, sweet-tart raspberry sauce. Perfect for breakfast or dessert. #yogurt #parfait #easy #breakfast #raspberry #chocolate #granola #healthy #recipe #greek #fruit #desserts #brunch, #toppings #vanilla #berry #bowl

    Enjoy, friends!

    Follow me on INSTAGRAM and PINTEREST for all the latest content and recipes!

    Subscribe to FOODTASIAโ€™S NEWSLETTER to receive fresh recipes straight to your inbox.

    You might also like:

    Crunchy clusters of maple sweetened granola with whole rolled oats, pecans, dates, pepitas, coconut and warm pumpkin spice. Healthy, delicious, and so easy to make!
    Maple Pumpkin Spice Granola with Dates and Pepitas
    Honey Almond Crunch Homemade Granola
    Chocolate Raspberry Parfaits filled with layers of crunchy chocolate granola, creamy yogurt, and a fresh, sweet-tart raspberry sauce. Perfect for breakfast or dessert. #yogurt #parfait #easy #breakfast #raspberry #chocolate #granola #healthy #recipe #greek #fruit #desserts #brunch, #toppings #vanilla #berry #bowl

    The Raspberry Sauce That Practically Makes Itself

    June 23, 2019 by Kelly 34 Comments

    A bright and tangy Raspberry Sauce that needs about 30 seconds of hands on time. It practically makes itself. Once you taste it, youโ€™ll start dreaming of all the things you can drizzle it over. #raspberry #sauce #easy #quick #desserts #recipe #homemade #foricecream #forwaffles #microwave #simple

    A bright, tart Raspberry Sauce that needs about 30 seconds of hands on time. It practically makes itself. Once you taste it, youโ€™ll start dreaming of all the things you can drizzle it over

    A bright and tangy Raspberry Sauce that needs about 30 seconds of hands on time. It practically makes itself. Once you taste it, youโ€™ll start dreaming of all the things you can drizzle it over. #raspberry #sauce #easy #quick #desserts #recipe #homemade #foricecream #forwaffles #microwave #simple

    This Raspberry Sauce is sweet, tart, and syrupy, just bursting with an intense raspberry flavor. Made with frozen raspberries, it requires no cooking, blending, or straining.

    A bright and tangy Raspberry Sauce that needs about 30 seconds of hands on time. It practically makes itself. Once you taste it, youโ€™ll start dreaming of all the things you can drizzle it over. #raspberry #sauce #easy #quick #desserts #recipe #homemade #foricecream #forwaffles #microwave #simple

    Jump to Section

    • How to make Raspberry Sauce
    • How to serve
    • Recipe
    • The Raspberry Sauce That Practically Makes Itself

    How to make Raspberry Sauce

    Or I should say โ€“ How to get Raspberry Sauce to make itself:

    • Put frozen raspberries in a bowl and stir in sugar and wait for the magic to happen.
    • Mash with a fork.

    And youโ€™re done.

    A bright and tangy Raspberry Sauce that needs about 30 seconds of hands on time. It practically makes itself. Once you taste it, youโ€™ll start dreaming of all the things you can drizzle it over. #raspberry #sauce #easy #quick #desserts #recipe #homemade #foricecream #forwaffles #microwave #simple

    So hereโ€™s whatโ€™s going on. Youโ€™re starting off with frozen berries. When berries are frozen, the water inside them freezes, which expands and breaks the cell walls of the berries. By using frozen berries, the breaking down of the berries into sauce has already started. You can use fresh berries, it will just take a little longer.

    A bright and tangy Raspberry Sauce that needs about 30 seconds of hands on time. It practically makes itself. Once you taste it, youโ€™ll start dreaming of all the things you can drizzle it over. #raspberry #sauce #easy #quick #desserts #recipe #homemade #foricecream #forwaffles #microwave #simple

    Next, macerate the berries by mixing them with sugar. This causes the juices in the berries to be drawn out and intensifies the flavor. They mix with the sugar to form a syrup. I speed things along a bit by sticking the berries in the microwave for about 2 minutes. I let them rest for about 3o minutes to an hour. This could take longer depending on how warm your kitchen is. You know the berries are ready when the juices have been released and the sugar has dissolved, forming a syrup.

    A bright and tangy Raspberry Sauce that needs about 30 seconds of hands on time. It practically makes itself. Once you taste it, youโ€™ll start dreaming of all the things you can drizzle it over. #raspberry #sauce #easy #quick #desserts #recipe #homemade #foricecream #forwaffles #microwave #simple

    Mash the berries to the desired consistency with a fork. You can leave bigger chunks of berries or mash it up more for a smoother sauce.

    I keep the seeds in for a more rustic, natural sauce. Donโ€™t want seeds in your sauce? Puree the berries in a blender and strain through a fine mesh strainer. Now you have a more sophisticated raspberry coulis.

    A bright and tangy Raspberry Sauce that needs about 30 seconds of hands on time. It practically makes itself. Once you taste it, youโ€™ll start dreaming of all the things you can drizzle it over. #raspberry #sauce #easy #quick #desserts #recipe #homemade #foricecream #forwaffles #microwave #simple

    How to serve

    This Raspberry Sauce is perfect for drizzling, pouring, and spooning anywhere that youโ€™d like a burst of sweet, tangy flavor. Here are some ideas:

    • yogurt
    • ice cream
    • oatmeal
    • pancakes
    • waffles
    • buttermilk biscuits
    • cheesecake
    • desserts

    Recipe

    A bright and tangy Raspberry Sauce that needs about 30 seconds of hands on time. It practically makes itself. Once you taste it, youโ€™ll start dreaming of all the things you can drizzle it over. #raspberry #sauce #easy #quick #desserts #recipe #homemade #foricecream #forwaffles #microwave #simple

    The Raspberry Sauce That Practically Makes Itself

    Kelly
    A bright and tangy Raspberry Sauce that needs about 30 seconds of hands on time. It practically makes itself. Once you taste it, youโ€™ll start dreaming of all the things you can drizzle it over!
    5 from 8 votes
    Print Recipe Pin Recipe
    Prep Time 1 minute min
    30 minutes mins
    Total Time 31 minutes mins
    Course Dessert
    Cuisine American
    Servings 5 servings
    Calories 35 kcal

    Ingredients
      

    • 12 oz frozen raspberries 340g
    • ยพ cup sugar (or to taste) 149g

    Instructions
     

    • Put frozen raspberries in a bowl.
    • Optional to speed things up: microwave for 2 minutes to thaw berries.
    • Mix sugar into berries and let rest on the counter for about 30 minutes to an hour, depending on how warm your kitchen and the berries are.
    • Berries will be ready when they have released their juices and the sugar has dissolved, forming a syrup.
    • Mash with a fork to the desired consistency.
    • Store in refrigerator for 3-4 days.

    Notes

    This Raspberry Sauce is perfect for drizzling, pouring, and spooning anywhere that youโ€™d like a burst of sweet, tangy flavor. Here are some ideas:
    • yogurt
    • ice cream
    • oatmeal
    • pancakes

    Nutrition

    Calories: 35kcalCarbohydrates: 8gProtein: 1gFat: 0.4gSaturated Fat: 0.01gPolyunsaturated Fat: 0.3gMonounsaturated Fat: 0.04gSodium: 1mgPotassium: 103mgFiber: 4gSugar: 3gVitamin A: 22IUVitamin C: 18mgCalcium: 17mgIron: 0.5mg
    Keyword raspberry sauce
    Tried this recipe?Let us know how it was!

    Enjoy, friends!

    Follow me on INSTAGRAM and PINTEREST for all the latest content and recipes!

    Subscribe to FOODTASIAโ€™S NEWSLETTER to receive fresh recipes straight to your inbox.

    You might also like:

    Ultra-smooth, rich and creamy white chocolate cheesecake on a buttery shortbread cookie crust, topped with raspberry sauce and fresh raspberries, this White Chocolate Raspberry Cheesecake is a favorite flavor combination.
    White Chocolate Raspberry Cheesecake
    Simple yet exquisite, Raspberry Financiers are lovely little French almond cakes with crispy exteriors and insides as soft as a pillow. Surprisingly quick and easy to make. #dessert #dessertrecipe #recipe #valentine #pastry #french #raspberry #almond #cake #baking #financier #financiers #easy #quick #eggwhites
    Almond Raspberry Financiers
    This is what I wanted to taste when I bit into that Subway White Chocolate Raspberry Cookie. But I didn't. So here's my vision of what White Chocolate Raspberry Cookies should be - thick and chewy cookies with chunks of white chocolate and tangy raspberries. A perfect flavor combination! Made from scratch - no box mix.
    White Chocolate Raspberry Cookies
    A bright and tangy Raspberry Sauce that needs about 30 seconds of hands on time. It practically makes itself. Once you taste it, youโ€™ll start dreaming of all the things you can drizzle it over. #raspberry #sauce #easy #quick #desserts #recipe #homemade #foricecream #forwaffles #microwave #simple

    Double Chocolate Granola

    June 16, 2019 by Kelly 56 Comments

    Double Chocolate Granola - crunchy chocolate oat clusters, sliced almonds, flakes of coconut, and best of all โ€“ a decadent chocolate coating. Sprinkled with raw sugar for even more crunch. Chocolate for breakfast? Yes, please! #granola #recipe #chocolate #cocoa #breakfast #easy #quick

    Double Chocolate Granola - crunchy chocolate oat clusters, sliced almonds, flakes of coconut, and best of all โ€“ a decadent chocolate coating. Sprinkled with raw sugar for even more crunch. Chocolate for breakfast? Yes, please!

    Double Chocolate Granola - crunchy chocolate oat clusters, sliced almonds, flakes of coconut, and best of all โ€“ a decadent chocolate coating. Sprinkled with raw sugar for even more crunch. Chocolate for breakfast? Yes, please! #granola #recipe #chocolate #cocoa #breakfast #easy #quick

    What started out as a healthy breakfast turned into what I crave for dessert. This Double Chocolate Granola is super chocolatey and adds a sweet crunch to anything you sprinkle it on. Try it with my easy, homemade Korean banana milk or my homemade strawberry milk!

    Double Chocolate Granola - crunchy chocolate oat clusters, sliced almonds, flakes of coconut, and best of all โ€“ a decadent chocolate coating. Sprinkled with raw sugar for even more crunch. Chocolate for breakfast? Yes, please! #granola #recipe #chocolate #cocoa #breakfast #easy #quick

    Jump to Section

    • Ways to eat
    • How to make Double Chocolate Granola
    • Hereโ€™s the magic to this recipe
    • Why I love making my own granola
    • Recipe
    • Double Chocolate Granola

    Ways to eat

    Layered in a parfait, sprinkled over a yogurt bowl, or in a bowl with milk - the possibilities are endless with this granola. I even love eating it by the handful as a snack.

    • Layered in a parfait
    • Sprinkled over a yogurt bowl
    • In a bowl with milk
    • By the handful
    • Sprinkled over a smoothie bowl
    • Mixed into ice cream
    • As part of a trail mix
    • Sprinkled over waffles or pancakes
    • Sprinkled over fruit

    Depending on how youโ€™re going to serve this, you could stir in some dried fruit. Dried cherries would be fantastic. Or dried oranges โ€“ yum! I havenโ€™t added dried fruit to the recipe because I often serve it with a fresh fruit. Like in a Raspberry Yogurt Parfait.

    Double Chocolate Granola - crunchy chocolate oat clusters, sliced almonds, flakes of coconut, and best of all โ€“ a decadent chocolate coating. Sprinkled with raw sugar for even more crunch. Chocolate for breakfast? Yes, please! #granola #recipe #chocolate #cocoa #breakfast #easy #quick

    How to make Double Chocolate Granola

    This recipe couldnโ€™t be simpler:

    • Combine the wet ingredients, cocoa, and brown sugar.
    • Stir in the rest of the dry ingredients (except coconut and chocolate chips).
    • Bake for about 30 minutes, stirring in the coconut in the last 5 minutes.
    • Sprinkle with chocolate chips and raw sugar.

    And enjoy! Itโ€™s so easy!

    Double Chocolate Granola - crunchy chocolate oat clusters, sliced almonds, flakes of coconut, and best of all โ€“ a decadent chocolate coating. Sprinkled with raw sugar for even more crunch. Chocolate for breakfast? Yes, please! #granola #recipe #chocolate #cocoa #breakfast #easy #quick
    Double Chocolate Granola - crunchy chocolate oat clusters, sliced almonds, flakes of coconut, and best of all โ€“ a decadent chocolate coating. Sprinkled with raw sugar for even more crunch. Chocolate for breakfast? Yes, please! #granola #recipe #chocolate #cocoa #breakfast #easy #quick
    Double Chocolate Granola - crunchy chocolate oat clusters, sliced almonds, flakes of coconut, and best of all โ€“ a decadent chocolate coating. Sprinkled with raw sugar for even more crunch. Chocolate for breakfast? Yes, please! #granola #recipe #chocolate #cocoa #breakfast #easy #quick
    Double Chocolate Granola - crunchy chocolate oat clusters, sliced almonds, flakes of coconut, and best of all โ€“ a decadent chocolate coating. Sprinkled with raw sugar for even more crunch. Chocolate for breakfast? Yes, please! #granola #recipe #chocolate #cocoa #breakfast #easy #quick
    Chocolate Granola before adding chocolate chips

    Hereโ€™s the magic to this recipe

    You start out with a delicious homemade chocolate granola. (Which is so good I sometimes just eat it as is.)

     When it comes out of the oven, you sprinkle chocolate chips over it and let it cool. The chocolate chips will become soft and melty from the heat of the granola, but they will keep their shape and solidify back to normal when they cool.

    Double Chocolate Granola - crunchy chocolate oat clusters, sliced almonds, flakes of coconut, and best of all โ€“ a decadent chocolate coating. Sprinkled with raw sugar for even more crunch. Chocolate for breakfast? Yes, please! #granola #recipe #chocolate #cocoa #breakfast #easy #quick

    Now you have two options here. You can let the granola cool completely until the chocolate chips are hardened in which case youโ€™ll have a chocolate โ€“ chocolate chip granola with chocolate chips fused into the clusters of granola.

    Or, you can stir the softened chocolate chips into the granola, giving you puddles of chocolate throughout the granola and coating the clusters.

    Both are amazing!

    Double Chocolate Granola - crunchy chocolate oat clusters, sliced almonds, flakes of coconut, and best of all โ€“ a decadent chocolate coating. Sprinkled with raw sugar for even more crunch. Chocolate for breakfast? Yes, please! #granola #recipe #chocolate #cocoa #breakfast #easy #quick

    The final touch is a sprinkle of raw sugar for added crunch and sweetness. I sprinkle it on when the chocolate chips are still soft and melty, but not too warm. That way they stick to the chocolate without dissolving.

    Double Chocolate Granola - crunchy chocolate oat clusters, sliced almonds, flakes of coconut, and best of all โ€“ a decadent chocolate coating. Sprinkled with raw sugar for even more crunch. Chocolate for breakfast? Yes, please! #granola #recipe #chocolate #cocoa #breakfast #easy #quick

    Why I love making my own granola

    I love making my own granola. There are so many different flavor combinations and add-ins. Youโ€™re only limited by your imagination. Check out my post on Homemade Granola. Itโ€™s so easy to customize the:

    • Oil โ€“ coconut, avocado, sunflower, canola, olive
    • Sweetener โ€“ honey, maple syrup, agave, brown sugar
    • Nuts and seeds
    • Dried fruits
    • Spices or other flavorings โ€“ chocolate! Or peanut butter, cinnamon

    Quality granolas sell for a premium price. Homemade granola lets you control what ingredients you want to use at a much better price.

    Double Chocolate Granola - crunchy chocolate oat clusters, sliced almonds, flakes of coconut, and best of all โ€“ a decadent chocolate coating. Sprinkled with raw sugar for even more crunch. Chocolate for breakfast? Yes, please! #granola #recipe #chocolate #cocoa #breakfast #easy #quick

    Recipe

    Double Chocolate Granola - crunchy chocolate oat clusters, sliced almonds, flakes of coconut, and best of all โ€“ a decadent chocolate coating. Sprinkled with raw sugar for even more crunch. Chocolate for breakfast? Yes, please! #granola #recipe #chocolate #cocoa #breakfast #easy #quick

    Double Chocolate Granola

    Kelly
    Double Chocolate Granola - crunchy chocolate oat clusters, sliced almonds, flakes of
    coconut, and best of all โ€“ a decadent chocolate coating.
    5 from 12 votes
    Print Recipe Pin Recipe
    Prep Time 5 minutes mins
    Cook Time 30 minutes mins
    Total Time 35 minutes mins
    Course Breakfast
    Cuisine American
    Servings 9 servings
    Calories 500 kcal

    Ingredients
      

    • โ…“ cup coconut oil (or other oil) 66g
    • โ…“ cup honey 119g
    • 1 teaspoon vanilla
    • ยฝ cup brown sugar 99g
    • โ…“ cup cocoa 25g
    • ยผ teaspoon salt
    • 3 cups old fashioned oats 240g
    • ยฝ cup sliced almonds 43g
    • ยฝ cup shredded coconut (I use sweetened) 37g
    • 1 ยฝ cups semi-sweet chocolate chips 275g
    • Raw sugar or other coarse sugar to taste

    Instructions
     

    • Combine honey, coconut oil, vanilla, brown sugar, cocoa, and salt in a mixing bowl. Mix until combined.
    • Stir in oats and almonds. Mix thoroughly until the oats are evenly covered.
    • Put granola mixture on a non-stick baking sheet or a baking sheet covered with baking parchment.
    • Bake in a preheated 350 degree F oven for about 15 minutes.
    • Add coconut to granola and stir gently.
    • Bake another 15 minutes until granola is golden and fragrant.
    • Remove from oven, sprinkle on chocolate chips.
    • Either let cool without stirring if you want the chocolate chips to keep their shape, or stir the melted chocolate chips through the granola. Sprinkle on raw sugar to taste before chocolate completely sets.
    • Let cool completely then break pieces of granola into clusters of desired size.
    • Store in an airtight container.

    Notes

    Ways to enjoy granola:
    • Layered in a parfait
    • Sprinkled over a yogurt bowl
    • In a bowl with milk
    • By the handful
    • Sprinkled over a smoothie bowl
    • Mixed into ice cream

    Nutrition

    Calories: 500kcalCarbohydrates: 61gProtein: 8gFat: 28gSaturated Fat: 17gPolyunsaturated Fat: 2gMonounsaturated Fat: 6gTrans Fat: 0.02gCholesterol: 2mgSodium: 76mgPotassium: 405mgFiber: 8gSugar: 34gVitamin A: 15IUVitamin C: 0.1mgCalcium: 63mgIron: 4mg
    Keyword chocolate granola
    Tried this recipe?Let us know how it was!

    Enjoy, friends!

    Follow me on INSTAGRAM and PINTEREST for all the latest content and recipes!

    Subscribe to FOODTASIAโ€™S NEWSLETTER to receive fresh recipes straight to your inbox.

    You might also like:

    Honey Almond Crunch Homemade Granola
    Crunchy clusters of maple sweetened granola with whole rolled oats, pecans, dates, pepitas, coconut and warm pumpkin spice. Healthy, delicious, and so easy to make!
    Maple Pecan Pumpkin Spice Granola
    Double Chocolate Granola - crunchy chocolate oat clusters, sliced almonds, flakes of coconut, and best of all โ€“ a decadent chocolate coating. Sprinkled with raw sugar for even more crunch. Chocolate for breakfast? Yes, please! #granola #recipe #chocolate #cocoa #breakfast #easy #quick

    Easy Artichoke Ravioli with Sun Dried Tomatoes and Fried Capers

    June 8, 2019 by Kelly 54 Comments

    a dish of artichoke ravioli

    This Easy Artichoke Ravioli is full of the flavors of the Mediterranean! Ravioli is stuffed with lemony, marinated artichokes, creamy ricotta, and parmesan. Itโ€™s tossed in a simple parsley butter with sun dried tomatoes and fried capers sprinkled on top. Made quick and easy using dumpling wrappers (gyoza).

    This Easy Artichoke Ravioli is full of the flavors of the Mediterranean! Ravioli is stuffed with lemony, marinated artichokes, creamy ricotta, and parmesan. Itโ€™s tossed in a simple parsley butter with sun dried tomatoes and fried capers sprinkled on top. Made quick and easy using dumpling wrappers (gyoza). #ravioli #pasta #gyoza #dumplingwrapper #wonton #italian #artichoke #sundriedtomato #capers #easy #dinner

    Ever since I started making my own Marinated Artichokes, I just want to put them in everything! Their fresh, lemony flavor brightens up so many dishes. This Artichoke Ravioli is one of my favorites.

    The flavors in this Easy Artichoke Ravioli are just amazing. The base for the ravioli is ricotta. I make it with my Homemade Ricotta and itโ€™s just creamy and divine. You can also use store bought.

    This Easy Artichoke Ravioli is full of the flavors of the Mediterranean! Ravioli is stuffed with lemony, marinated artichokes, creamy ricotta, and parmesan. Itโ€™s tossed in a simple parsley butter with sun dried tomatoes and fried capers sprinkled on top. Made quick and easy using dumpling wrappers (gyoza). #ravioli #pasta #gyoza #dumplingwrapper #wonton #italian #artichoke #sundriedtomato #capers #easy #dinner

    Mixed into the ricotta are marinated artichoke hearts. Once again, I use my Easy Marinated Artichoke Hearts. Their flavor is superior to anything you can buy in a jar and they take minutes to prepare.

    A hint of lemon zest brightens things up without being overpowering, and parmesan adds a rich, cheesy, umami flavor.

    This Easy Artichoke Ravioli is full of the flavors of the Mediterranean! Ravioli is stuffed with lemony, marinated artichokes, creamy ricotta, and parmesan. Itโ€™s tossed in a simple parsley butter with sun dried tomatoes and fried capers sprinkled on top. Made quick and easy using dumpling wrappers (gyoza). #ravioli #pasta #gyoza #dumplingwrapper #wonton #italian #artichoke #sundriedtomato #capers #easy #dinner

    Iโ€™ve kept the sauce simple so that it complements the ravioli. Melted butter is the base of the sauce for its buttery richness. I havenโ€™t browned it to keep things fresh and sunny. Parsley pairs perfectly with artichoke and adds to the freshness of the sauce.

    Sprinkled on top are sun dried tomatoes for a little tang. Fried Capers are magical little flavor bombs, adding a salty, briny flavor and a surprising crispy crunch.

    Put these flavors all together โ€“ artichoke, lemon, sun dried tomato, capers, parsley โ€“ with creamy ricotta and butter - and itโ€™s so good. Unbelievably good.

    This Easy Artichoke Ravioli is full of the flavors of the Mediterranean! Ravioli is stuffed with lemony, marinated artichokes, creamy ricotta, and parmesan. Itโ€™s tossed in a simple parsley butter with sun dried tomatoes and fried capers sprinkled on top. Made quick and easy using dumpling wrappers (gyoza). #ravioli #pasta #gyoza #dumplingwrapper #wonton #italian #artichoke #sundriedtomato #capers #easy #dinner

    Jump to Section

    • How to make ravioli with dumpling wrappers (gyoza)
    • How to make Artichoke Ravioli
    • How to freeze
    • Recipe
    • Easy Artichoke Ravioli

    How to make ravioli with dumpling wrappers (gyoza)

    I love homemade Ravioli, but letโ€™s face it, I donโ€™t often have the time. But I still want to enjoy my favorite ravioli flavors. Making ravioli with dumpling wrappers is the perfect alternative. Theyโ€™re fast, easy, and very much like pasta. Theyโ€™re thicker and more pasta like than wonton wrappers. I try to find the smallest, thickest wrappers I can, about 3 ยฝ inches wide. Look for frozen dumpling wrappers in Asian grocery stores.

    Making ravioli with dumpling wrappers is so quick and easy. Keep the wrappers frozen and thaw for about an hour before using (or follow the directions on the package). Place a wrapper on the work surface, spoon the filling on top being sure not to get any on the edges. Wet the edges of the wrapper with water using a brush or your finger. Place a wrapper on top, gently pressing out any air bubbles and sealing the edges, without pushing any of the filling into the edges.

    How to make Artichoke Ravioli

    To make the filling for the Artichoke Ravioli, start with the marinated artichokes. I highly recommend making my Easy Marinated Artichokes, their flavor canโ€™t be matched by those from a jar. Theyโ€™re super quick and easy. They take about 5 minutes to make and theyโ€™re made from artichoke hearts canned in water. At the very least, cut up a can of artichoke hearts and toss them with about 1-2 tablespoons lemon juice, 1-2 tablespoons olive oil, a little dried oregano, a little salt, and a little chili flakes. Let it sit for about 5 minutes and youโ€™re ready to go. The fresh lemon and olive oil will give them a delicious flavor thatโ€™s hard to find in a jar. Itโ€™s all about the quality ingredients.

    This Easy Artichoke Ravioli is full of the flavors of the Mediterranean! Ravioli is stuffed with lemony, marinated artichokes, creamy ricotta, and parmesan. Itโ€™s tossed in a simple parsley butter with sun dried tomatoes and fried capers sprinkled on top. Made quick and easy using dumpling wrappers (gyoza). #ravioli #pasta #gyoza #dumplingwrapper #wonton #italian #artichoke #sundriedtomato #capers #easy #dinner

    So, starting with marinated artichoke hearts, drain them and squeeze off any excess liquid that might make the filling too runny. (Leftover marinade from my Easy Marinated Artichokes makes a great dressing for salad or vegetables.) Pulse them a few times in a food processor or chop them by hand.

    Ricotta cheese is added next. I use my Homemade Ricotta Cheese, itโ€™s so creamy and rich. I love using the version made with cream for the creamiest, richest ravioli. For a lighter version, use the milk only Homemade Ricotta. Store bought ricotta will also do.

    Add 1 finely minced garlic clove, 1 ounce of parmesan, and ยฝ teaspoon lemon zest, just a touch to brighten without overpowering the delicate flavor of the artichokes. Salt and pepper to taste. I use a few pinches of both, depending on how salty the artichokes are. After mixing, give it a taste so you can add more salt if necessary.

    This Easy Artichoke Ravioli is full of the flavors of the Mediterranean! Ravioli is stuffed with lemony, marinated artichokes, creamy ricotta, and parmesan. Itโ€™s tossed in a simple parsley butter with sun dried tomatoes and fried capers sprinkled on top. Made quick and easy using dumpling wrappers (gyoza). #ravioli #pasta #gyoza #dumplingwrapper #wonton #italian #artichoke #sundriedtomato #capers #easy #dinner

    Pulse the ingredients in the food processor or mix by hand just until combined. Itโ€™s nice to see flecks of artichoke in the filling. Taste for seasoning at this point. Depending on how lemony and salty the artichokes are, you may or may not need to add more salt. You can also add a teaspoon of lemon juice if you think it needs it. If my marinated artichokes have enough lemon still clinging to them, the extra teaspoon may not be necessary.

    This Easy Artichoke Ravioli is full of the flavors of the Mediterranean! Ravioli is stuffed with lemony, marinated artichokes, creamy ricotta, and parmesan. Itโ€™s tossed in a simple parsley butter with sun dried tomatoes and fried capers sprinkled on top. Made quick and easy using dumpling wrappers (gyoza). #ravioli #pasta #gyoza #dumplingwrapper #wonton #italian #artichoke #sundriedtomato #capers #easy #dinner

    Keep the wrappers frozen and thaw for about an hour before using (or follow the directions on the package). Place a wrapper on the work surface, spoon the filling on top being sure not to get any on the edges. Wet the edges of the wrapper with water using a brush or your finger. Place a wrapper on top, gently pressing out any air bubbles and sealing the edges, without pushing any of the filling into the edges.

    I use about 1 tablespoon (16g) of filling for a 3 ยฝ inch wrapper.

    Lay the filled ravioli out on a lightly floured surface as you make them. If you will be holding them a few hours before cooking them, put them in a sealed container with a sheet of wax paper in between the layers. The edges that you put water on for sealing should be dry before layering. Store in the refrigerator until ready or use. They can also be frozen.

    This Easy Artichoke Ravioli is full of the flavors of the Mediterranean! Ravioli is stuffed with lemony, marinated artichokes, creamy ricotta, and parmesan. Itโ€™s tossed in a simple parsley butter with sun dried tomatoes and fried capers sprinkled on top. Made quick and easy using dumpling wrappers (gyoza). #ravioli #pasta #gyoza #dumplingwrapper #wonton #italian #artichoke #sundriedtomato #capers #easy #dinner

    Boil the ravioli in salted water until al dente, about 4-5 minutes. Boil them in batches so you donโ€™t crowd the pan. Give them a stir occasionally to be sure theyโ€™re not sticking to each other. I cook about 7 at a time. You can remove one and test it by testing the sealed edge โ€“ the thickest part.

    Toss the cooked Artichoke Ravioli in melted butter and chopped fresh parsley. Salt to taste. Sprinkle on chopped sun dried tomatoes and fried capers to garnish. Check out my post on Fried Capers. They take just minutes to make, but add a wonderful salty, briny flavor and light, crispy crunch. Top with grated parmesan.

    This Easy Artichoke Ravioli is full of the flavors of the Mediterranean! Ravioli is stuffed with lemony, marinated artichokes, creamy ricotta, and parmesan. Itโ€™s tossed in a simple parsley butter with sun dried tomatoes and fried capers sprinkled on top. Made quick and easy using dumpling wrappers (gyoza). #ravioli #pasta #gyoza #dumplingwrapper #wonton #italian #artichoke #sundriedtomato #capers #easy #dinner

    How to freeze

    Artichoke Ravioli can definitely be frozen. Freeze them in a single layer on a baking sheet. When they are frozen you can put them in a ziplock bag. Frozen Artichoke Ravioli are perfect for the quickest weeknight dinner or lunch. Just pull a couple out of the bag and boil them whenever the craving strikes.

    This Easy Artichoke Ravioli is full of the flavors of the Mediterranean! Ravioli is stuffed with lemony, marinated artichokes, creamy ricotta, and parmesan. Itโ€™s tossed in a simple parsley butter with sun dried tomatoes and fried capers sprinkled on top. Made quick and easy using dumpling wrappers (gyoza). #ravioli #pasta #gyoza #dumplingwrapper #wonton #italian #artichoke #sundriedtomato #capers #easy #dinner

    Recipe

    This Easy Artichoke Ravioli is full of the flavors of the Mediterranean! Ravioli is stuffed with lemony, marinated artichokes, creamy ricotta, and parmesan. Itโ€™s tossed in a simple parsley butter with sun dried tomatoes and fried capers sprinkled on top. Made quick and easy using dumpling wrappers (gyoza). #ravioli #pasta #gyoza #dumplingwrapper #wonton #italian #artichoke #sundriedtomato #capers #easy #dinner

    Easy Artichoke Ravioli

    Kelly
    This Easy Artichoke Ravioli is full of the flavors of the Mediterranean! Ravioli is
    stuffed with lemony, marinated artichokes, creamy ricotta, and parmesan. Itโ€™s
    tossed in a simple parsley butter with sun dried tomatoes and fried capers
    sprinkled on top. Made quick and easy using dumpling wrappers (gyoza).
    5 from 15 votes
    Print Recipe Pin Recipe
    Prep Time 30 minutes mins
    Cook Time 15 minutes mins
    Total Time 45 minutes mins
    Course Main Course
    Cuisine Italian
    Servings 6 servings
    Calories 544 kcal

    Ingredients
      

    • 60 dumpling wrappers gyoza, thawed for about 1 hour before using

    For the filling:

    • 1 ยฝ cups marinated artichoke hearts *see note (about 7.6oz, 215g, drained and squeezed)
    • 1 cup ricotta cheese *see note (8oz,227g)
    • ยฝ teaspoon finely grated lemon zest
    • 1 clove garlic minced
    • ยฝ cup grated parmesan cheese (1oz, 28g)
    • Salt and pepper to taste I use a few pinches of both
    • 1 teaspoon lemon juice (optional) to taste, depending on how lemony Artichoke Hearts are

    For the Sauce:

    • 8 tablespoons unsalted butter (4oz, 113g)
    • ยฝ cup chopped fresh parsley
    • Salt to taste

    To garnish:

    • ยฝ cup chopped sun dried tomatoes (2oz, 57g)
    • ยฝ cup Fried Capers *see note
    • Freshly grated parmesan

    Instructions
     

    • Drain the marinated artichokes and lightly squeeze off any excess liquid.
    • Pulse them a few times in a food processor or chop them by hand.
    • Add ricotta, finely minced garlic clove, parmesan, and lemon zest. Salt and pepper to taste.
    • Pulse the ingredients in the food processor or mix by hand just until combined. Itโ€™s nice to see flecks of artichoke in the filling.
    • Taste for seasoning at this point. Depending on how lemony and salty the artichokes are, you may or may not need to add more salt. You can also add a teaspoon of lemon juice if you think it needs it. If the marinated artichokes have enough lemon still clinging to them, the extra teaspoon may not be necessary.
    • Place a wrapper on the work surface. Spoon the filling on top being sure not to get any on the edges. Wet the edges of the wrapper with water using a brush or your finger. Place a wrapper on top, gently pressing out any air bubbles and sealing the edges, without pushing any of the filling into the edges.
    • I use about 1 tablespoon (16g) of filling for a 3 ยฝ inch wrapper.
    • Lay the filled ravioli out on a lightly floured surface as you make them. If you will be holding them a few hours before cooking them, put them in a sealed container with a sheet of wax paper in between the layers. The edges that you put water on for sealing should be dry before layering. Store in the refrigerator until ready or use. They can also be frozen.
    • Boil the ravioli in salted water until al dente, about 4-5 minutes. Boil them in batches so you donโ€™t crowd the pan. Give them a stir occasionally to be sure theyโ€™re not sticking to each other. I cook about 7 at a time. You can remove one and test it by testing the sealed edge โ€“ the thickest part.
    • For the Sauce: Melt the butter in a sauce pan. Turn off the heat and add chopped parsley and salt to taste.
    • Toss the cooked Artichoke Ravioli in melted butter and chopped fresh parsley.
    • Sprinkle on chopped sun dried tomatoes and fried capers to garnish.
    • Top with grated parmesan.

    Notes

    • Makes about 30 ravioli
    • For the ricotta, check out my Homemade Ricotta.
    • For the marinated artichoke hearts, I highly recommend using my Easy Marinated Artichoke Hearts. They taste so much better than jarred and take only minutes to make.
    • 1 ยฝ cups drained and lightly squeezed marinated artichoke hearts weighs about 7.6oz, 215g.
    • You can substitute wonton wrappers if dumpling wrappers are unavailable.
    • To make Fried Capers, check out my post here.ย 

    Nutrition

    Calories: 544kcalCarbohydrates: 55gProtein: 17gFat: 29gSaturated Fat: 15gPolyunsaturated Fat: 1gMonounsaturated Fat: 6gTrans Fat: 1gCholesterol: 75mgSodium: 1218mgPotassium: 475mgFiber: 4gSugar: 4gVitamin A: 1755IUVitamin C: 22mgCalcium: 233mgIron: 4mg
    Keyword artichoke ravioli
    Tried this recipe?Let us know how it was!
    This Easy Artichoke Ravioli is full of the flavors of the Mediterranean! Ravioli is stuffed with lemony, marinated artichokes, creamy ricotta, and parmesan. Itโ€™s tossed in a simple parsley butter with sun dried tomatoes and fried capers sprinkled on top. Made quick and easy using dumpling wrappers (gyoza). #ravioli #pasta #gyoza #dumplingwrapper #wonton #italian #artichoke #sundriedtomato #capers #easy #dinner

    Enjoy, friends!

    Follow me on INSTAGRAM and PINTEREST for all the latest content and recipes!

    Subscribe to FOODTASIAโ€™S NEWSLETTER to receive fresh recipes straight to your inbox.

    You might also like:

    Crispy, nutty, and briny, Fried Capers are magical little flavor bombs that add an incredible dimension of flavor and texture to salads, pasta, meat, and vegetable dishes. #garnish #italian #recipe #easy #quick #flavor #fried #whatare #howtouse

    Fried Capers - Magical Flavor Bombs for Your Food
    The creamiest, smoothest, most delicious homemade ricotta cheese. You wonโ€™t believe how easy and foolproof this recipe is! #ricotta #homemade #cheese #italian #creamy #easy #recipe #simple #withoutcream #cream
    How to Make Homemade Ricotta
    Ready in 5 minutes! You wonโ€™t believe how easy and how delicious these Easy Marinated Artichoke Hearts are! #artichokes #artichokehearts #marinated #italian #recipe #appetizer #antipasto #salad #food #easy #quick #homemade #5minute
    Easy Marinated Artichokes
    Butternut Squash Ravioli topped with crispy sage, browned butter, and crunchy bacon โ€“ my favorite dish for fall! Easy to make with dumpling or wonton wrappers. Truly comfort food at its finest! #ravioli #butternut #butternutsquash #butternutsquashrecipes #pasta #pastafoodrecipes #recipesfordinner #recipeseasyfast #easy #shortcut #shortcutfoodie #easydinner #easydinnerrecipes #easydinnerideas
    Easy Butternut Squash Ravioli with Crispy Sage, Browned Butter, and Bacon
    This Easy Artichoke Ravioli is full of the flavors of the Mediterranean! Ravioli is stuffed with lemony, marinated artichokes, creamy ricotta, and parmesan. Itโ€™s tossed in a simple parsley butter with sun dried tomatoes and fried capers sprinkled on top. Made quick and easy using dumpling wrappers (gyoza). #ravioli #pasta #gyoza #dumplingwrapper #wonton #italian #artichoke #sundriedtomato #capers #easy #dinner

    Fried Capers - Magical Flavor Bombs for Your Food

    May 30, 2019 by Kelly 75 Comments

    Crispy, nutty, and briny, Fried Capers are magical little flavor bombs that add an incredible dimension of flavor and texture to salads, pasta, meat, and vegetable dishes. #garnish #italian #recipe #easy #quick #flavor #fried #whatare #howtouse

    Crispy, nutty, and briny, Fried Capers are magical little flavor bombs that add an incredible dimension of flavor and texture to salads, pasta, meat, and vegetable dishes.

    Crispy, nutty, and briny, Fried Capers are magical little flavor bombs that add an incredible dimension of flavor and texture to salads, pasta, meat, and vegetable dishes. #garnish #italian #recipe #easy #quick #flavor #fried #whatare #howtouse

    Something magical happens when you quickly fry capers. They lose a lot of their pungency and become nutty, crisp and incredibly light. Imagine a flower bud immediately blooming on contact with hot oil, each of its petals becoming ethereally light and crispy. Their salty, briny flavor makes them an addictive little garnish.

    Crispy, nutty, and briny, Fried Capers are magical little flavor bombs that add an incredible dimension of flavor and texture to salads, pasta, meat, and vegetable dishes. #garnish #italian #recipe #easy #quick #flavor #fried #whatare #howtouse

    Jump to Section

    • What are capers?
    • What do fried capers taste like?
    • Where do capers come from?
    • How to make fried capers
    • How to use
    • How to store
    • Recipe
    • Fried Capers - Magical Flavor Bombs for Your Food

    What are capers?

    Capers are the unopened flower buds of the spiny caper bush (Capparis spinose). They get their sharp pungency from a sulfurous, mustard-like compound called glucocapparin.  Capers of all sizes may be cured in salt or brined in salt and vinegar. They are found in dishes like veal piccata, tapenade, and spaghetti alla puttanesca.

    Capers are not the same thing as caper berries. While capers are the immature flower buds of the bush, caper berries are the fruit the bush produces once the buds have flowered and then been fertilized. Caper berries are about the size of a grape and are often harvested with their stems attached. They are also cured in vinegar like capers.

    Capers are not naturally sour; to obtain the briny, salty flavor for which they are famous they must be cured in seasoned vinegar, a process that been used for thousands of years.

    Crispy, nutty, and briny, Fried Capers are magical little flavor bombs that add an incredible dimension of flavor and texture to salads, pasta, meat, and vegetable dishes. #garnish #italian #recipe #easy #quick #flavor #fried #whatare #howtouse

    What do fried capers taste like?

    Capers have been valued since ancient times for the burst of salty, lemony, briny flavor they give to foods. Get past the brine, and they have a floral, grassy flavor. Frying capers takes away some of the vinegary sharpness and brings out a nutty, crispy, crunchiness. When fried, the flower buds open up and each petal becomes as light as gauze and crackly crisp. Even the stamens inside the flower become crispy.

    Where do capers come from?

    Capers are grown in parts of Asia, the Middle East, the Mediterranean, North Africa, Southern Europe, Turkey and California.

    Pickling capers is a long and tedious process. The plant from which the tiny flower buds are plucked is prickly, and theyโ€™re too small and delicate to be plucked by machine, so they have to be harvested individually by hand. After being picked, capers are sorted by size. The smallest are named โ€œnon pareillesโ€ and are the most expensive. Next in size are surfines, capuchins, fines, and capotes. Then they are dried, brined, or salted.

    Crispy, nutty, and briny, Fried Capers are magical little flavor bombs that add an incredible dimension of flavor and texture to salads, pasta, meat, and vegetable dishes. #garnish #italian #recipe #easy #quick #flavor #fried #whatare #howtouse

    How to make fried capers

    Use capers that are brined in a jar. Drain the capers and put them on a paper towel or kitchen towel to dry them as much as possible.

    Crispy, nutty, and briny, Fried Capers are magical little flavor bombs that add an incredible dimension of flavor and texture to salads, pasta, meat, and vegetable dishes. #garnish #italian #recipe #easy #quick #flavor #fried #whatare #howtouse

    In a small saucepan, heat โ…› inch vegetable or olive oil until it shimmers (350ยฐF). Add the capers to the hot oil (theyโ€™ll give off some liquid at first, so watch out for spattering oil) and fry until they turn golden brown and begin to crisp. This takes me about 2-3 minutes, depending on the size of the caper. Fry in batches if youโ€™re doing a lot, otherwise youโ€™ll cool the oil down too much.

    Crispy, nutty, and briny, Fried Capers are magical little flavor bombs that add an incredible dimension of flavor and texture to salads, pasta, meat, and vegetable dishes. #garnish #italian #recipe #easy #quick #flavor #fried #whatare #howtouse

    Drain carefully and put on paper towels to absorb excess oil. The capers can be made 3 to 4 hours ahead; keep them uncovered at room temperature.

    Crispy, nutty, and briny, Fried Capers are magical little flavor bombs that add an incredible dimension of flavor and texture to salads, pasta, meat, and vegetable dishes. #garnish #italian #recipe #easy #quick #flavor #fried #whatare #howtouse

    How to use

    Fried Capers add a pop of briny, fruitiness to any dish. Theyโ€™re an elegant garnish for pasta, salads, fish, or grilled meats. Theyโ€™re also addictive little nibbles on their own! Leftover frying oil will be infused with caper flavor and can be used again to sautรฉ fish, chicken, or vegetables, or wherever you might like the flavor of capers.

    How to store

    The capers can be made 3 to 4 hours ahead. Keep them uncovered at room temperature so they stay crispy. Any leftover can be stored at room temperature, covered, for up to 3 days.

    Crispy, nutty, and briny, Fried Capers are magical little flavor bombs that add an incredible dimension of flavor and texture to salads, pasta, meat, and vegetable dishes. #garnish #italian #recipe #easy #quick #flavor #fried #whatare #howtouse

    Recipe

    Crispy, nutty, and briny, Fried Capers are magical little flavor bombs that add an incredible dimension of flavor and texture to salads, pasta, meat, and vegetable dishes. #garnish #italian #recipe #easy #quick #flavor #fried #whatare #howtouse

    Fried Capers - Magical Flavor Bombs for Your Food

    Kelly
    Crispy, nutty, and briny, Fried Capers are magical little flavor bombs that add an incredible dimension of flavor and texture to salads, pasta, meat, and vegetable dishes.
    5 from 14 votes
    Print Recipe Pin Recipe
    Prep Time 2 minutes mins
    Cook Time 3 minutes mins
    Total Time 5 minutes mins
    Course Side Dish
    Cuisine American
    Servings 6 servings
    Calories 4 kcal

    Ingredients
      

    • 3.25 oz jarred capers in brine
    • vegetable or olive oil to fill small saucepan โ…› inch deep

    Instructions
     

    • Pour oil into small sauce pan to โ…› inch deep.
    • Heat oil until shimmering or 350F.
    • Drain capers and dry on paper towels or kitchen towel.
    • Add capers to pan without overcrowding, in batches if making a large quantity.
    • Fry until golden brown, about 2-3 minutes.
    • Carefully remove capers from oil with a slotted spoon and drain on paper towel.
    • Let rest a few minutes before using. If making ahead, they can stay uncovered at room temperature for several hours.
    • To store, keep in covered container at room temperature for several days.

    Notes

    • Make sure to drain the capers in a strainer as well as pat dry!

    Nutrition

    Calories: 4kcalCarbohydrates: 1gProtein: 0.4gFat: 0.1gSaturated Fat: 0.03gPolyunsaturated Fat: 0.05gMonounsaturated Fat: 0.01gSodium: 425mgPotassium: 6mgFiber: 0.5gSugar: 0.1gVitamin A: 21IUVitamin C: 1mgCalcium: 6mgIron: 0.3mg
    Keyword fried capers
    Tried this recipe?Let us know how it was!
    Crispy, nutty, and briny, Fried Capers are magical little flavor bombs that add an incredible dimension of flavor and texture to salads, pasta, meat, and vegetable dishes. #garnish #italian #recipe #easy #quick #flavor #fried #whatare #howtouse

    Enjoy, friends!

    Follow me on INSTAGRAM and PINTEREST for all the latest content and recipes!

    Subscribe to FOODTASIAโ€™S NEWSLETTER to receive fresh recipes straight to your inbox.

    Crispy, nutty, and briny, Fried Capers are magical little flavor bombs that add an incredible dimension of flavor and texture to salads, pasta, meat, and vegetable dishes. #garnish #italian #recipe #easy #quick #flavor #fried #whatare #howtouse

    How to Make Homemade Ricotta Cheese (2 ways)

    May 23, 2019 by Kelly 65 Comments

    The creamiest, smoothest, most delicious homemade ricotta cheese. You wonโ€™t believe how easy and foolproof this recipe is! #ricotta #homemade #cheese #italian #creamy #easy #recipe #simple #withoutcream #cream

    Milk, optional cream, lemon juice, and a few minutes of hands-on time are all you need to make the creamiest, smoothest, most delicious homemade ricotta cheese. You wonโ€™t believe how easy and foolproof this recipe is! Youโ€™ll never want to go back to store bought again.

    The creamiest, smoothest, most delicious homemade ricotta cheese. You wonโ€™t believe how easy and foolproof this recipe is! #ricotta #homemade #cheese #italian #creamy #easy #recipe #simple #withoutcream #cream
    Homemade Ricotta Cheese made with milk

    Jump to Section

    • Homemade Ricotta Cheese is so lush and decadent
    • How is Ricotta traditionally made?
    • What's it made out of?
    • Homemade Ricotta made with milk or milk and cream
    • How to make with milk
    • How to make with milk and cream
    • What kind of milk do I use
    • How much does this recipe yield?
    • What type of acid is used
    • How much acid should I use?
    • How much salt do I use?
    • How long to strain
    • Storage
    • How to freeze
    • How to serve
    • Recipe
    • Homemade Ricotta (2 ways)

    Homemade Ricotta Cheese is so lush and decadent

    I love the creamy richness of fresh ricotta cheese. Itโ€™s so lush and so decadent. You would never catch me eating a spoonful of store bought ricotta, but fresh, Homemade Ricotta Cheese is so good. You know when you keep tasting it and each time youโ€™re like Wow! I canโ€™t believe how good this is? Thatโ€™s this ricotta.

    The creamiest, smoothest, most delicious homemade ricotta cheese. You wonโ€™t believe how easy and foolproof this recipe is! #ricotta #homemade #cheese #italian #creamy #easy #recipe #simple #withoutcream #cream
    Homemade Ricotta cheese made with milk and cream

    How is Ricotta traditionally made?

    Ricotta is the Italian word for "re-cooked," which describes the two-stage heating and coagulation process that goes into making cheese and then ricotta.

    First, cheese is made from milk using rennet. The casein proteins in the milk bond forming the cheese, (including much of the dairy fat), leaving the whey proteins.

    The whey is then heated again, allowing the whey proteins to coagulate, forming ricotta curds.

    What's it made out of?

    Unless you have leftover whey from making cheese with rennet at home, you canโ€™t make the traditional ricotta. You can, however, make a cheese that is very similar to a true ricotta. While technically a fresh cheese, it has a much better taste and texture than the ricotta you can buy in a tub in the supermarket.

    Milk, with or without the addition of cream, is heated and acid, usually in the form of lemon juice or vinegar, is added which causes the proteins to coagulate and form curds. These curds, when strained, form the ricotta.

    Homemade Ricotta made with milk or milk and cream

    I have two recipes for ricotta that I really love, one with milk and one with milk and cream. The recipe with only milk yields a product that is closer to a true ricotta.

    The creamiest, smoothest, most delicious homemade ricotta cheese. You wonโ€™t believe how easy and foolproof this recipe is! #ricotta #homemade #cheese #italian #creamy #easy #recipe #simple #withoutcream #cream
    Homemade Ricotta made with milk

    The recipe with milk and cream yields a product that is so heavenly and luscious. This is the recipe I use when Iโ€™m feeling particularly indulgent to dollop on top of pancakes or as a topping for toast with fresh fruit. Itโ€™s also amazing in ravioli or cannoli.

    The creamiest, smoothest, most delicious homemade ricotta cheese. You wonโ€™t believe how easy and foolproof this recipe is! #ricotta #homemade #cheese #italian #creamy #easy #recipe #simple #withoutcream #cream
    Homemade Ricotta with milk and cream

    Iโ€™ve given the recipe and instructions for both below.

    How to make with milk

    If you want a ricotta that is closer to a traditional ricotta and made with only milk,  heat the salt and milk to 185 F. Turn off the heat, and gently stir in the acid, just a time or two around the pan, then let rest, untouched for 20 minutes. During this time, keep the temperature at about 185 degrees F. It can go down to 175 F or up to 190 F, but try to keep it in that range. I just take a look at the thermometer every so often and turn on the heat for just a little while until it gets in that range. After the resting period, spoon out the curds and strain through a cheesecloth-lined strainer.

    The creamiest, smoothest, most delicious homemade ricotta cheese. You wonโ€™t believe how easy and foolproof this recipe is! #ricotta #homemade #cheese #italian #creamy #easy #recipe #simple #withoutcream #cream
    The creamiest, smoothest, most delicious homemade ricotta cheese. You wonโ€™t believe how easy and foolproof this recipe is! #ricotta #homemade #cheese #italian #creamy #easy #recipe #simple #withoutcream #cream
    The creamiest, smoothest, most delicious homemade ricotta cheese. You wonโ€™t believe how easy and foolproof this recipe is! #ricotta #homemade #cheese #italian #creamy #easy #recipe #simple #withoutcream #cream

    The whey should be clear with a bit of a greenish tinge. If you whey is still milky, you can add a little more acid to help the remaining proteins coagulate.

    After the ricotta is done straining, I either give it a good whipping or put it in the food processor for a few seconds. It does wonders for the texture. It becomes so smooth and creamy.

    The creamiest, smoothest, most delicious homemade ricotta cheese. You wonโ€™t believe how easy and foolproof this recipe is! #ricotta #homemade #cheese #italian #creamy #easy #recipe #simple #withoutcream #cream

    How to make with milk and cream

    Bring milk and cream just up to a boil, then turn off the heat and gently stir in salt and lemon juice, just a time or two around the pan. The curds should form pretty quickly. After they start forming, donโ€™t stir, it may break apart the delicate curds. Let the curds rest for about 20 minutes, then strain the curds through cheesecloth. This is a less hands on method that doesnโ€™t require a thermometer.

    The creamiest, smoothest, most delicious homemade ricotta cheese. You wonโ€™t believe how easy and foolproof this recipe is! #ricotta #homemade #cheese #italian #creamy #easy #recipe #simple #withoutcream #cream
    The creamiest, smoothest, most delicious homemade ricotta cheese. You wonโ€™t believe how easy and foolproof this recipe is! #ricotta #homemade #cheese #italian #creamy #easy #recipe #simple #withoutcream #cream
    The creamiest, smoothest, most delicious homemade ricotta cheese. You wonโ€™t believe how easy and foolproof this recipe is! #ricotta #homemade #cheese #italian #creamy #easy #recipe #simple #withoutcream #cream
    The creamiest, smoothest, most delicious homemade ricotta cheese. You wonโ€™t believe how easy and foolproof this recipe is! #ricotta #homemade #cheese #italian #creamy #easy #recipe #simple #withoutcream #cream

    What kind of milk do I use

    I use whole milk for the milk only ricotta. I use a combination of whole milk and cream for the richest, creamiest ricotta you can imagine.

    Making Homemade Ricotta Cheese works best when using whole milk, but you can also make it with 2% milk.

    Homemade Ricotta can be made using raw milk since the heating during curd formation more than meets heat requirements for pasteurization.

    Avoid using UHT (ultra-high temperature) pasteurized milk. The high heat changes the protein structure of the milk and prevents it from separating. Many national organic brands are ultra-pasteurized so check the label.

    How much does this recipe yield?

    For the milk only ricotta, 8 cups of whole milk yields about 1.5 cups ricotta. (This batch weighed 14 ounces.) This can vary depending on how much you strain the final cheese.

    For the milk and cream ricotta, 4 cups of milk and 2 cups of cream yield about 2 cups of ricotta. (This batch weighed 16 ounces.)  Once again, this can vary depending on how much you strain the final cheese.

    What type of acid is used

    You can use lemon juice or vinegar to make ricotta. I love the light, fresh taste of ricotta made with lemon. Vinegar has more of a neutral, savory taste.

    When making ricotta with only milk, Iโ€™ve noticed a slight difference in the texture of ricotta made with lemon juice vs. vinegar. I made them side by side to compare them. The ricotta made with vinegar coagulated very quickly in bigger curds. After it drained, it had more of a compressed, tighter curd. The ricotta made with lemon juice coagulated more slowly, with a finer, more delicate curd.  

    The creamiest, smoothest, most delicious homemade ricotta cheese. You wonโ€™t believe how easy and foolproof this recipe is! #ricotta #homemade #cheese #italian #creamy #easy #recipe #simple #withoutcream #cream

    Homemade Ricotta made with milk and cream

    How much acid should I use?

    Making Homemade Ricotta is part science and part art. Acid is what makes the milk proteins separate and coagulate. A good amount of acid ensures that most of the proteins coagulate and gives a good yield of ricotta curds. Using enough acid makes making ricotta nearly foolproof. On the other hand, the more acid you use, the more acidic the cheese will taste.

    Some traditional ricotta makers donโ€™t use any acid, they use only heat. Using less acid will give the final product a truer ricotta taste. However, not using enough acid results in the proteins not coagulating and a low yield of curd. The art is in finding the balance.

    For the purists, as pure as we can get with a milk based ricotta, you can make the ricotta with 8 cups of whole milk and 3 tablespoons of acid. The acid taste will be much more understated.  

    The ricotta using milk and cream uses 4 tablespoons of lemon juice.

    How much salt do I use?

    The amount of salt you use is really up to personal preference. I like about 1 teaspoon in the milk only ricotta and 1 ยฝ teaspoons in the ricotta made with milk and cream. Traditional ricotta makers use little to no salt.

    The creamiest, smoothest, most delicious homemade ricotta cheese. You wonโ€™t believe how easy and foolproof this recipe is! #ricotta #homemade #cheese #italian #creamy #easy #recipe #simple #withoutcream #cream

    Homemade Ricotta made with milk and cream

    How long to strain

    How long you strain the ricotta depends on the texture you want it to have and which recipe you use.

    Generally speaking, drain the ricotta until itโ€™s the texture that you want, shorter for a looser ricotta and longer for a firmer, dryer ricotta

    The milk only ricotta forms larger curds, especially when making with vinegar. I use a slotted spoon to scoop up the curds and place them in the cheesecloth lined strainer. Pouring all the whey through might clog up the strainer. Milk only ricotta also drains faster for this reason. I strain it for about 30 minutes.

    The milk and cream ricotta forms very small delicate curds. These I pour into a cheesecloth lined strainer and let strain for about 2 hours.

    The amount of straining time also depends on the size of your strainer. My strainer has a wide, flat bottom, about 8-inches across. It strains a lot quicker than a smaller strainer.

    Storage

    Homemade Ricotta can be stored in the refrigerator in a covered container for up to five days.

    How to freeze

    Homemade Ricotta can be frozen for up to 2 months. Its taste will be fine, however itโ€™s texture may be affected. Since Ricotta has a high moisture content, the moisture in the cheese turns to ice when frozen. After thawing, the texture becomes drier and more crumbly.

    The creamiest, smoothest, most delicious homemade ricotta cheese. You wonโ€™t believe how easy and foolproof this recipe is! #ricotta #homemade #cheese #italian #creamy #easy #recipe #simple #withoutcream #cream
    Crostini with fresh Ricotta made with cream and fresh blueberries

    How to serve

    There are so many uses for Homemade Ricotta. I used to use Ricotta mainly for lasagna or ravioli. After I discovered how amazing Homemade Ricotta is, I love eating it on crostini. Here are some ideas:

    • In lasagna
    • In ravioli
    • As a topping on pizza
    • As a spread on toast or crostini topped with fresh or roasted fruit and honey
    • As a spread on toast or crostini topped with tomatoes marinated in basil and balsamic
    • In an Italian cheesecake
    • In cannoli
    • Dolloped on top of pancakes or waffles
    • In pancakes or waffles
    • In a pasta sauce
    The creamiest, smoothest, most delicious homemade ricotta cheese. You wonโ€™t believe how easy and foolproof this recipe is! #ricotta #homemade #cheese #italian #creamy #easy #recipe #simple #withoutcream #cream
    Artichoke and Ricotta ravioli

    Recipe

    The creamiest, smoothest, most delicious homemade ricotta cheese. You wonโ€™t believe how easy and foolproof this recipe is! #ricotta #homemade #cheese #italian #creamy #easy #recipe #simple #withoutcream #cream

    Homemade Ricotta (2 ways)

    Kelly
    The creamiest, smoothest, most delicious homemade ricotta cheese. You wonโ€™t believe how easy and foolproof this recipe is!
    5 from 21 votes
    Print Recipe Pin Recipe
    Prep Time 5 minutes mins
    Cook Time 20 minutes mins
    Total Time 25 minutes mins
    Course Sauces
    Cuisine Italian
    Servings 6 servings
    Calories 566 kcal

    Ingredients
      

    For Ricotta made with MILK ONLY:

    • 8 cups whole milk, not ultra-pasteurized 2 L
    • Kosher or sea salt to taste (I use 1 teaspoon)
    • 3 tablespoons distilled white vinegar or fresh lemon juice 45ml

    For Ricotta made with MILK AND CREAM:

    • 4 cups whole milk 1 L
    • 2 cups heavy cream ยฝ L
    • Kosher or sea salt to taste (I use 1 ยฝ teaspoons)
    • ยผ cup fresh lemon juice 60ml

    Instructions
     

    For Ricotta made with MILK ONLY:

    • Heat the salt and milk to 185 F (It will start to look a little foamy on top.)
    • Turn off the heat, and gently stir in the acid, just a time or two around the pan. Donโ€™t over stir or it will break the curds. The curds should form almost immediately.
    • Without stirring, let the curds rest, untouched for 20 minutes.
    • During this time, keep the temperature at about 185 degrees It can go down to 175 F or up to 190 F, but try to keep it in that range. I just take a look at the thermometer every so often and turn on the heat for just a little while until it gets in that range.
    • After the resting period, spoon out the curds and strain through a cheesecloth-lined strainer.
    • Let drain until it reaches the desired consistency.
    • For a creamy smooth ricotta, either whip by hand or process in a food processor for a few seconds.
    • Store in a closed container in the refrigerator for up to 5 days.

    For Ricotta made with MILK AND CREAM (no thermometer):

    • Bring milk, cream, and salt just up to a boil (not a full boil, more of a simmer).
    • Turn off the heat and gently stir in the lemon juice, just a time or two around the pan. The curds should form pretty quickly. After they start forming, donโ€™t stir, it may break apart the delicate curds.
    • Let the curds rest for about 20 minutes, then strain the curds through a large cheesecloth lined strainer.
    • Let drain until it reaches the desired consistency.
    • Store in a closed container in the refrigerator for up to 5 days.

    Notes

    • If the whey looks too milky, add a little more acid to help the formation of the curd.
    • Ricotta made with milk only results in about 1 ยฝ cups. Made with milk and cream it results in about 2 cups.
    • Nutrition information reflects ricotta made with milk

    Nutrition

    Serving: 0.25cupCalories: 566kcalCarbohydrates: 26gProtein: 18gFat: 44gSaturated Fat: 27gPolyunsaturated Fat: 2gMonounsaturated Fat: 11gCholesterol: 148mgSodium: 207mgPotassium: 818mgFiber: 0.03gSugar: 26gVitamin A: 1957IUVitamin C: 4mgCalcium: 654mgIron: 0.1mg
    Keyword cheese, homemade, ricotta
    Tried this recipe?Let us know how it was!
    The creamiest, smoothest, most delicious homemade ricotta cheese. You wonโ€™t believe how easy and foolproof this recipe is! #ricotta #homemade #cheese #italian #creamy #easy #recipe #simple #withoutcream #cream

    Enjoy, friends!

    Follow me on INSTAGRAM and PINTEREST for all the latest content and recipes!

    Subscribe to FOODTASIAโ€™S NEWSLETTER to receive fresh recipes straight to your inbox.

    You might also like:

    How to Make Crรจme Fraiche

    How to Make Crรจme Fraiche

    How to Make Yogurt:

    How to Make Yogurt

    How to make Greek Yogurt:

    How to Make Greek Yogurt
    The creamiest, smoothest, most delicious homemade ricotta cheese. You wonโ€™t believe how easy and foolproof this recipe is! #ricotta #homemade #cheese #italian #creamy #easy #recipe #simple #withoutcream #cream
    The creamiest, smoothest, most delicious homemade ricotta cheese. You wonโ€™t believe how easy and foolproof this recipe is! #ricotta #homemade #cheese #italian #creamy #easy #recipe #simple #withoutcream #cream
    • « Previous Page
    • 1
    • …
    • 10
    • 11
    • 12
    • 13
    • 14
    • …
    • 25
    • Next Page »
    Kelly Shaban

    Hi there! My name is Kelly Shaban. Here youโ€™ll find delicious, trusted recipes with easy step-by-step photos and videos. Read More About Me

    Game Day Favorites

    • plate of lemon ricotta pasta
      One-Pot Lemon Ricotta Pasta with Arugula
    • This Creamy Lemon Artichoke Pasta with Chicken, red peppers, and parsley has a bright, delicate lemon flavor in a creamy, garlicky parmesan sauce. An easy and flavorful one dish meal. Restaurant quality in under 30 minutes. #pasta #artichoke #quick #easy #chicken #dinner #creamy #redpepper #lemon #under30minutes #datenight
      Creamy Lemon Artichoke Pasta with Chicken
    • The BEST thick and chewy Sugar Cookie Bars with vanilla buttercream frosting. Quick and easy to make bar cookies recipe! #dessert #homemade #fromscratch
      Frosted Sugar Cookie Bars Recipe
    • a slice of mango cheesecake with a bite taken out
      The BEST Mango Cheesecake
    • Chocolate Cream Pie is the ultimate creamy, dreamy, decadent dessert. With an Oreo cookie crust, a velvety smooth chocolate custard filling, and billows of whipped cream, this Chocolate Cream Pie will leave you swooning! #chocolate cream pie #chocolate #pie #dessert #best #homemade #no bake #recipe #from scratch #oreo #video
      Chocolate Cream Pie {VIDEO}
    • Incredibly moist and so delicious! This is my favorite Carrot Cake recipe โ€“ a super moist and tender Carrot Cake bursting with flavor from pineapple and coconut, topped with the most heavenly cream cheese frosting. #easy #best #recipe #healthy #homemade #cupcakes #decoration #pineapple #creamcheesefrosting #dessert #spring #easter
      Favorite Carrot Cake
    • Lemon Blueberry Cheesecake Bars - rich, creamy cheesecake with flecks of lemon zest and studded with juicy blueberries on a shortbread crust. All the deliciousness of cheesecake in a quick and easy bar.
      Lemon Blueberry Cheesecake Bars
    • Double Glazed Blueberry Lemon Pound Cake - A moist, tender pound cake, infused with the bright and sunny flavor of lemon, bursting with sweet juicy blueberries, and topped with two (2!) glazes - one vibrant and tangy, one creamy and sweet.
      Double Glazed Blueberry Lemon Pound Cake

    Popular Posts

    • Classic Lasagna - layers of silky smooth, creamy parmesan bรฉchamel sauce, a slow simmered Bolognese meat sauce, sheets of pasta, and lots of mozzarella cheese make this the Worldโ€™s Best Lasagna recipe.
      Classic Lasagna Recipe (VIDEO)
    • Creamy Tuscan Chicken Pasta is loaded with the flavors of the Mediterranean โ€“ sundried tomato, baby spinach, garlic, red pepper, and parmesan. Itโ€™s super quick and easy. A restaurant quality dish on the table in under 30 minutes. #pasta #recipe #recipeeasyfast #chicken #chickenrecipes #chickendinner #chickendishes #easy #easyrecipe #easydinner
      Creamy Tuscan Chicken Pasta
    • Old-fashioned Chicken and Dumplings - soft, pillowy dumplings and tender chicken in a rich, flavorful broth. With both made from scratch and quick and easy versions. Truly comfort food at its finest!
      Old Fashioned Chicken and Dumplings
    • piece of chocolate lasagna with a bite taken out
      Chocolate Lasagna (Quick and Easy No-Bake Dessert) + Video
    • Italian Pignoli Cookies
      Easy Italian Pignoli Cookies Recipe (with VIDEO)
    • peanut butter fudge stacked on a plate
      Easy Peanut Butter Fudge Recipe (VIDEO)

    Footer


    as featured in

    buzzfeed logo
    greatest logo
    yummly logo
    huffpo logo
    foodista logo
    taste of home

    Accessibility Privacy Policy About Subscribe

    • Facebook
    • Instagram
    • Pinterest

    Copyright ยฉ 2023

    As an Amazon Associate I earn from qualifying purchases.